Growing In Unity Day Four … Spooky with Deco Foil

It’s Day four sharing my love of Unity but I wanted to incorporate by second love in card making and that’s Thermoweb Deco Foil with Unity Stamp Company toner card fronts. You can simply use a laminator the toner card front and foil to get these looks.

However I was at a crafty retreat with friends this spring and was taught that you can also use Thermoweb Deco Foil & Toner card fronts with a Spellbinders Glimmer Machine and the Pink Fresh Studio Solid Hot Foil Plate let me tell you its a game changer! Heather Hoffman & Lea Lawson discovered this and she has tutorials over on the Pink Fresh youtube channel. I encourage you to watch her video but here is the quick ”sandwich”: Step 1 Pink Fresh solid hot foil plate on the glimmer machine. Step 2 Deco Foil pretty side facing the hot foil plate. Step 3 Toner Card Front toner side down over the Deco Foil. Step 4 place the ”cutting plates” over the Glimmer base (I need a card stock shim in mine it depends on your die cutting machine) and run the whole thing through you dies cutting machine cranking it through slowly. the heat and pressure adhere the foil to the toner panel and its the best results I’ve ever gotten. Thanks Lea for showing me this amazing new way to use Deco Foil.

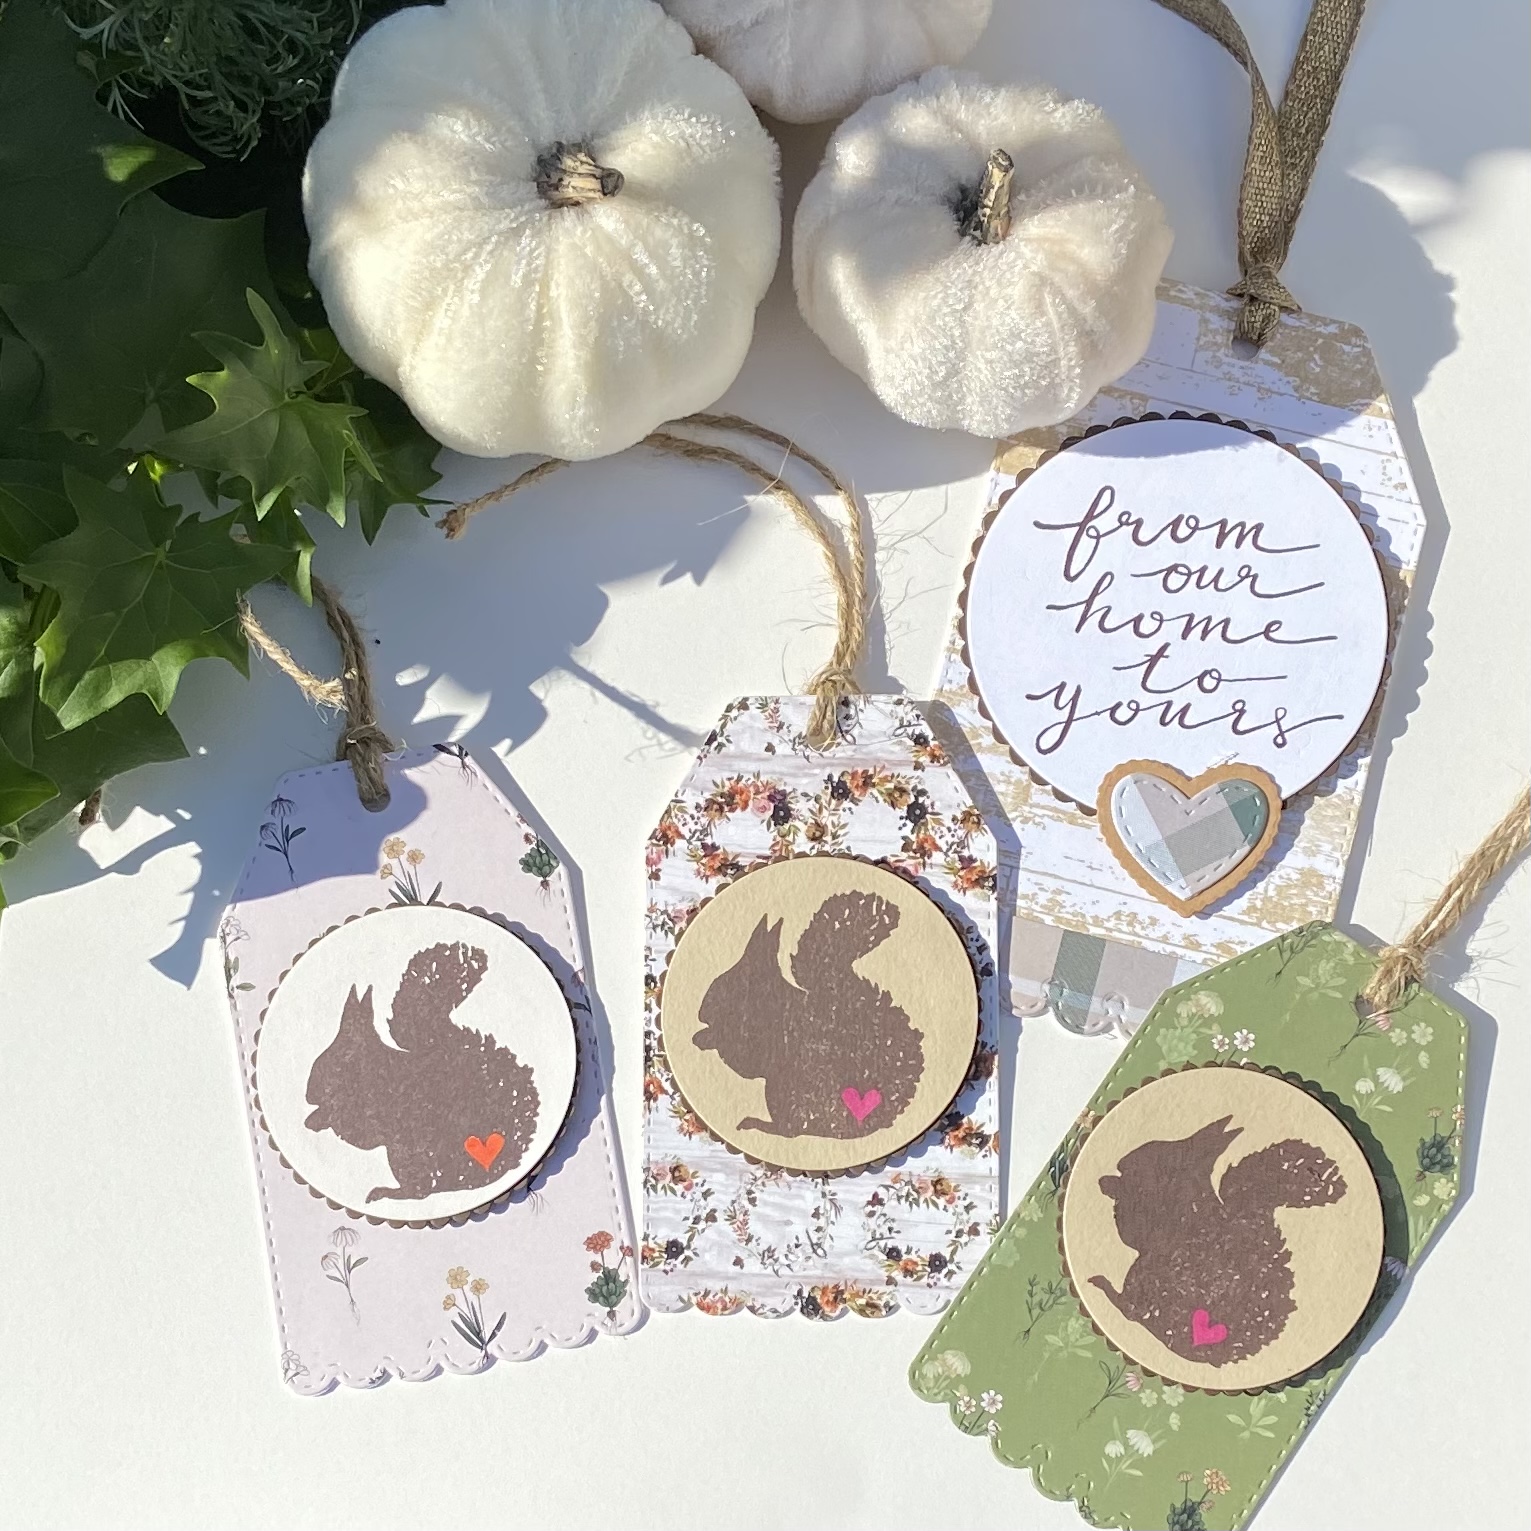
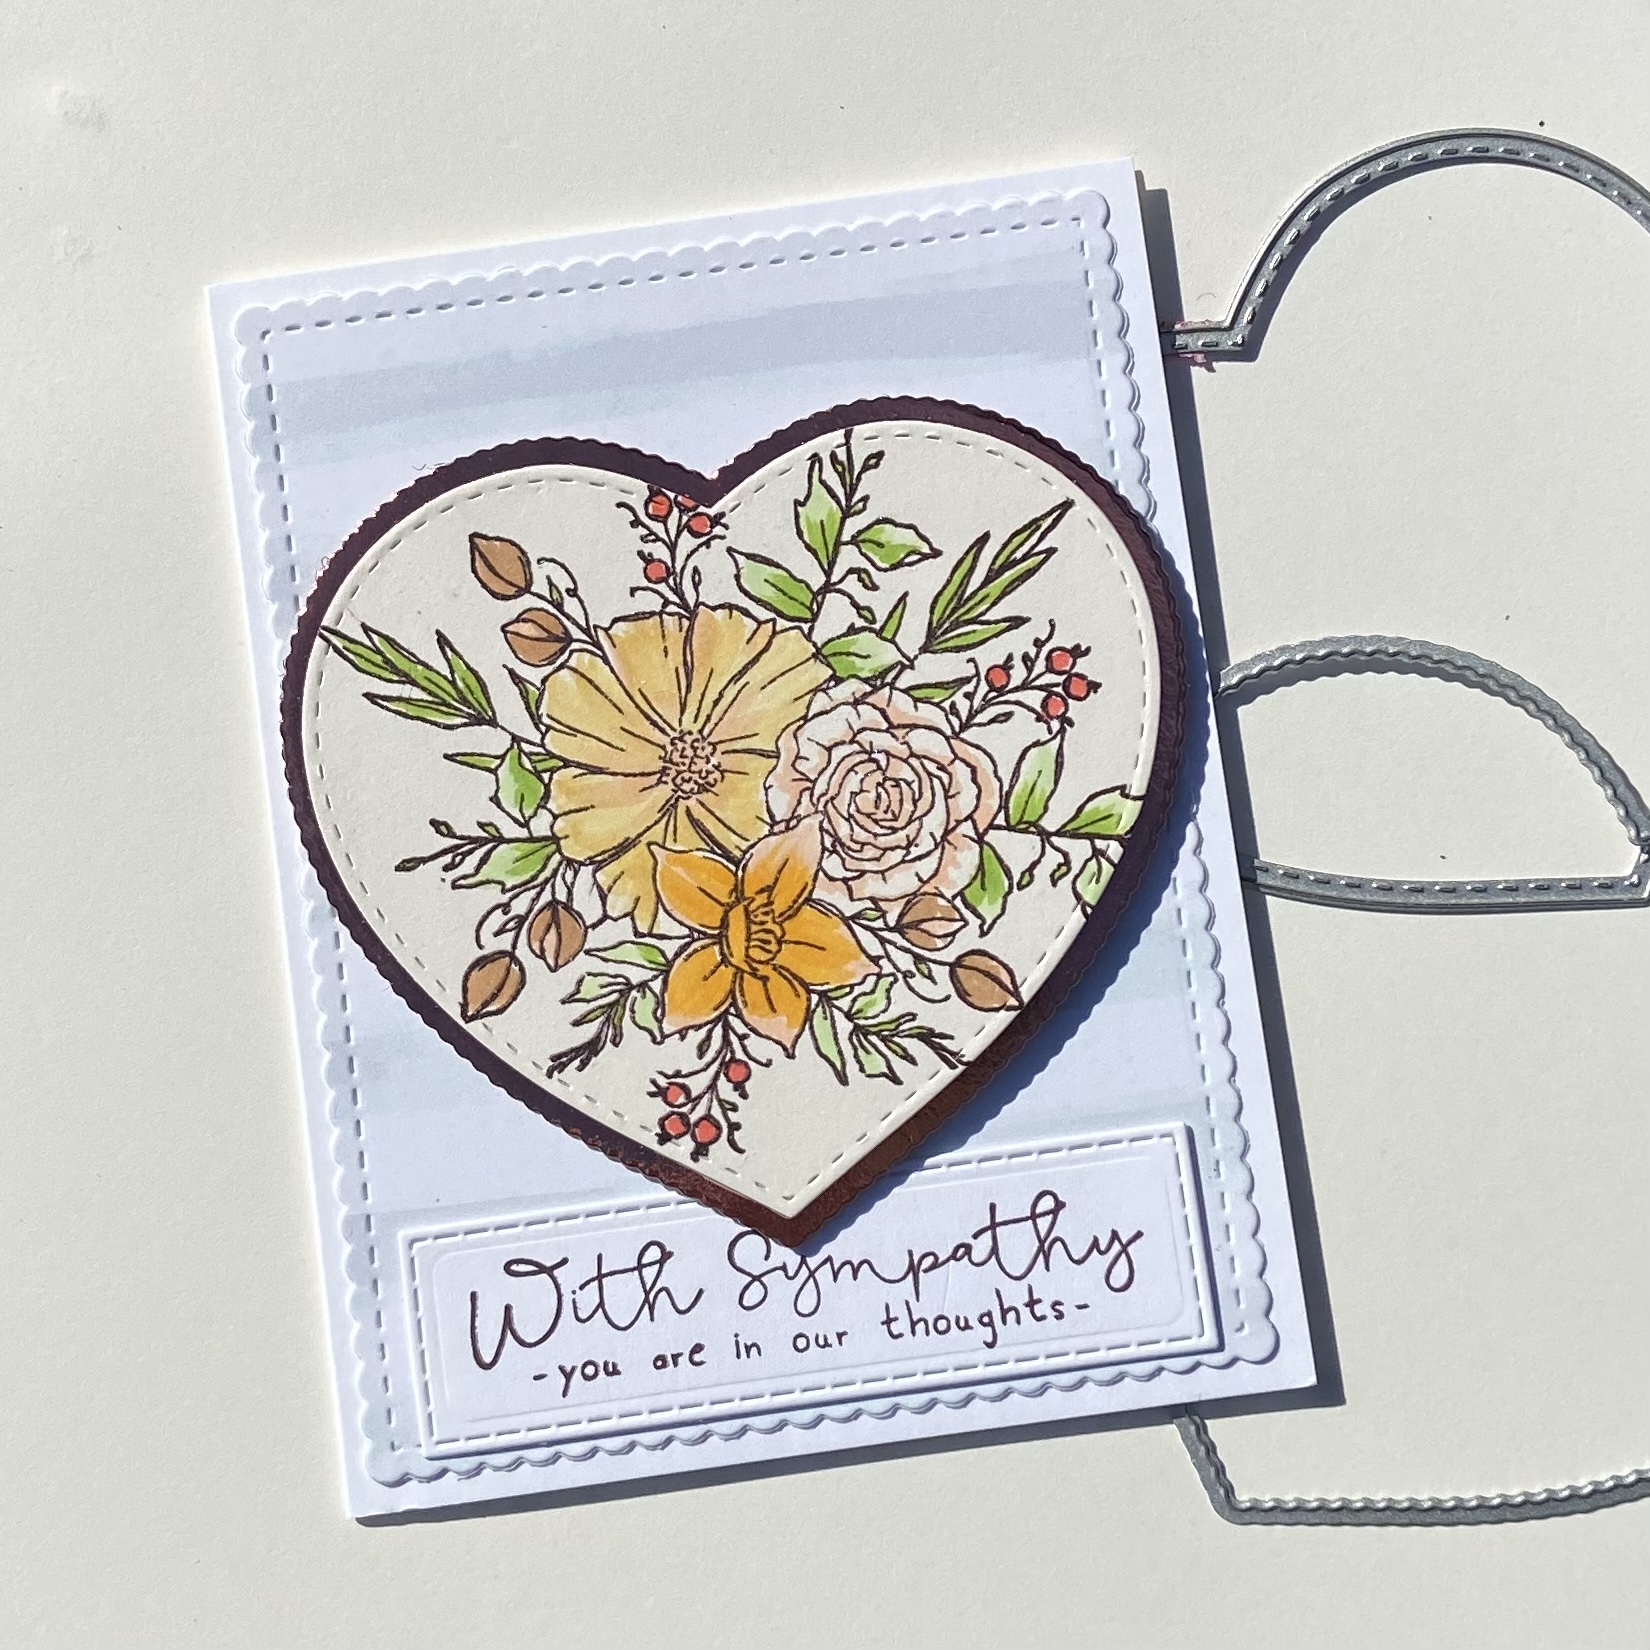
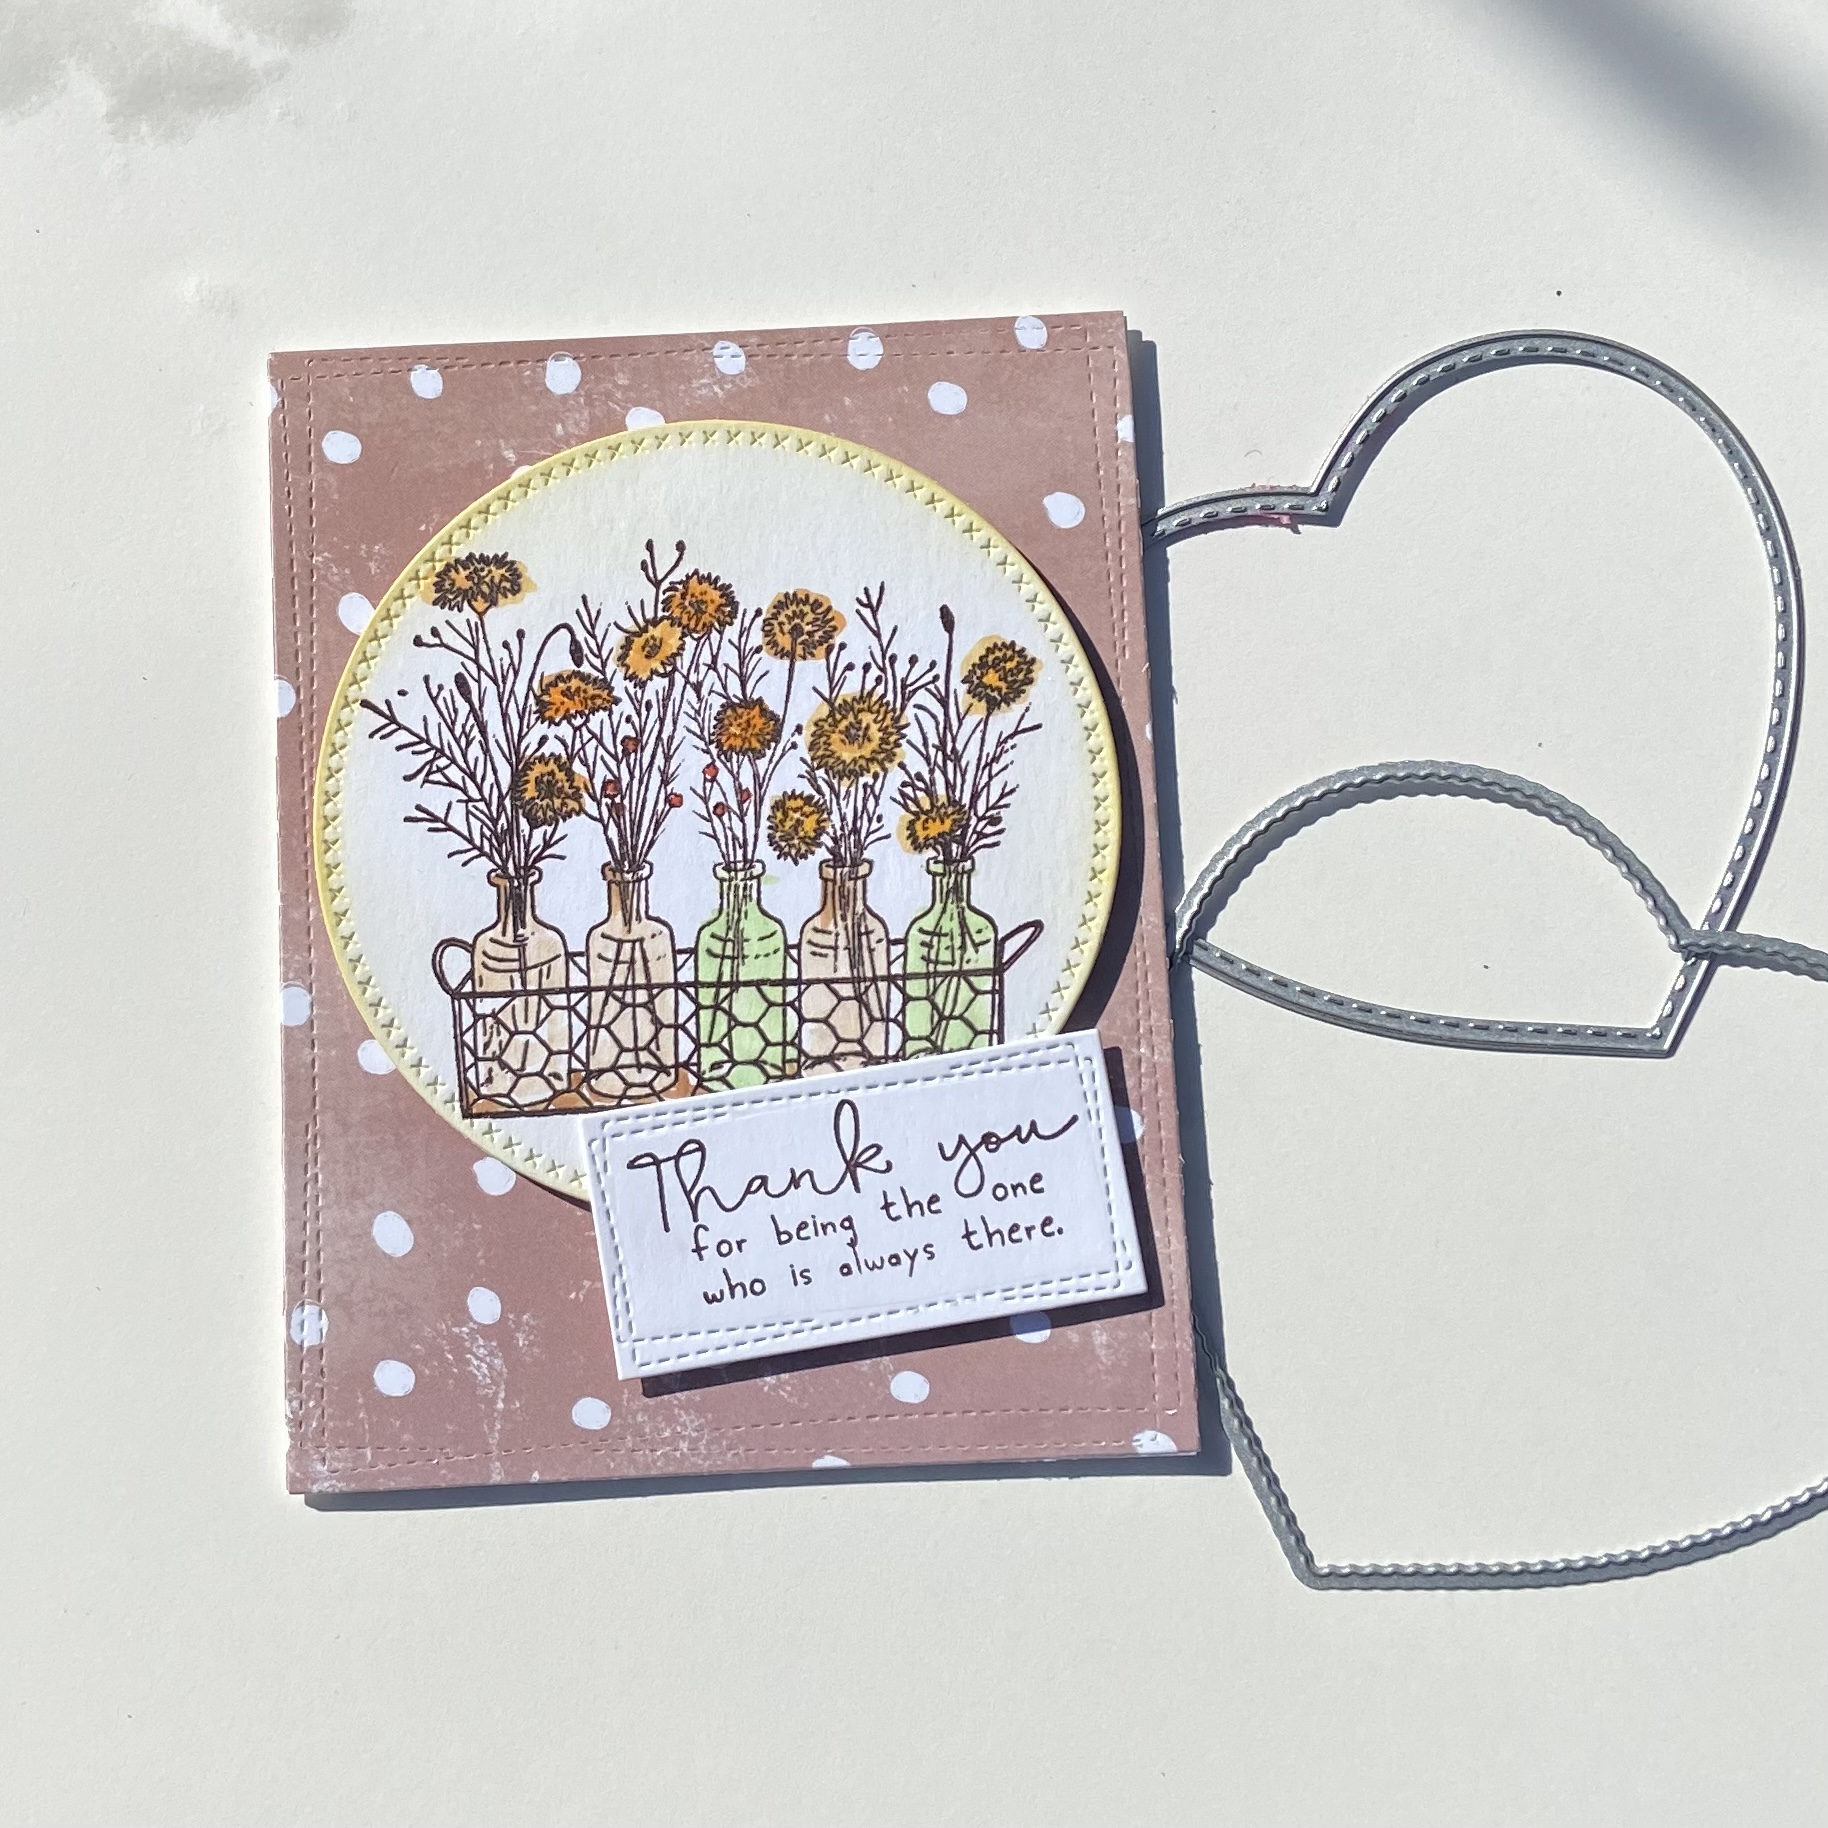
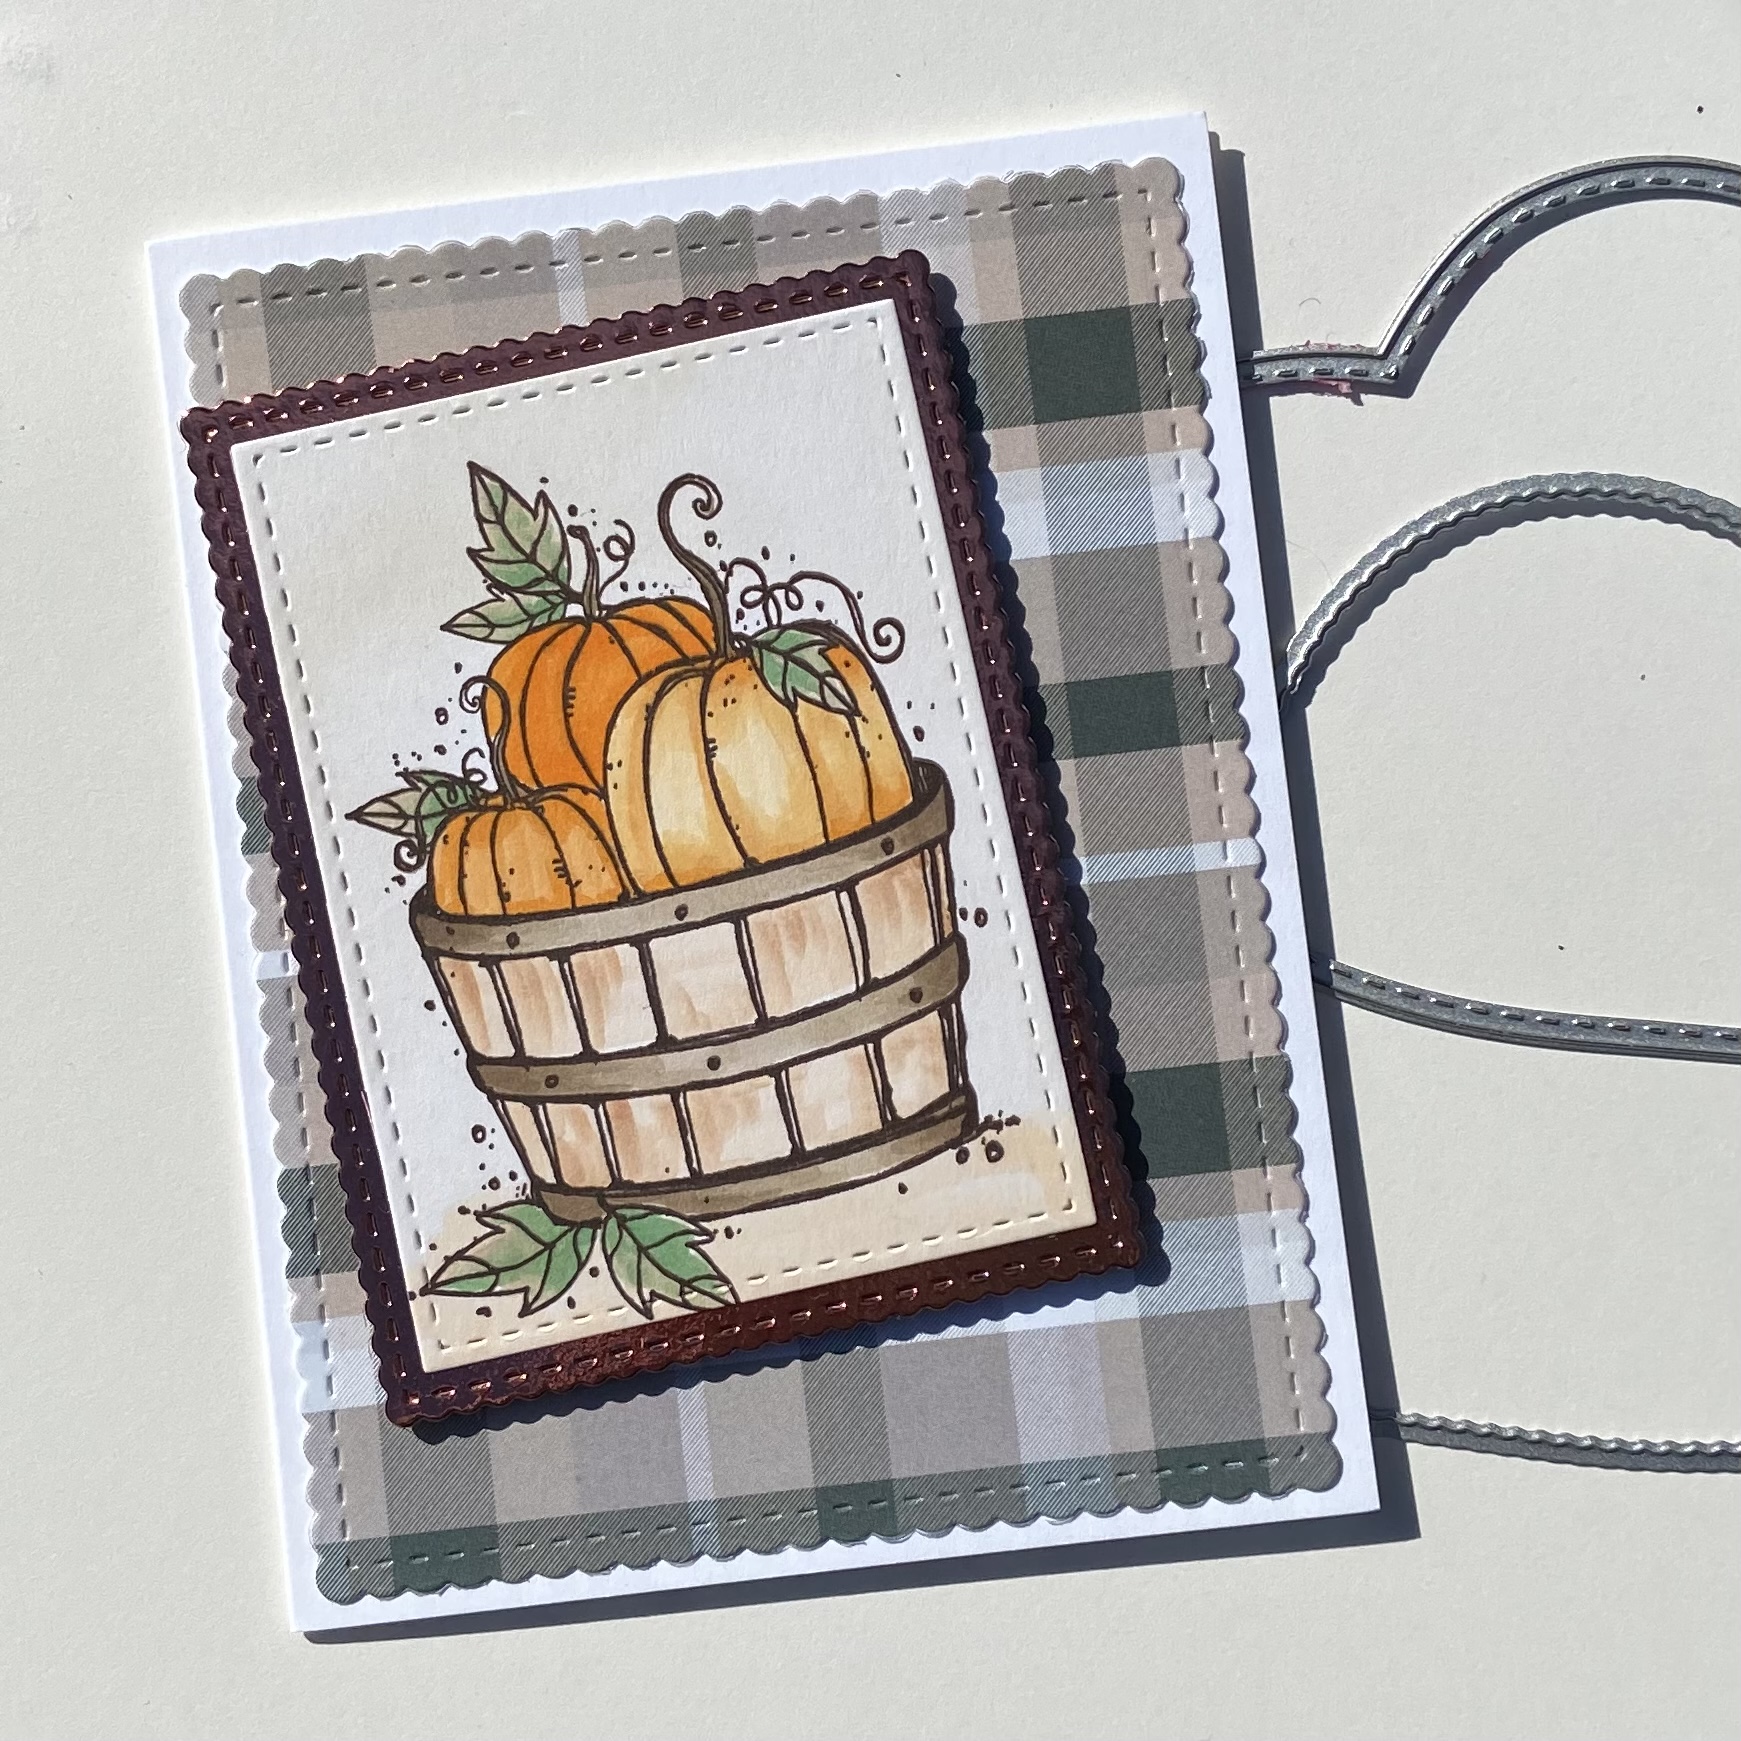
I used Gina K Inks to blend the spooky scenes the ground color is Moon Lit Fog. The first card uses Plum Punch, Wild Lilac and Eggplant. Then second & fourth card sky is Navy and Tranquil Teal. My favorite is the simplest with that Spooky sentiment the whole panel is blended with Moon Lit Fog ink and then I used a Copic (putty) to color over the ink in certain spots for interest. I would have made more but i used the last of my Wild Garden toner panels don’t worry I have more on order. It’s a gorgeous floral but paired with the Halloween images i think it looks ominous.

Unity Stamp R.I.P. stamp kit & Wild Garden Toner card front with Gold Glitter foil
Unity Stamp R.I.P. stamp kit & Wild Garden Toner card front with Silver Glitter foil
Unity Stamp R.I.P. stamp kit & Wild Garden Toner card front with Brutus Monroe Silver Sketch Foil
Unity Stamp R.I.P. stamp kit and 31 kit with Wild Garden Toner card front with Brutus Monroe Green Sketch foil

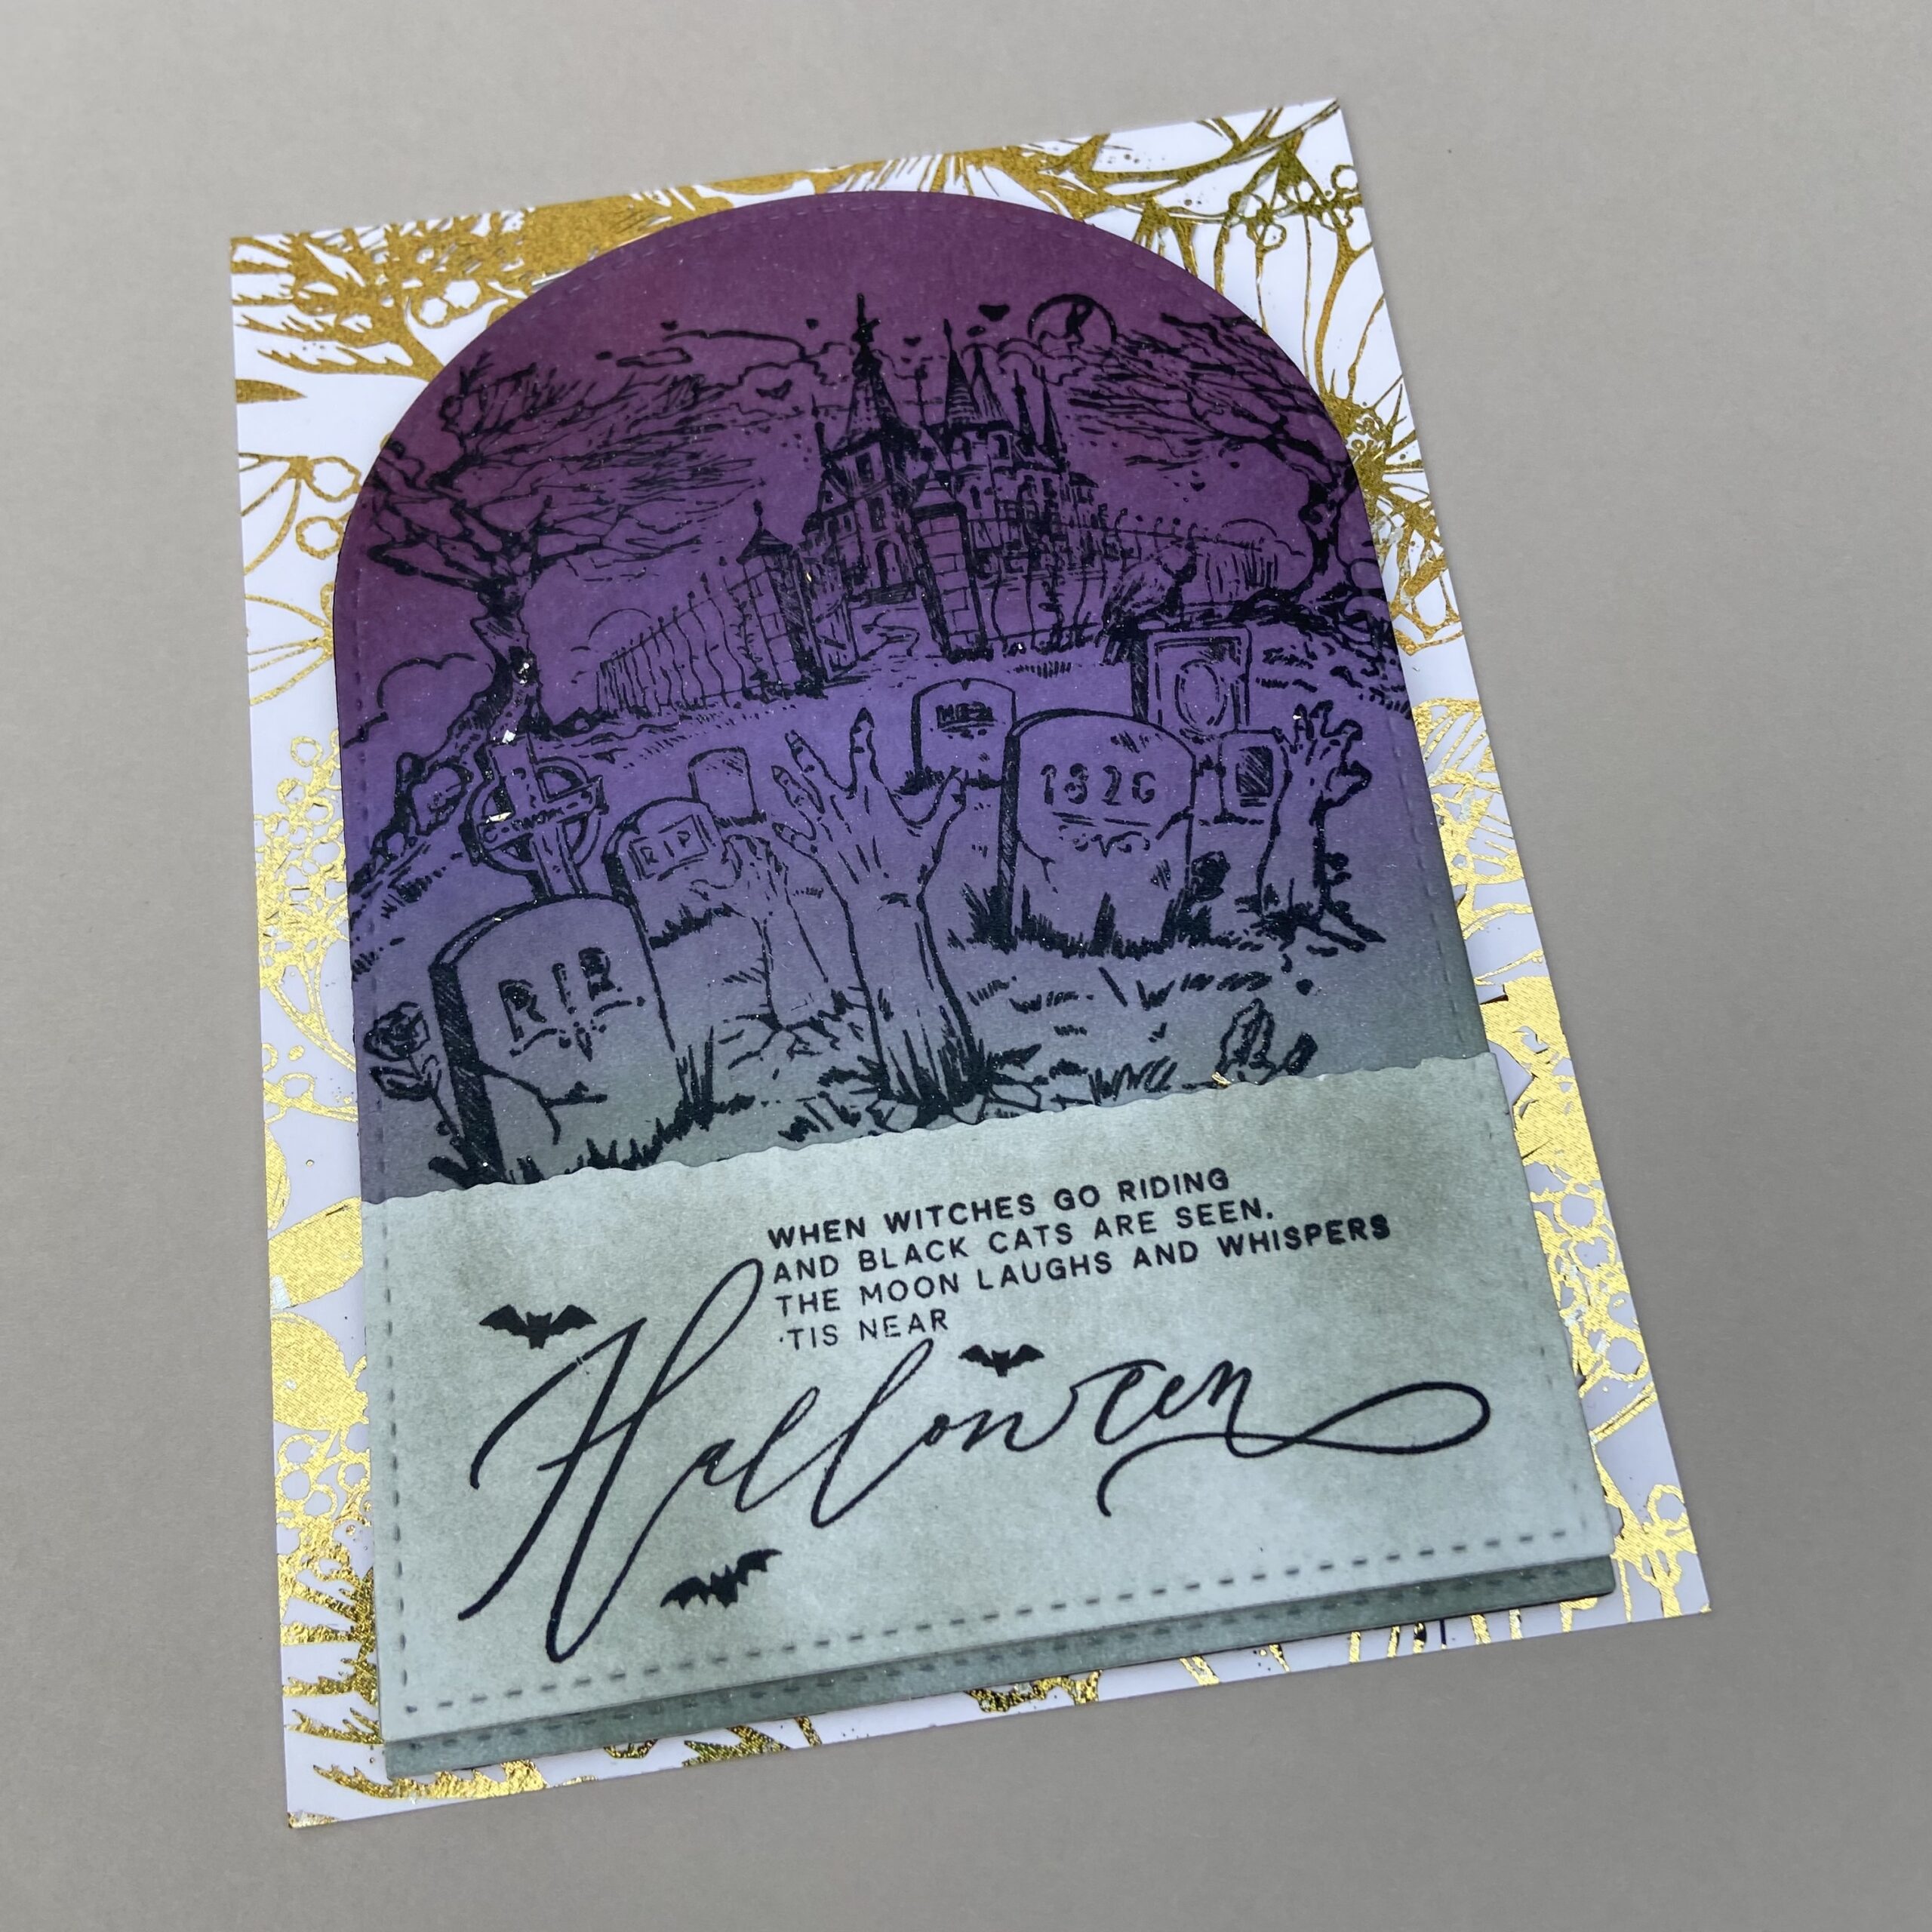
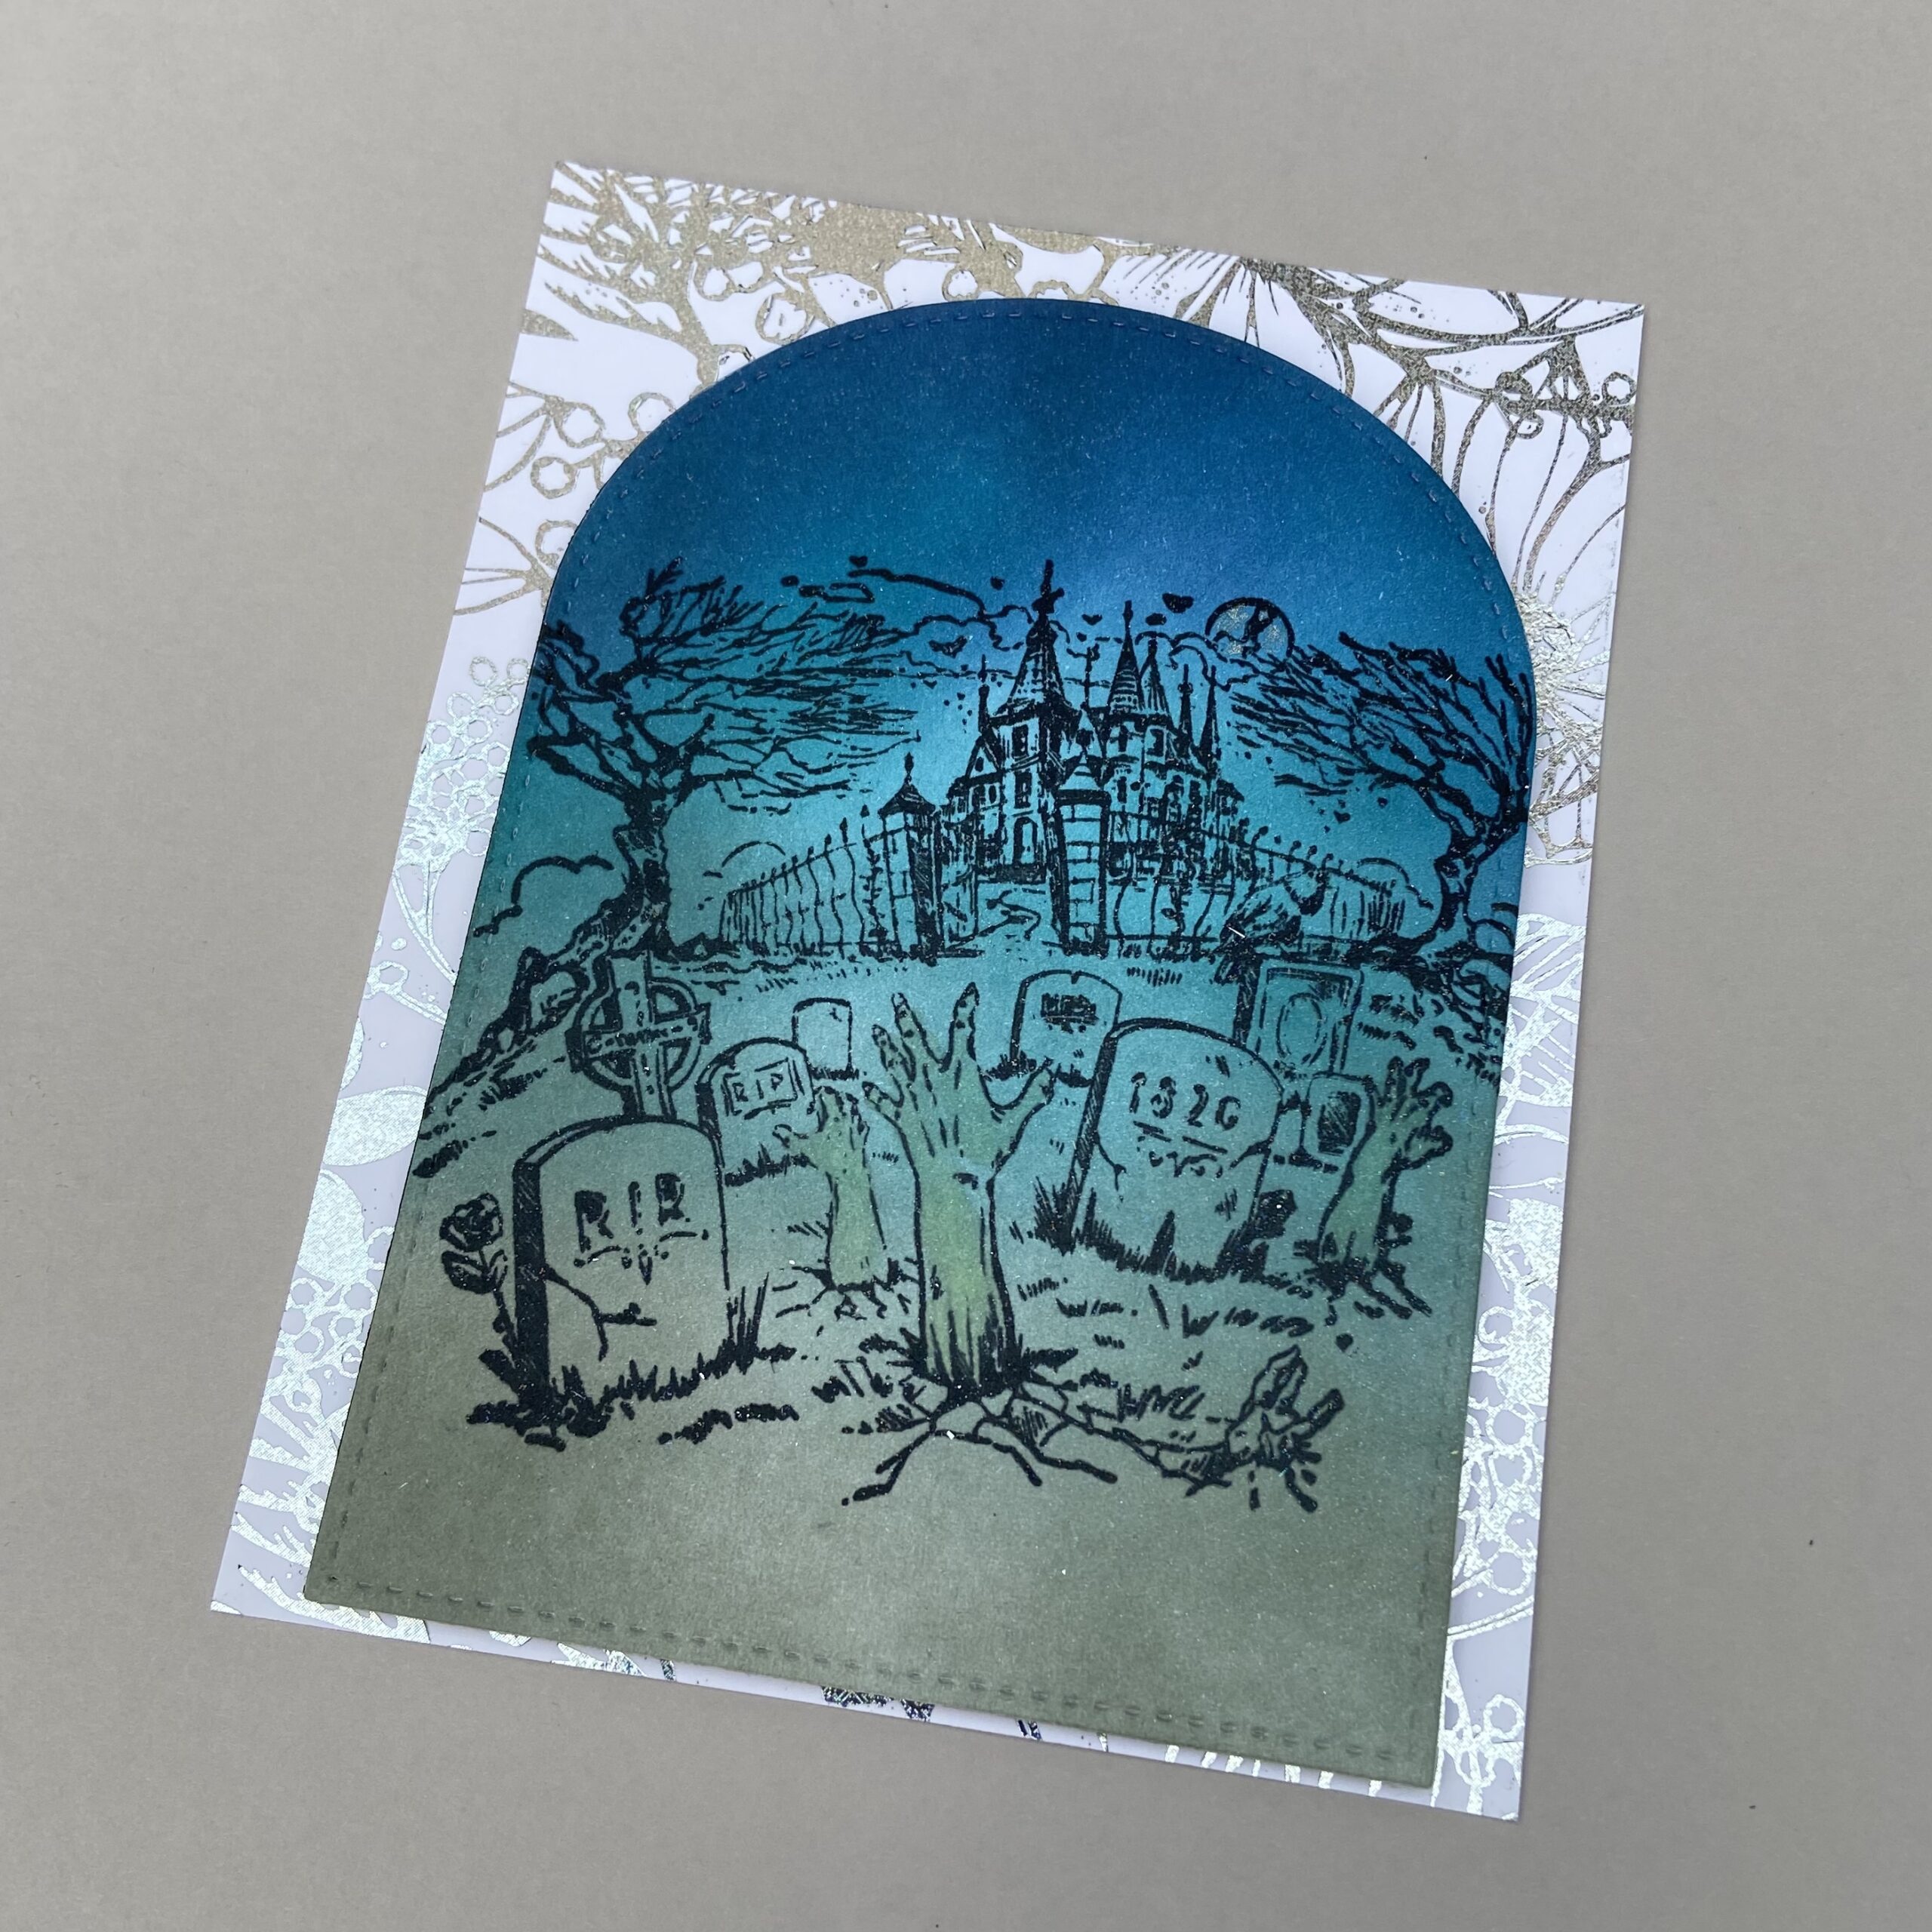
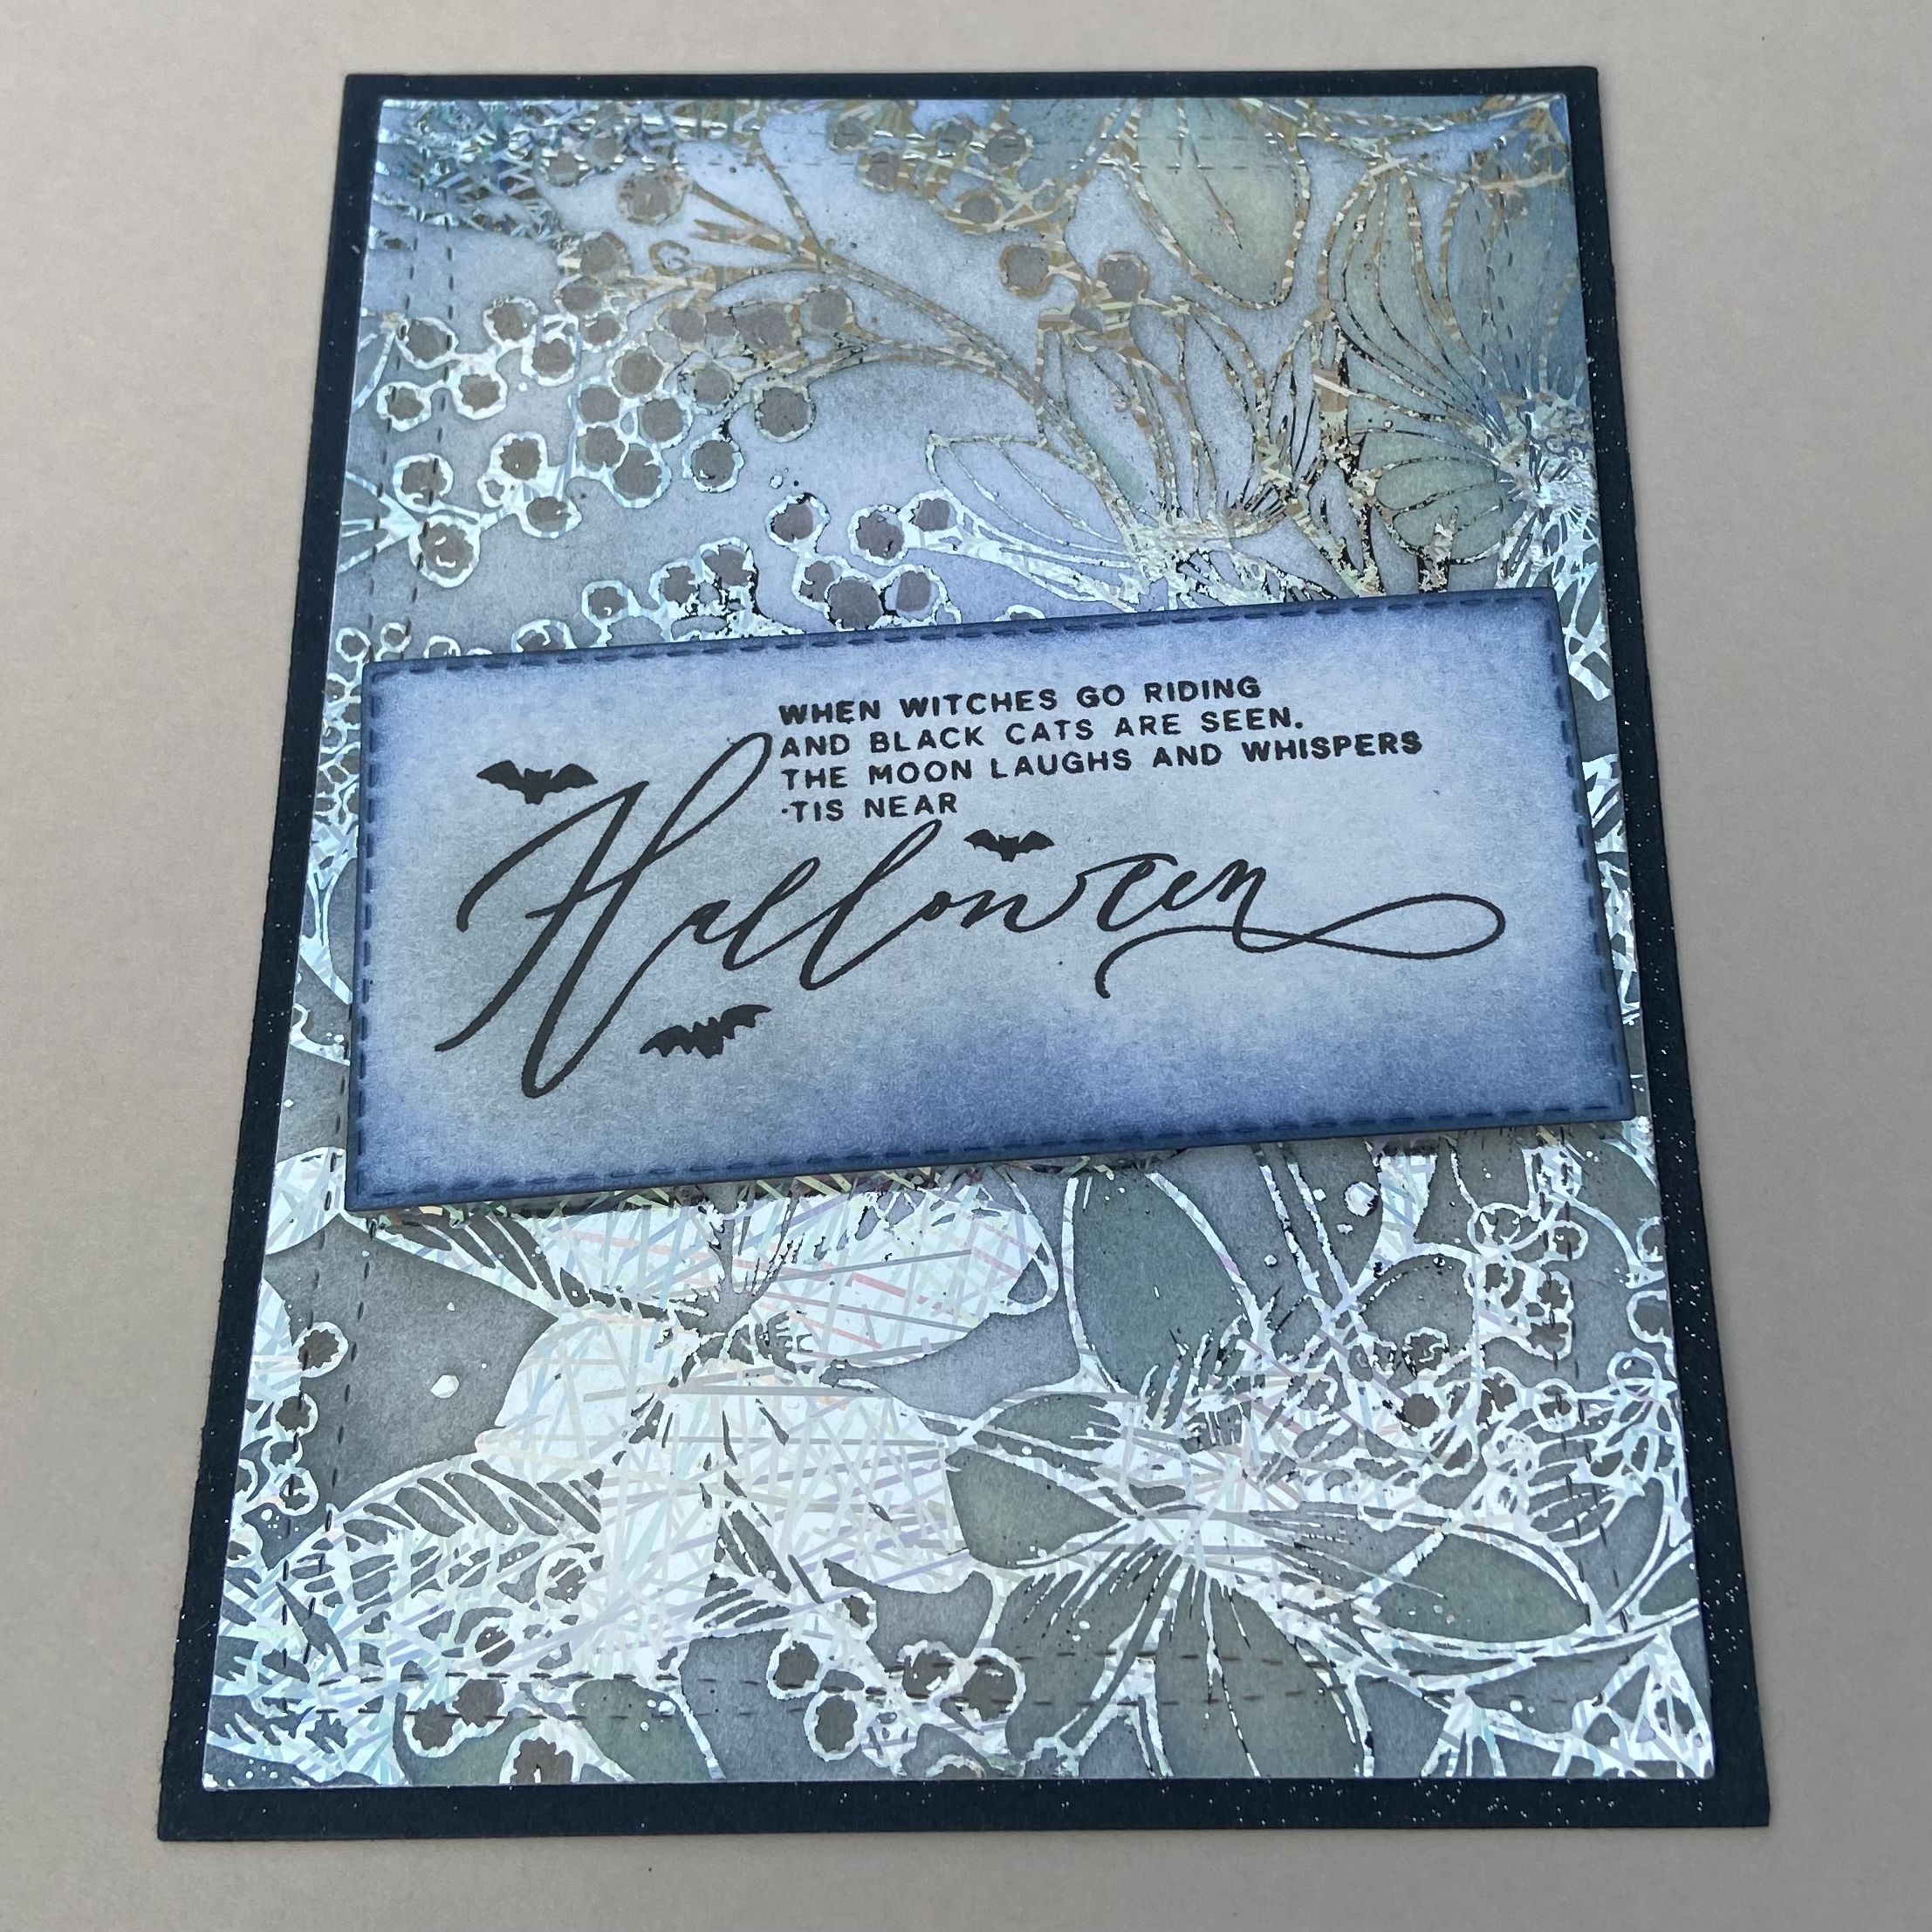
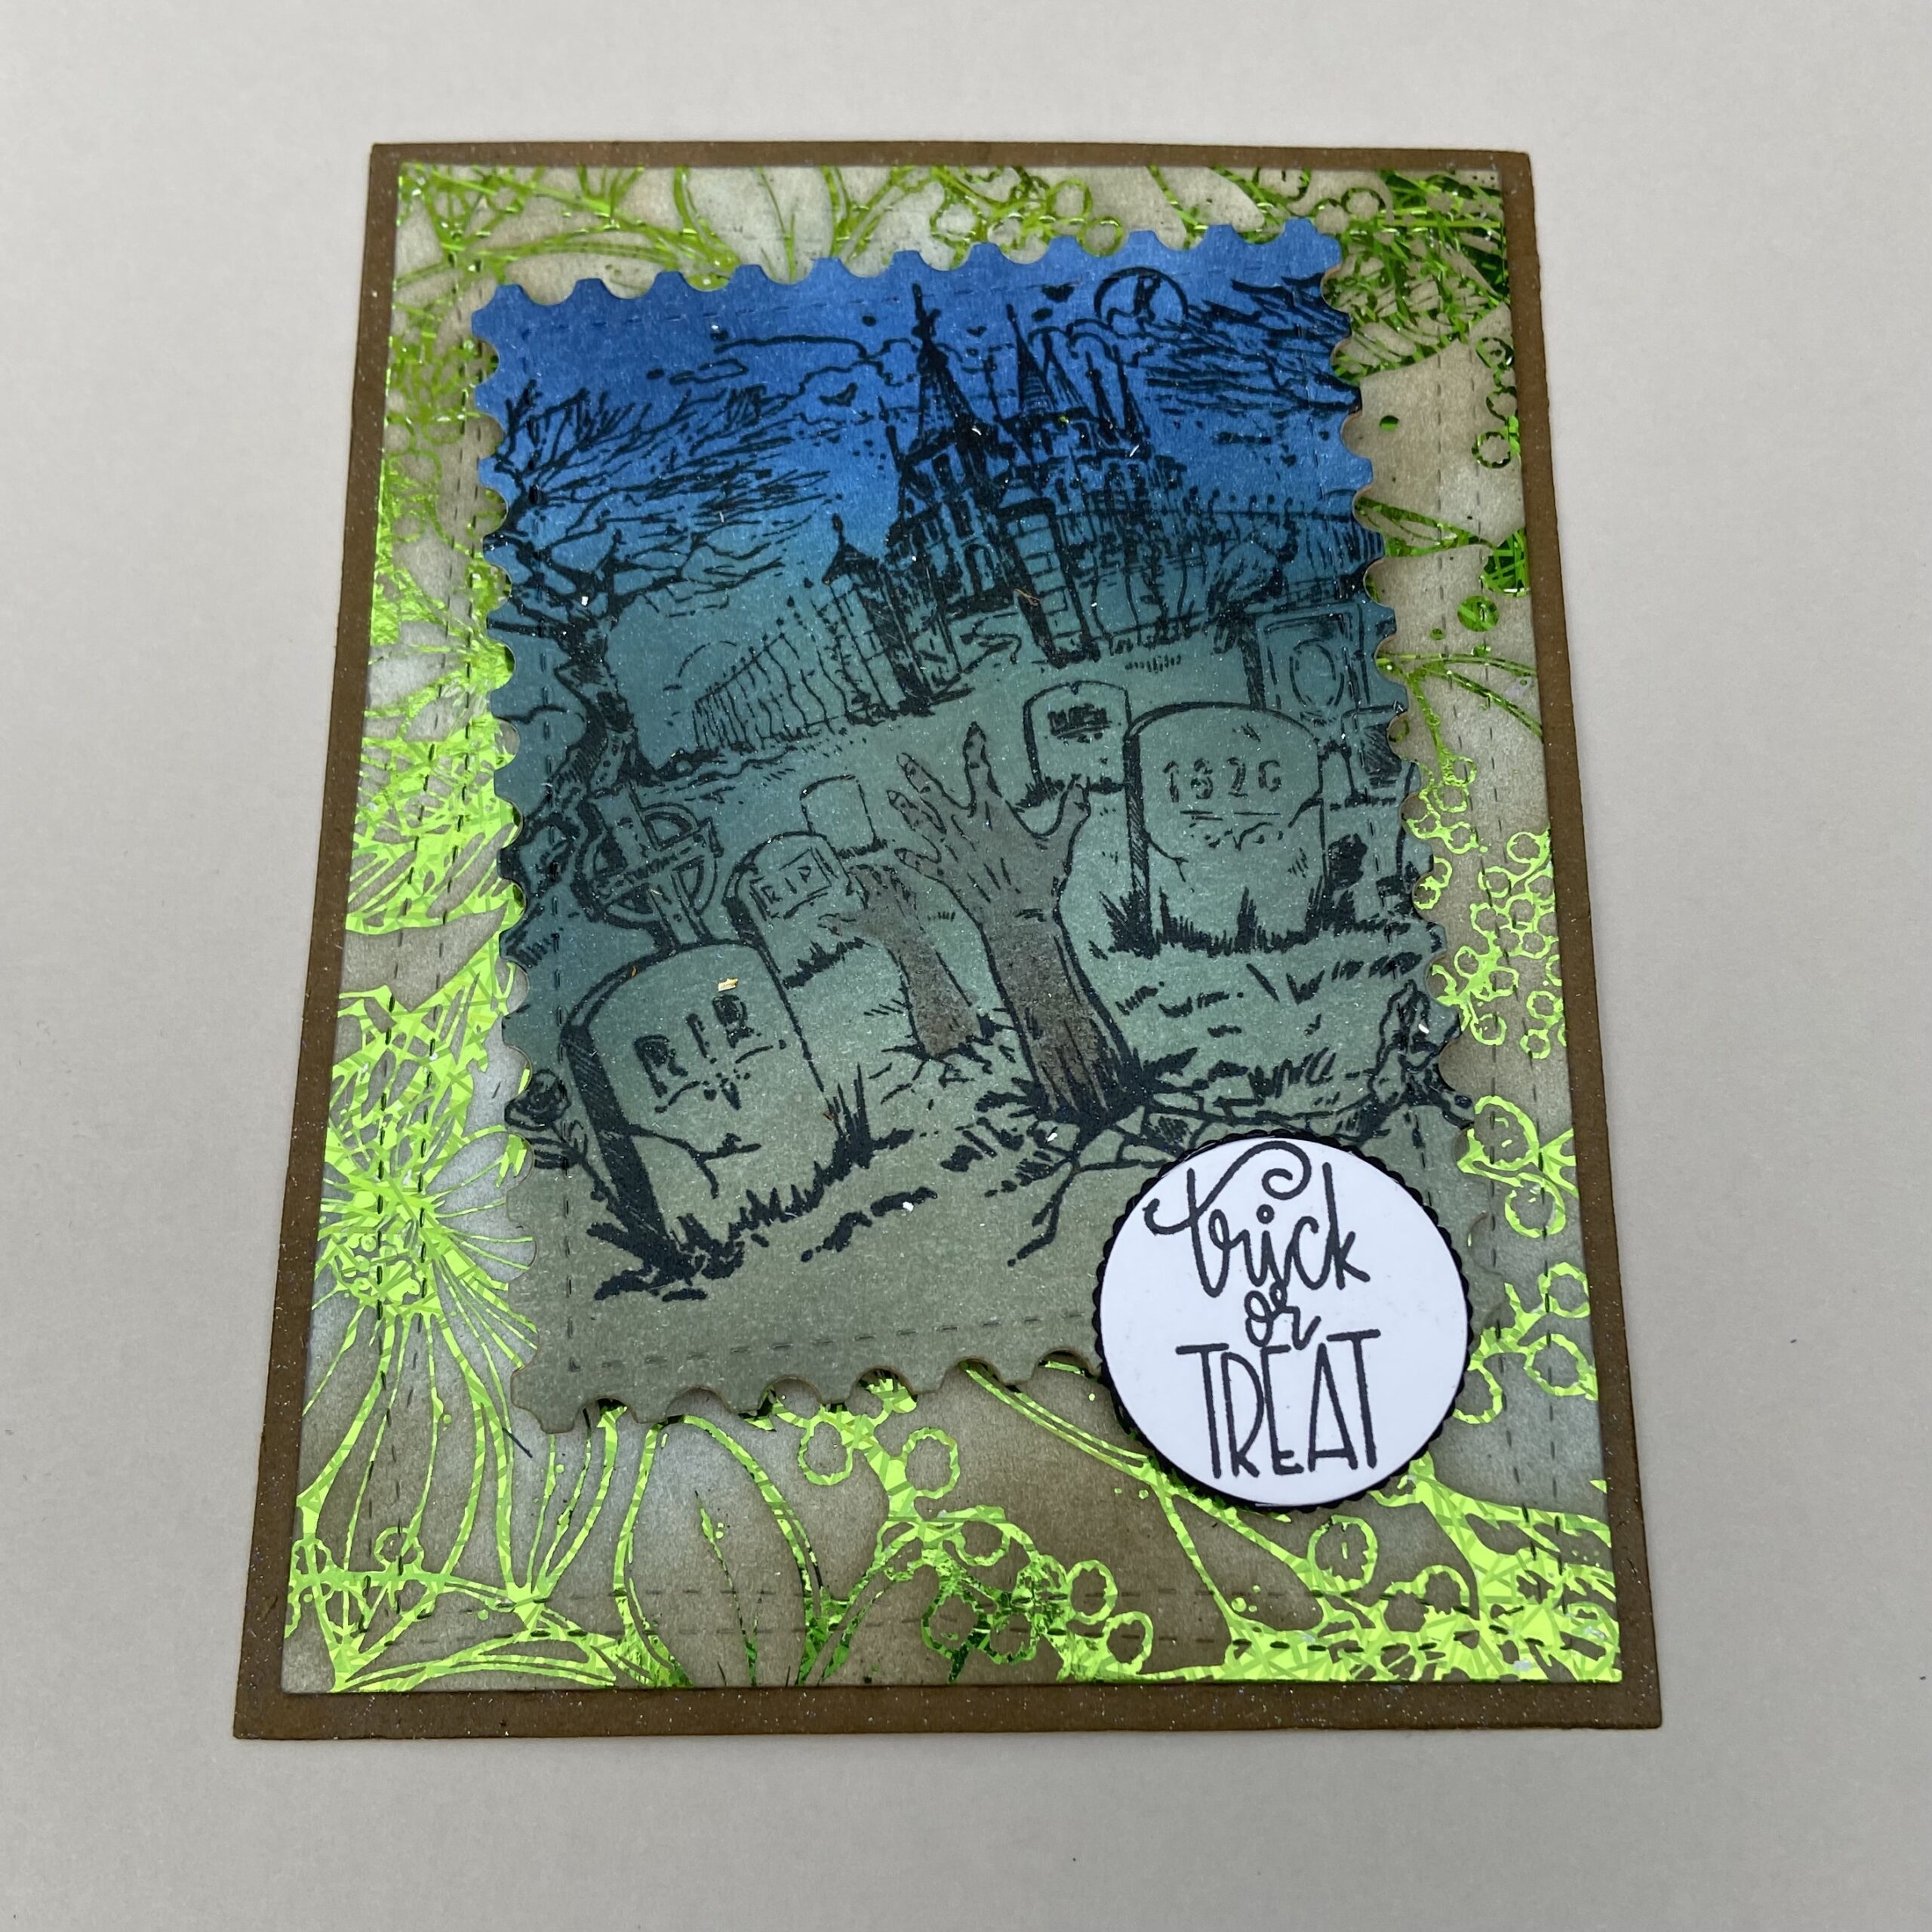
I hope you like these Spooky Halloween card with lots of sparkle and shiny foiled goodness.

Growing In Unity Day Three Butterflies

If I could only have one type of image in my stash it would be butterflies and Unity has the best butterfly stamps! Today I’m sharing some of my favorites. I used Copics to color all the images with a autumn color scheme. I find coloring butterflies really helps you practice Copic color blending its a fun way to experiment with color choices.

The images are from various KOM’s and some of my favorite butterfly kits. Sentiments are a mix from some of my favorite sentiment kits.

Here’s a couple crafty tips for you. I love foil card stock for framing my colored panels I buy Cricut foil kraft stock its available in store at Joann’s and also on Amazon. I used the Jewel tones pack for these cards. I also used Thermoweb Ultra fine Giller Spray to add shine its amazing stuff.

Who says you can’t turn a spring lilac into a fall card?

Thank you so much for stopping by for my day three as Unity’s GIU Girl Week❤️

Growing In Unity Day Two … Simple Cards with Unity Pattern Paper

Today I’m sharing tags and cards made with Unity patterned paper I’ve been collecting and not using because it is so luxurious. Most of my pattern paper stash came from my Whit Kit Membership. This idea began when I received my last Unity order I purchased the Dashes & Frills Heart Die set. Let me just say if you don’t have these in your stash add them to your next order.

The card layout it very simple a patterned paper background and a stamped image die cut focal point. I really enjoy coloring so I will stamp out a bunch of images and color them when I have time. Once I have a pile of colored images, I spray them with Thermoweb Ultra Fine Glitter Spray and die cut them out.

For sentiments I batch them usually pulling a few Sentiment kits out. I cut Neenah 110# in half and place it in my Misti then I place a bunch of sentiments in the Misti with enough room around them to I can die cut them. I’ll stamp 5 or 6 pages of these then swap out the sentiments and do it again. When I’m watching tv or listening to a pod cast I mindlessly die cut out all the sentiments and organize them in piles. Then I put them in 12 pocket sleeve in a three ring binder. Now I have cards ready to send but usually I will make gift sets and package 4-6 cards for friends or hostess gifts. I will usually give the cards without sentiments attached and then include various die cut sentiments for the recipent so they can decide what they need. I will add Thermoweb tear tape to the back of the die cut sentiments so the recipent can just pull off the release paper. Below are several examples one with sentiments and some blank. I’ve listed the Stamp sets i used under each picture.

Sentiment Kits Hearts of Autumn (8/2020) & There Is No Reason (8/2018)
September 2017 KOM I plan on using these squirrel tags for jars of homemade trail mix.

Autumn Dream & There Is No Reason (8/2018)
September 2017 KOM
Warm & Cozy August 2019 KOM
This is my favorite pattern paper those nails❤️
KOM 9/2017

Later this week I will share how I package cards for gifts with simple Dollar Tree supplies.

Thank you so much for stopping ❤️

Growing In Unity Day One… Fall Pumpkins 

My first projects feature some of my favorite sets Pumpkin Patch Background and Fall To Go. I used a sentiment from Hey There Pumpkin. I made two A2 cards and a tag. I like to keep sentiments on the front of my cards generic so I customize them with a sentiment on the inside when I’m ready to use them. the cute ”Hey Pumpkin” will work for just about any occasion.

All my projects today are colored using Copics. I have a couple tricks I like doing for Fall stamping and its to use brown ink. I start by using my Misti and Gina K Charcoal Brown Ink all her inks are Copic friendly. Next I color all my images. Then I put my panel back into the Misti and stamp over the colored image in Versafine Claire Pinecone. Versafine inks are a pigment so they sit on top of the card stock and make all the lines of the image come back into focus. When I have a stamp set out I always stamp it mulitple times sometimes they all turn out and sometimes the first one is practice coloring. I also like to have lots of tags on hard and I think its fun to use background stamps and die cut part of the image. A great way to stretch your supplies. Another tip is after I’m done die cutting my projects I always spray them with Thermoweb’s Ultra Fine Glitter Spray. I used Iridescent today, it also comes in Gold and Silver it does two thinks seals your work and gives the most beautiful sparkle without distorting your image the way shimmer pens do.

Thank you so much for stopping by!