Growing In Unity Day Two … Simple Cards with Unity Pattern Paper

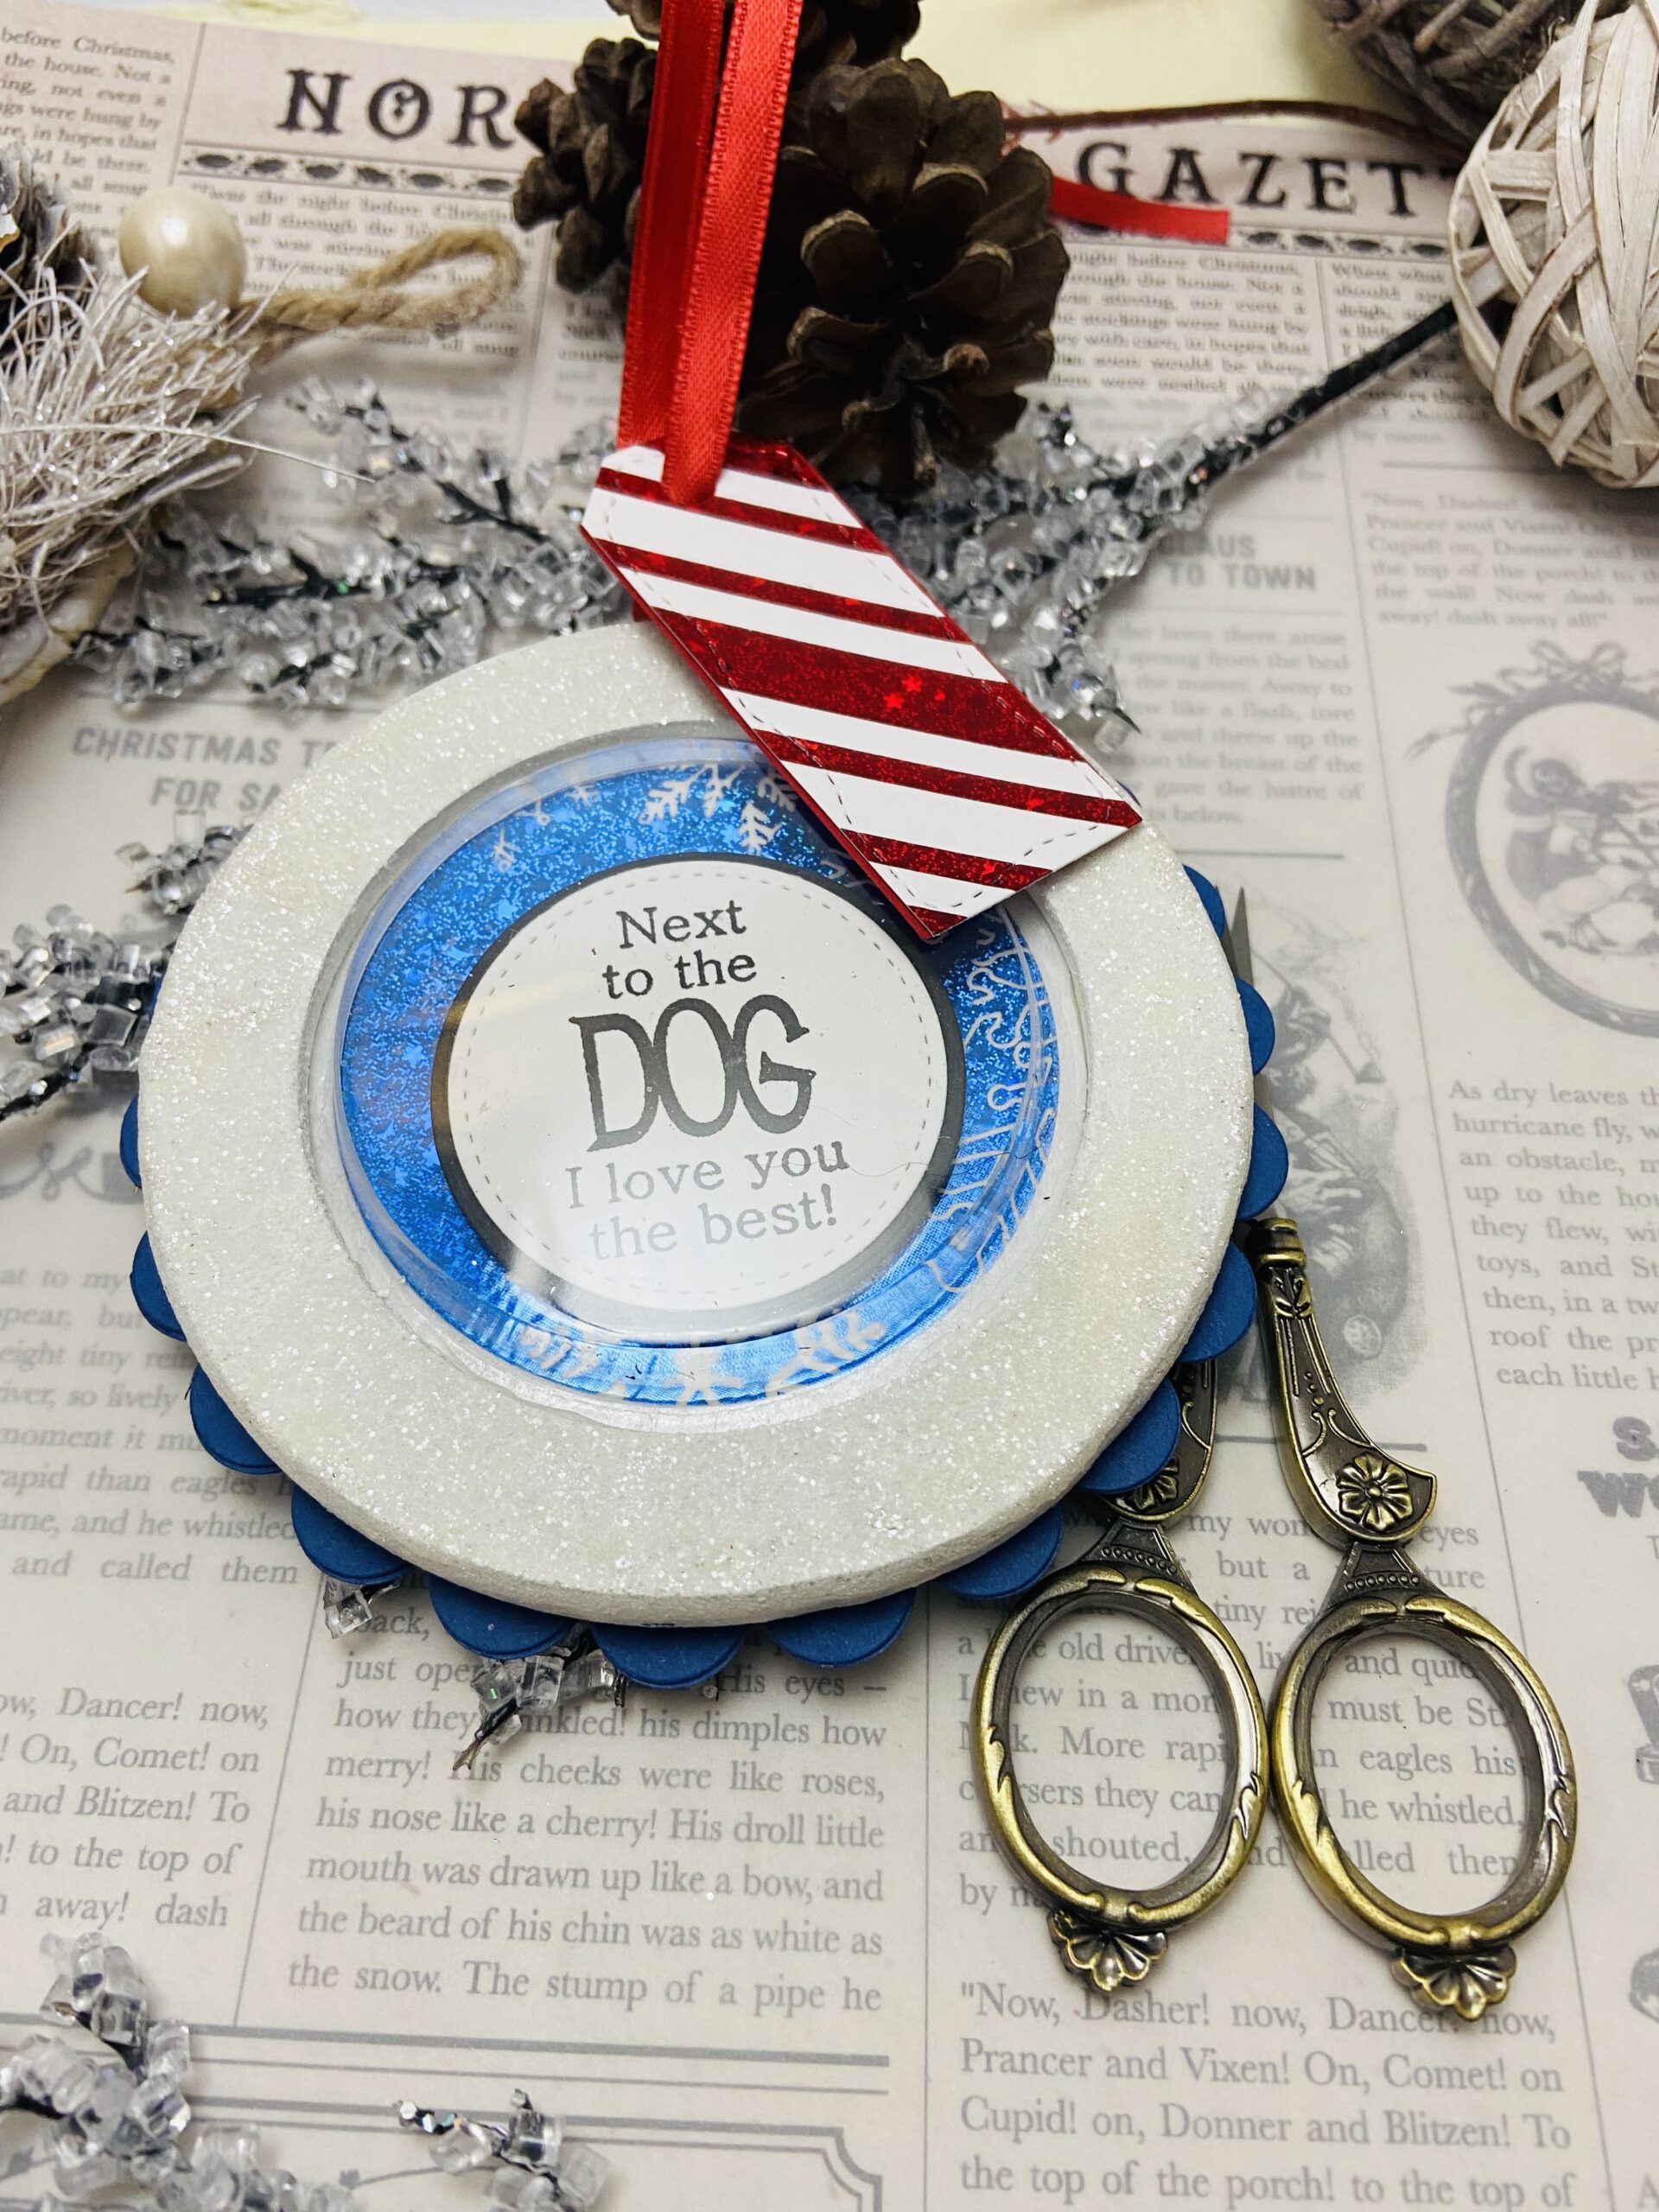
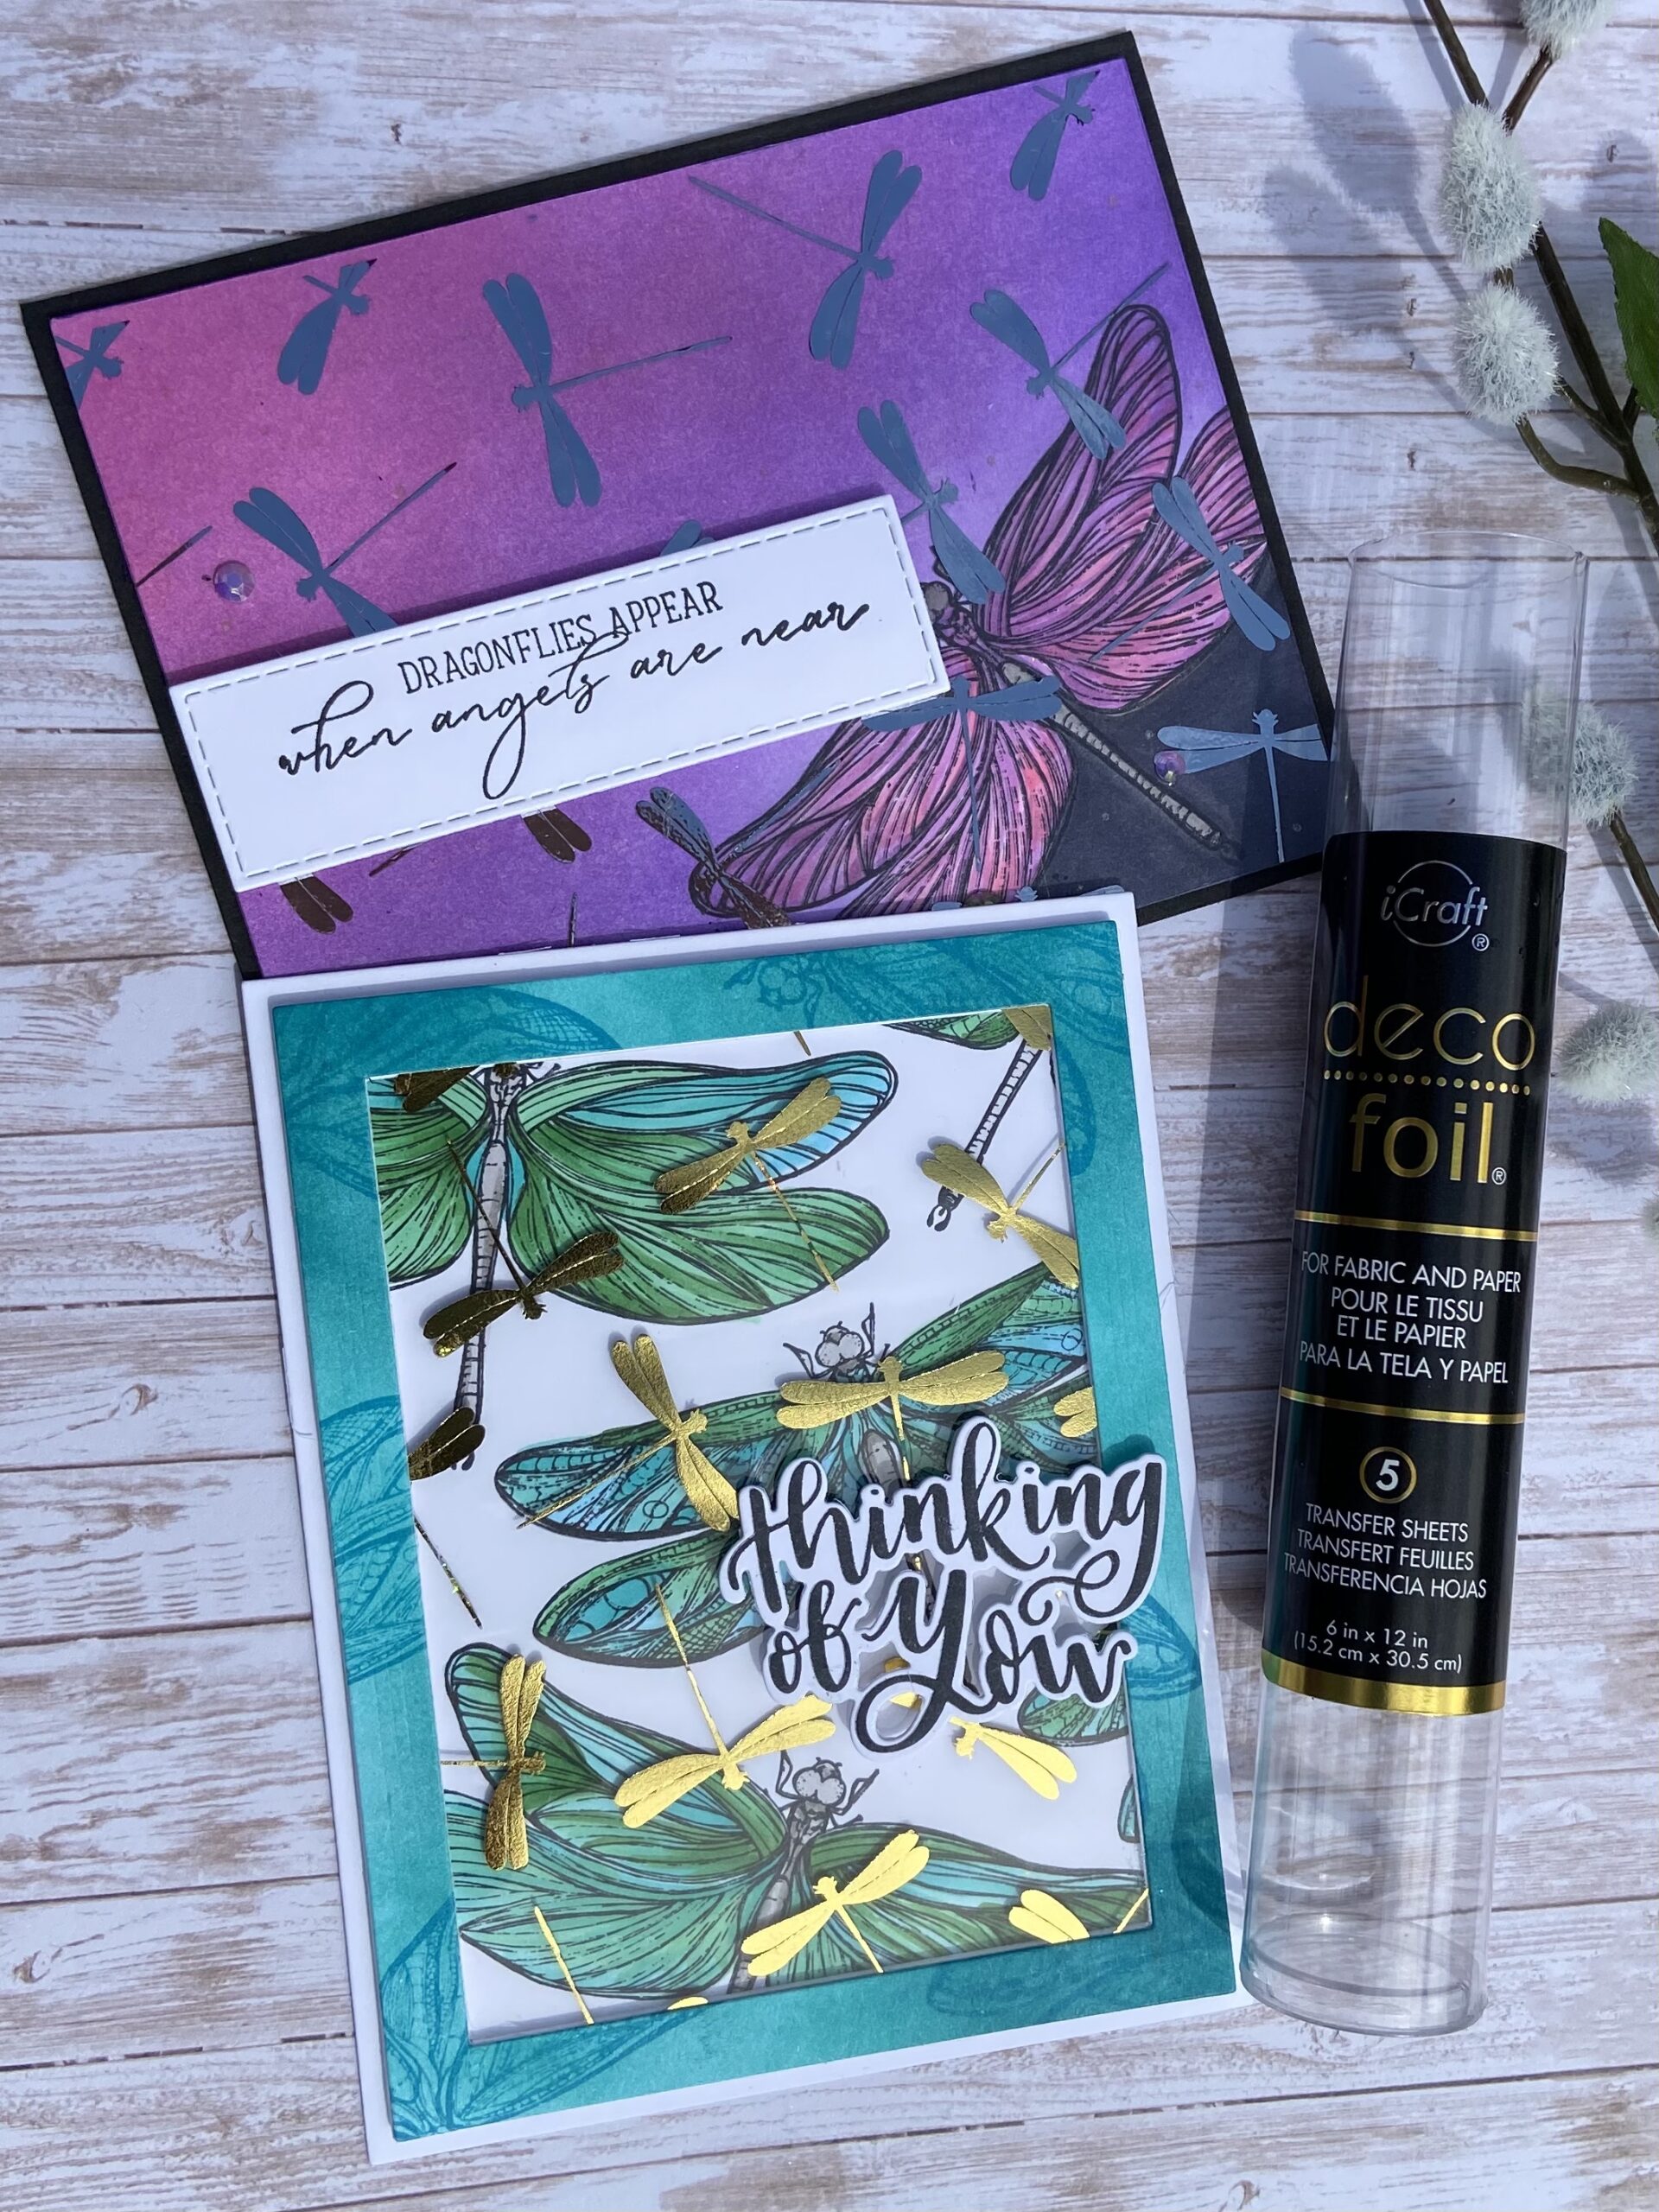
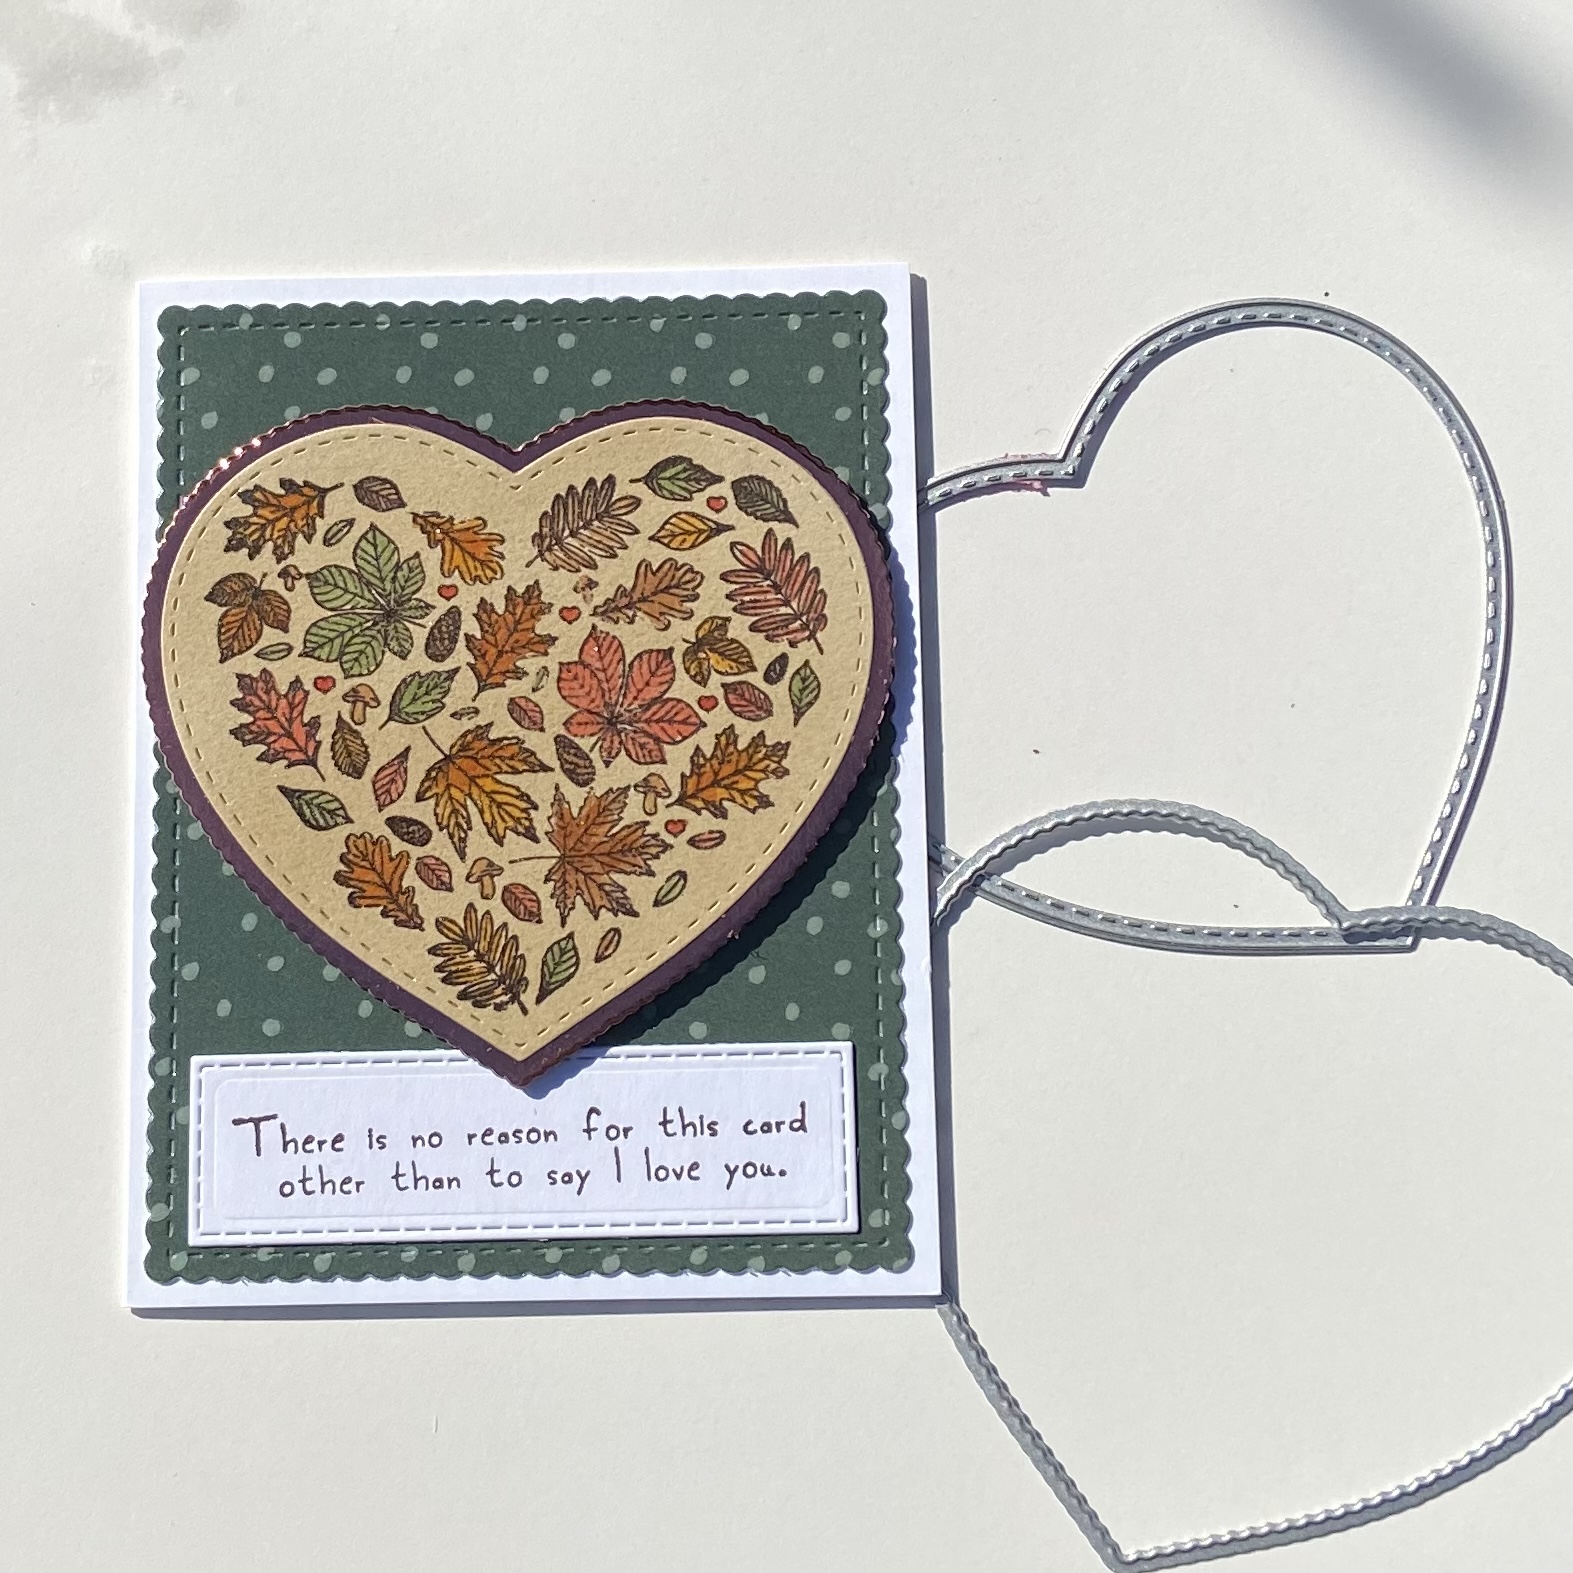
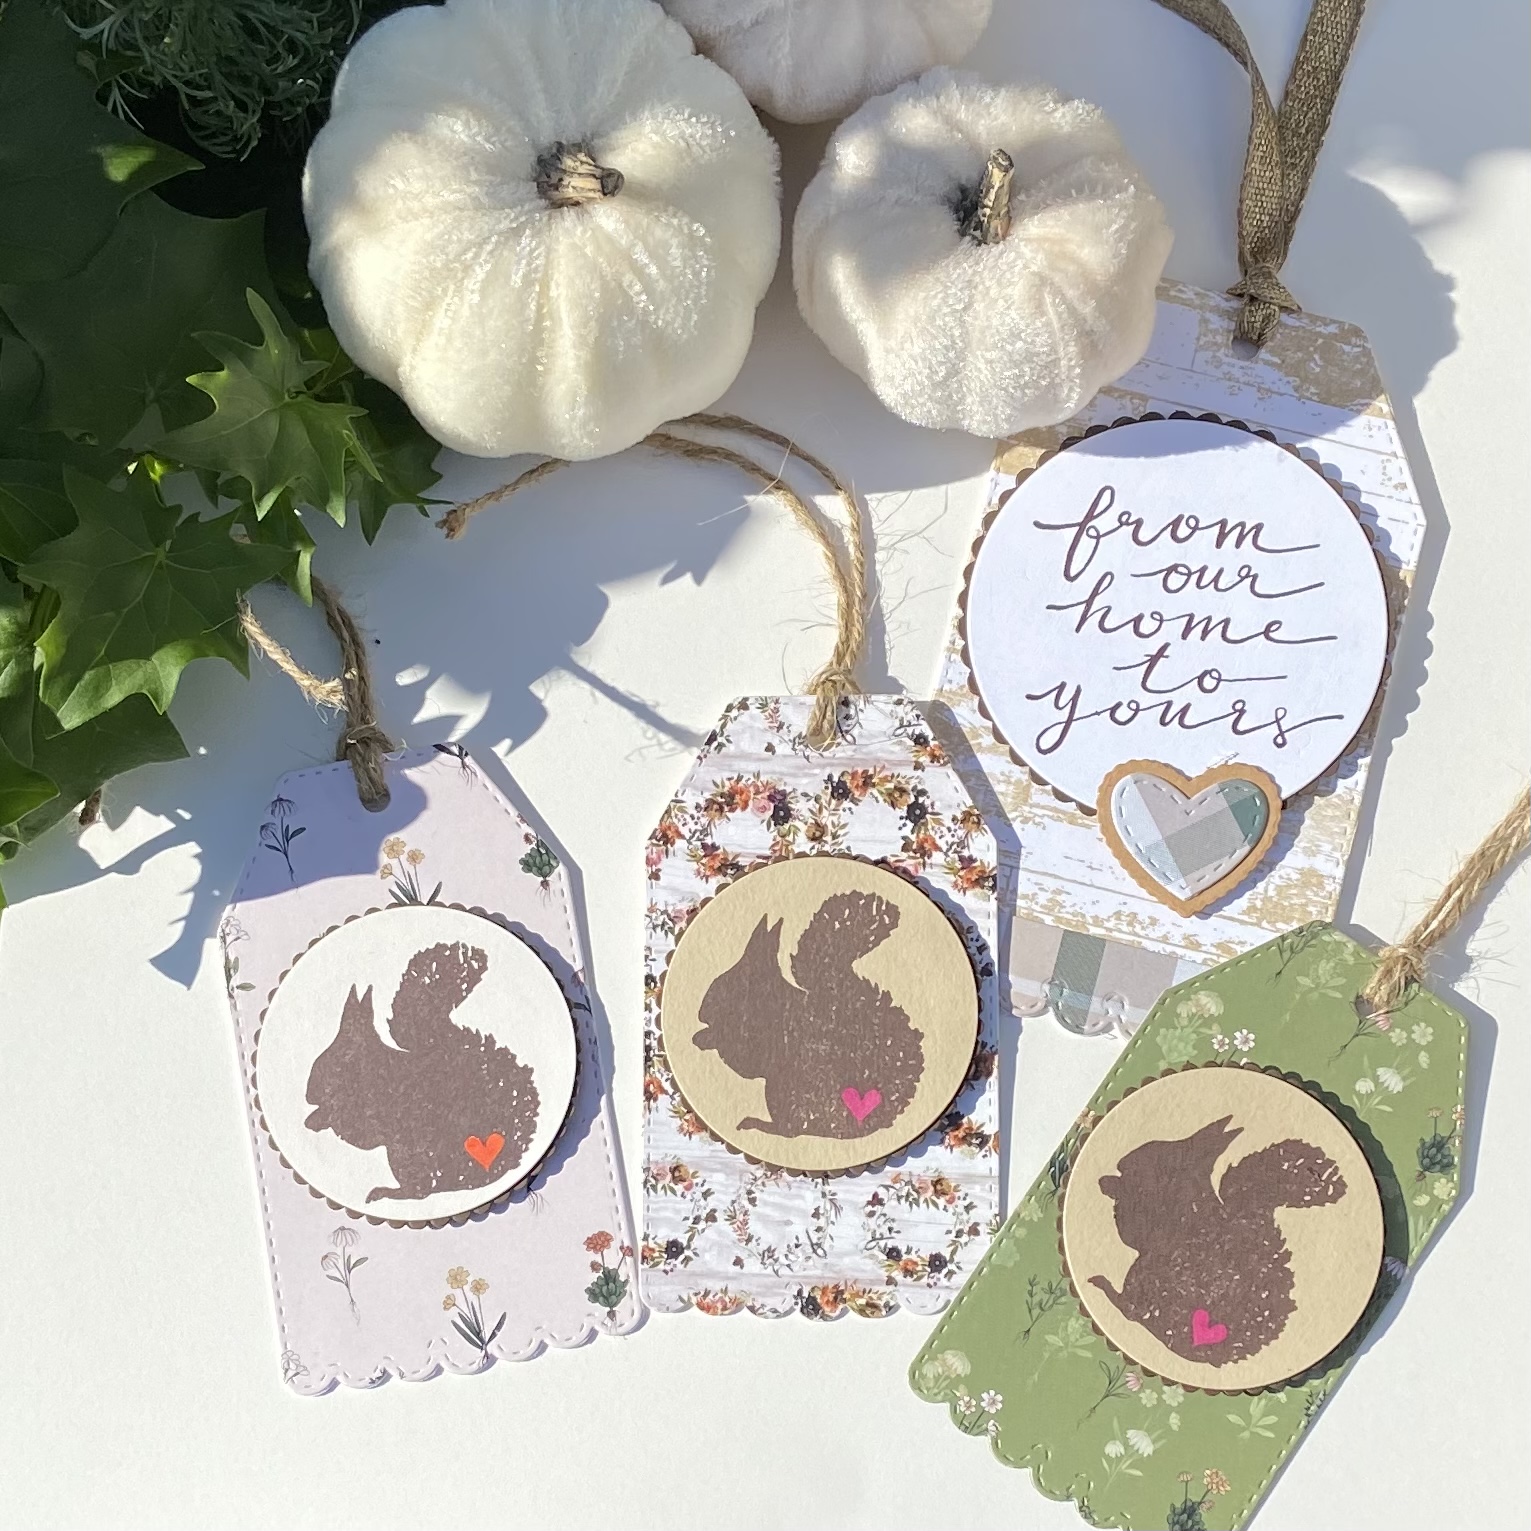
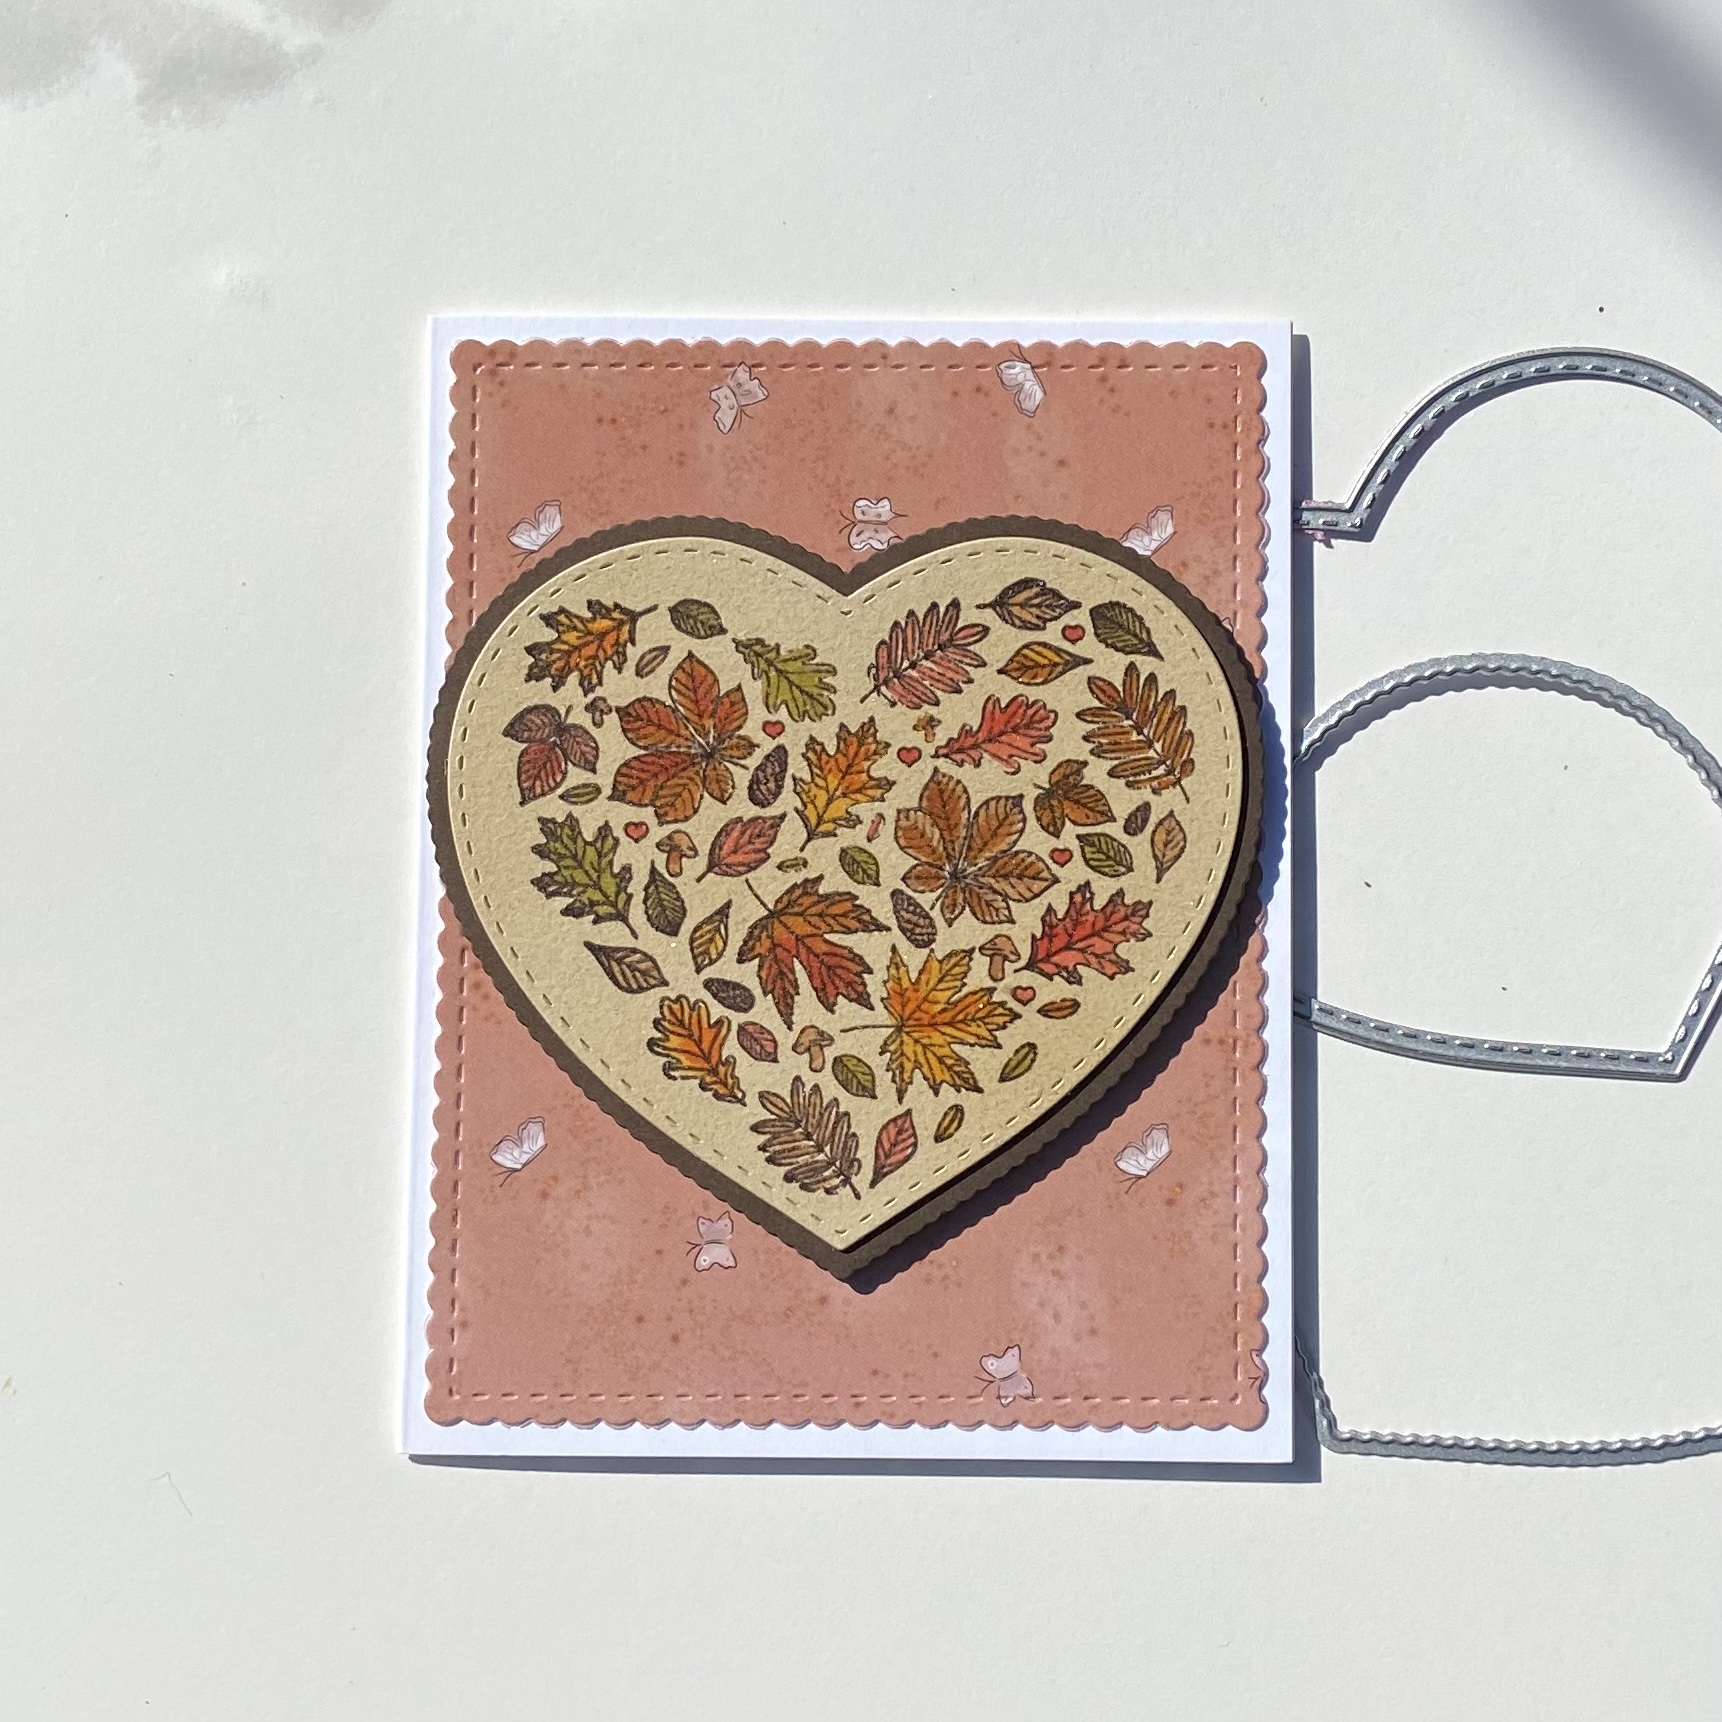
Today I’m sharing tags and cards made with Unity patterned paper I’ve been collecting and not using because it is so luxurious. Most of my pattern paper stash came from my Whit Kit Membership. This idea began when I received my last Unity order I purchased the Dashes & Frills Heart Die set. Let me just say if you don’t have these in your stash add them to your next order.

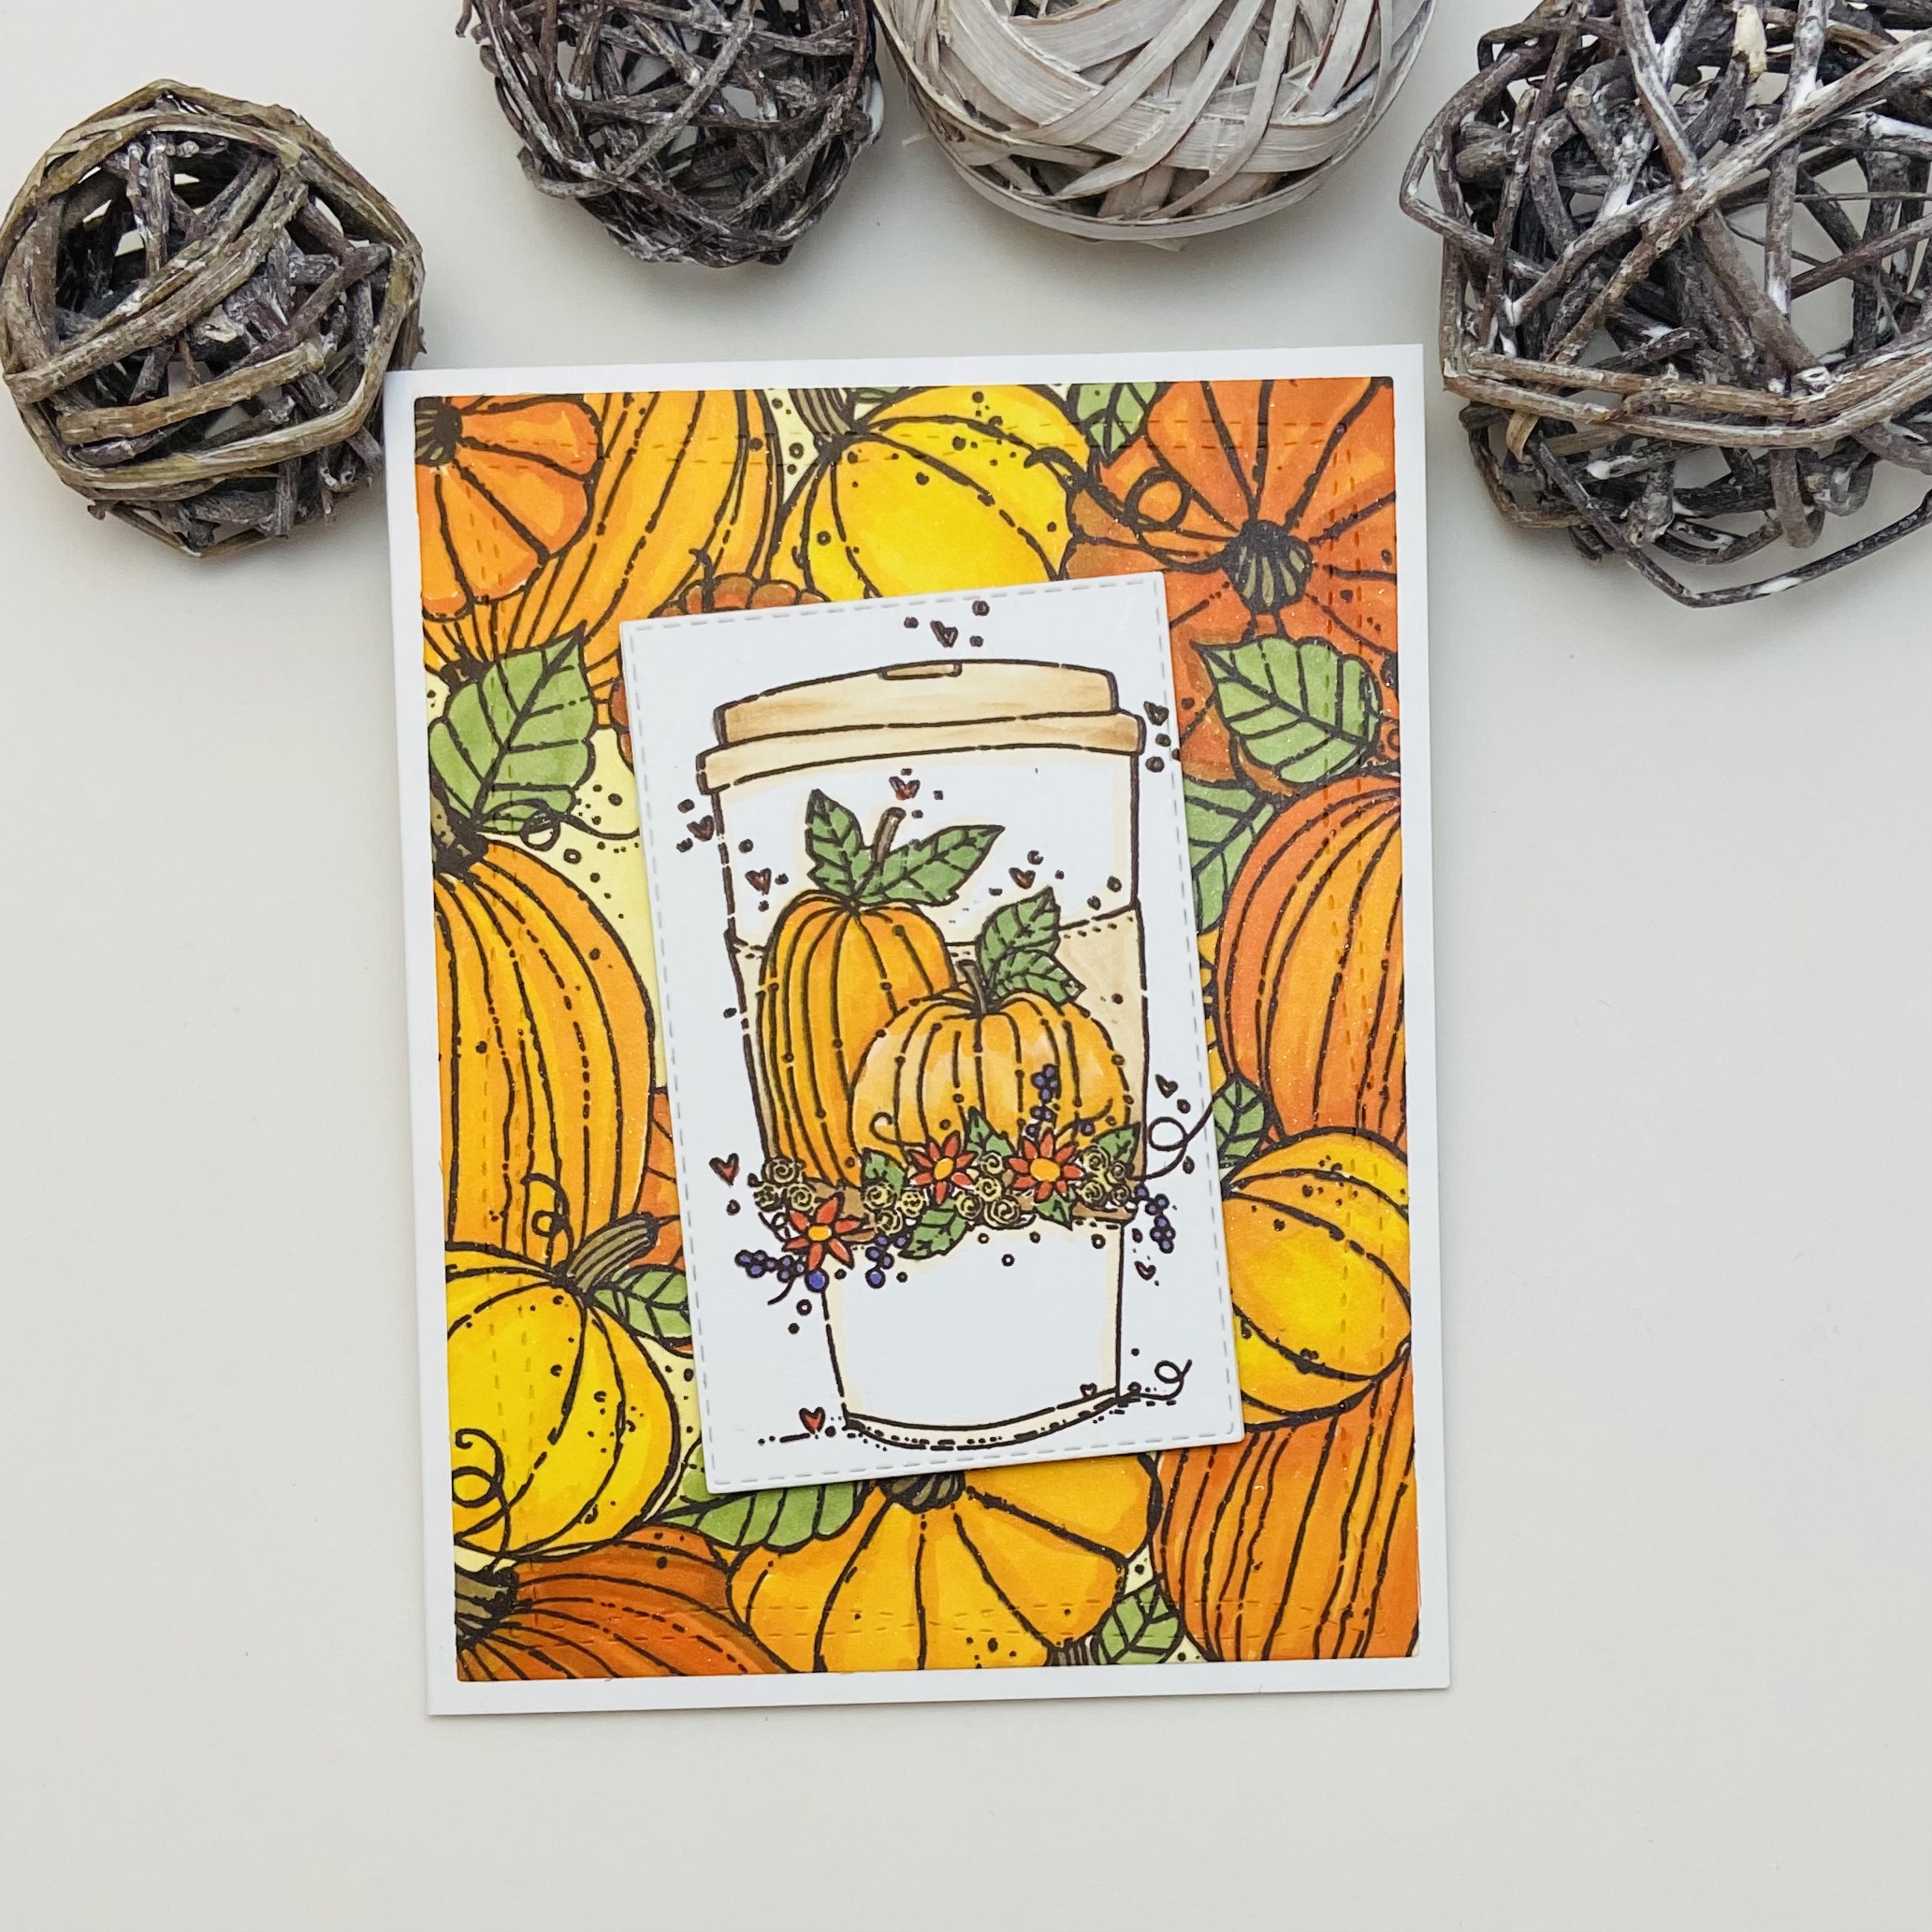
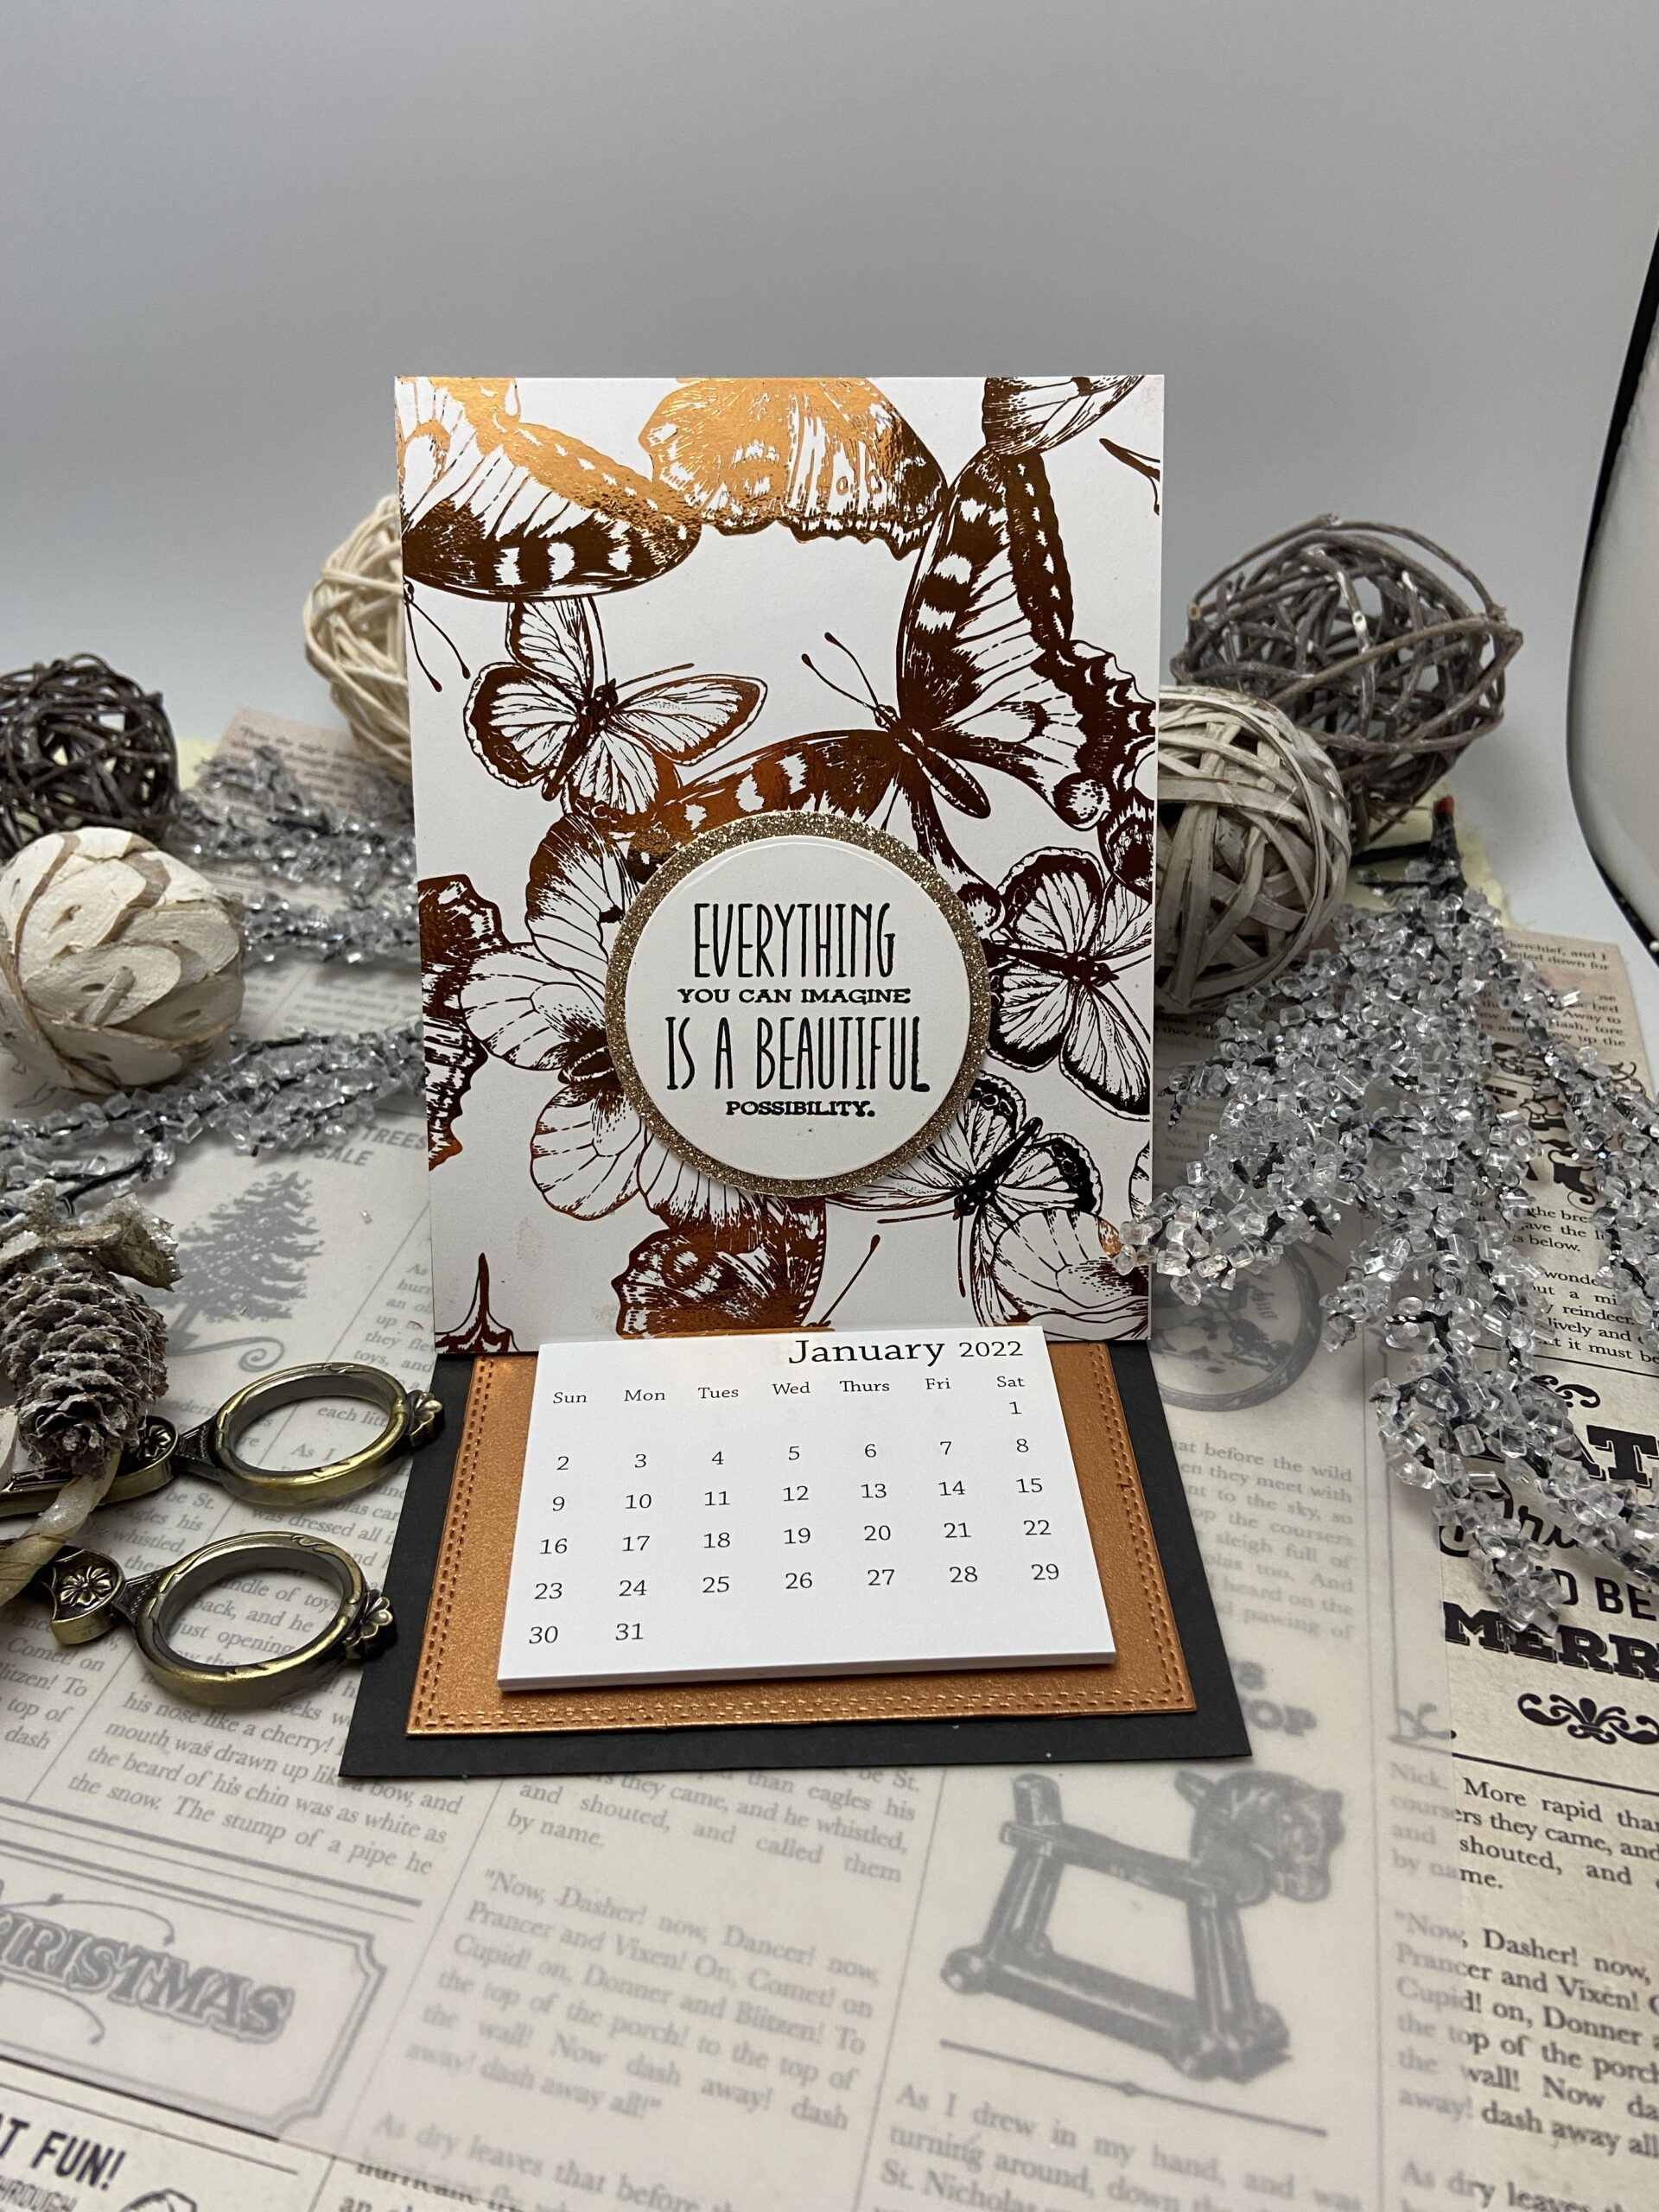
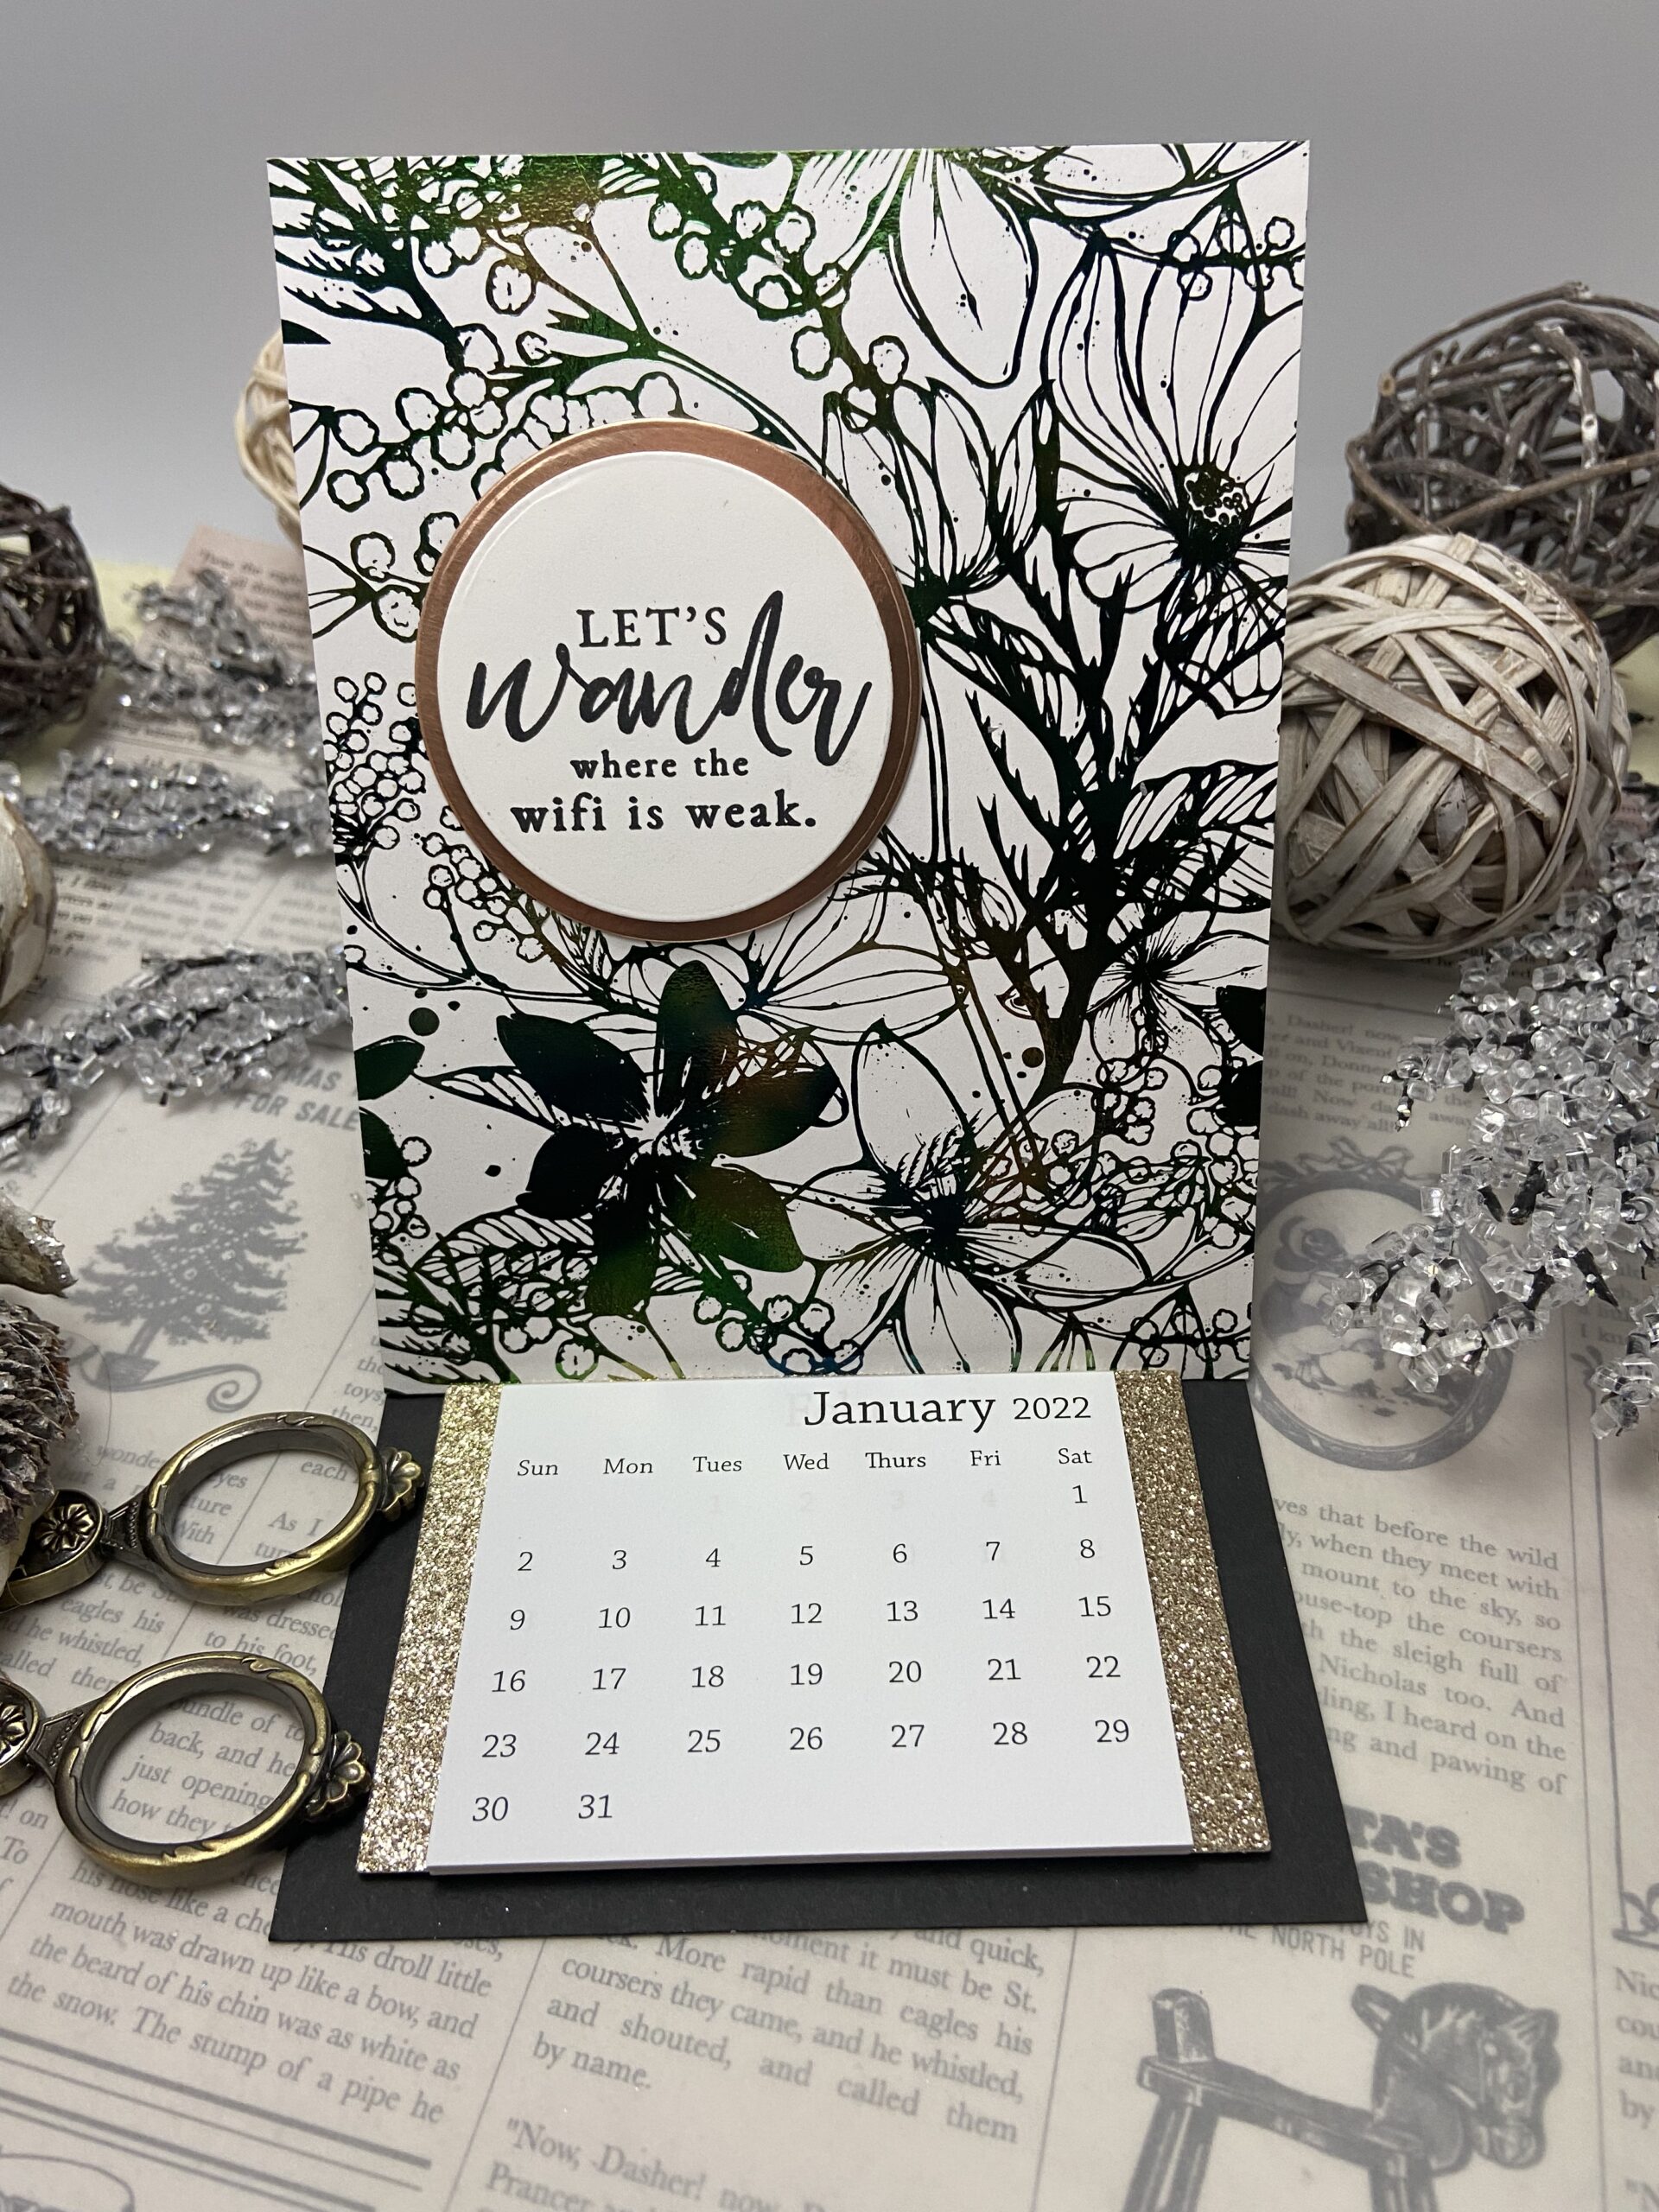
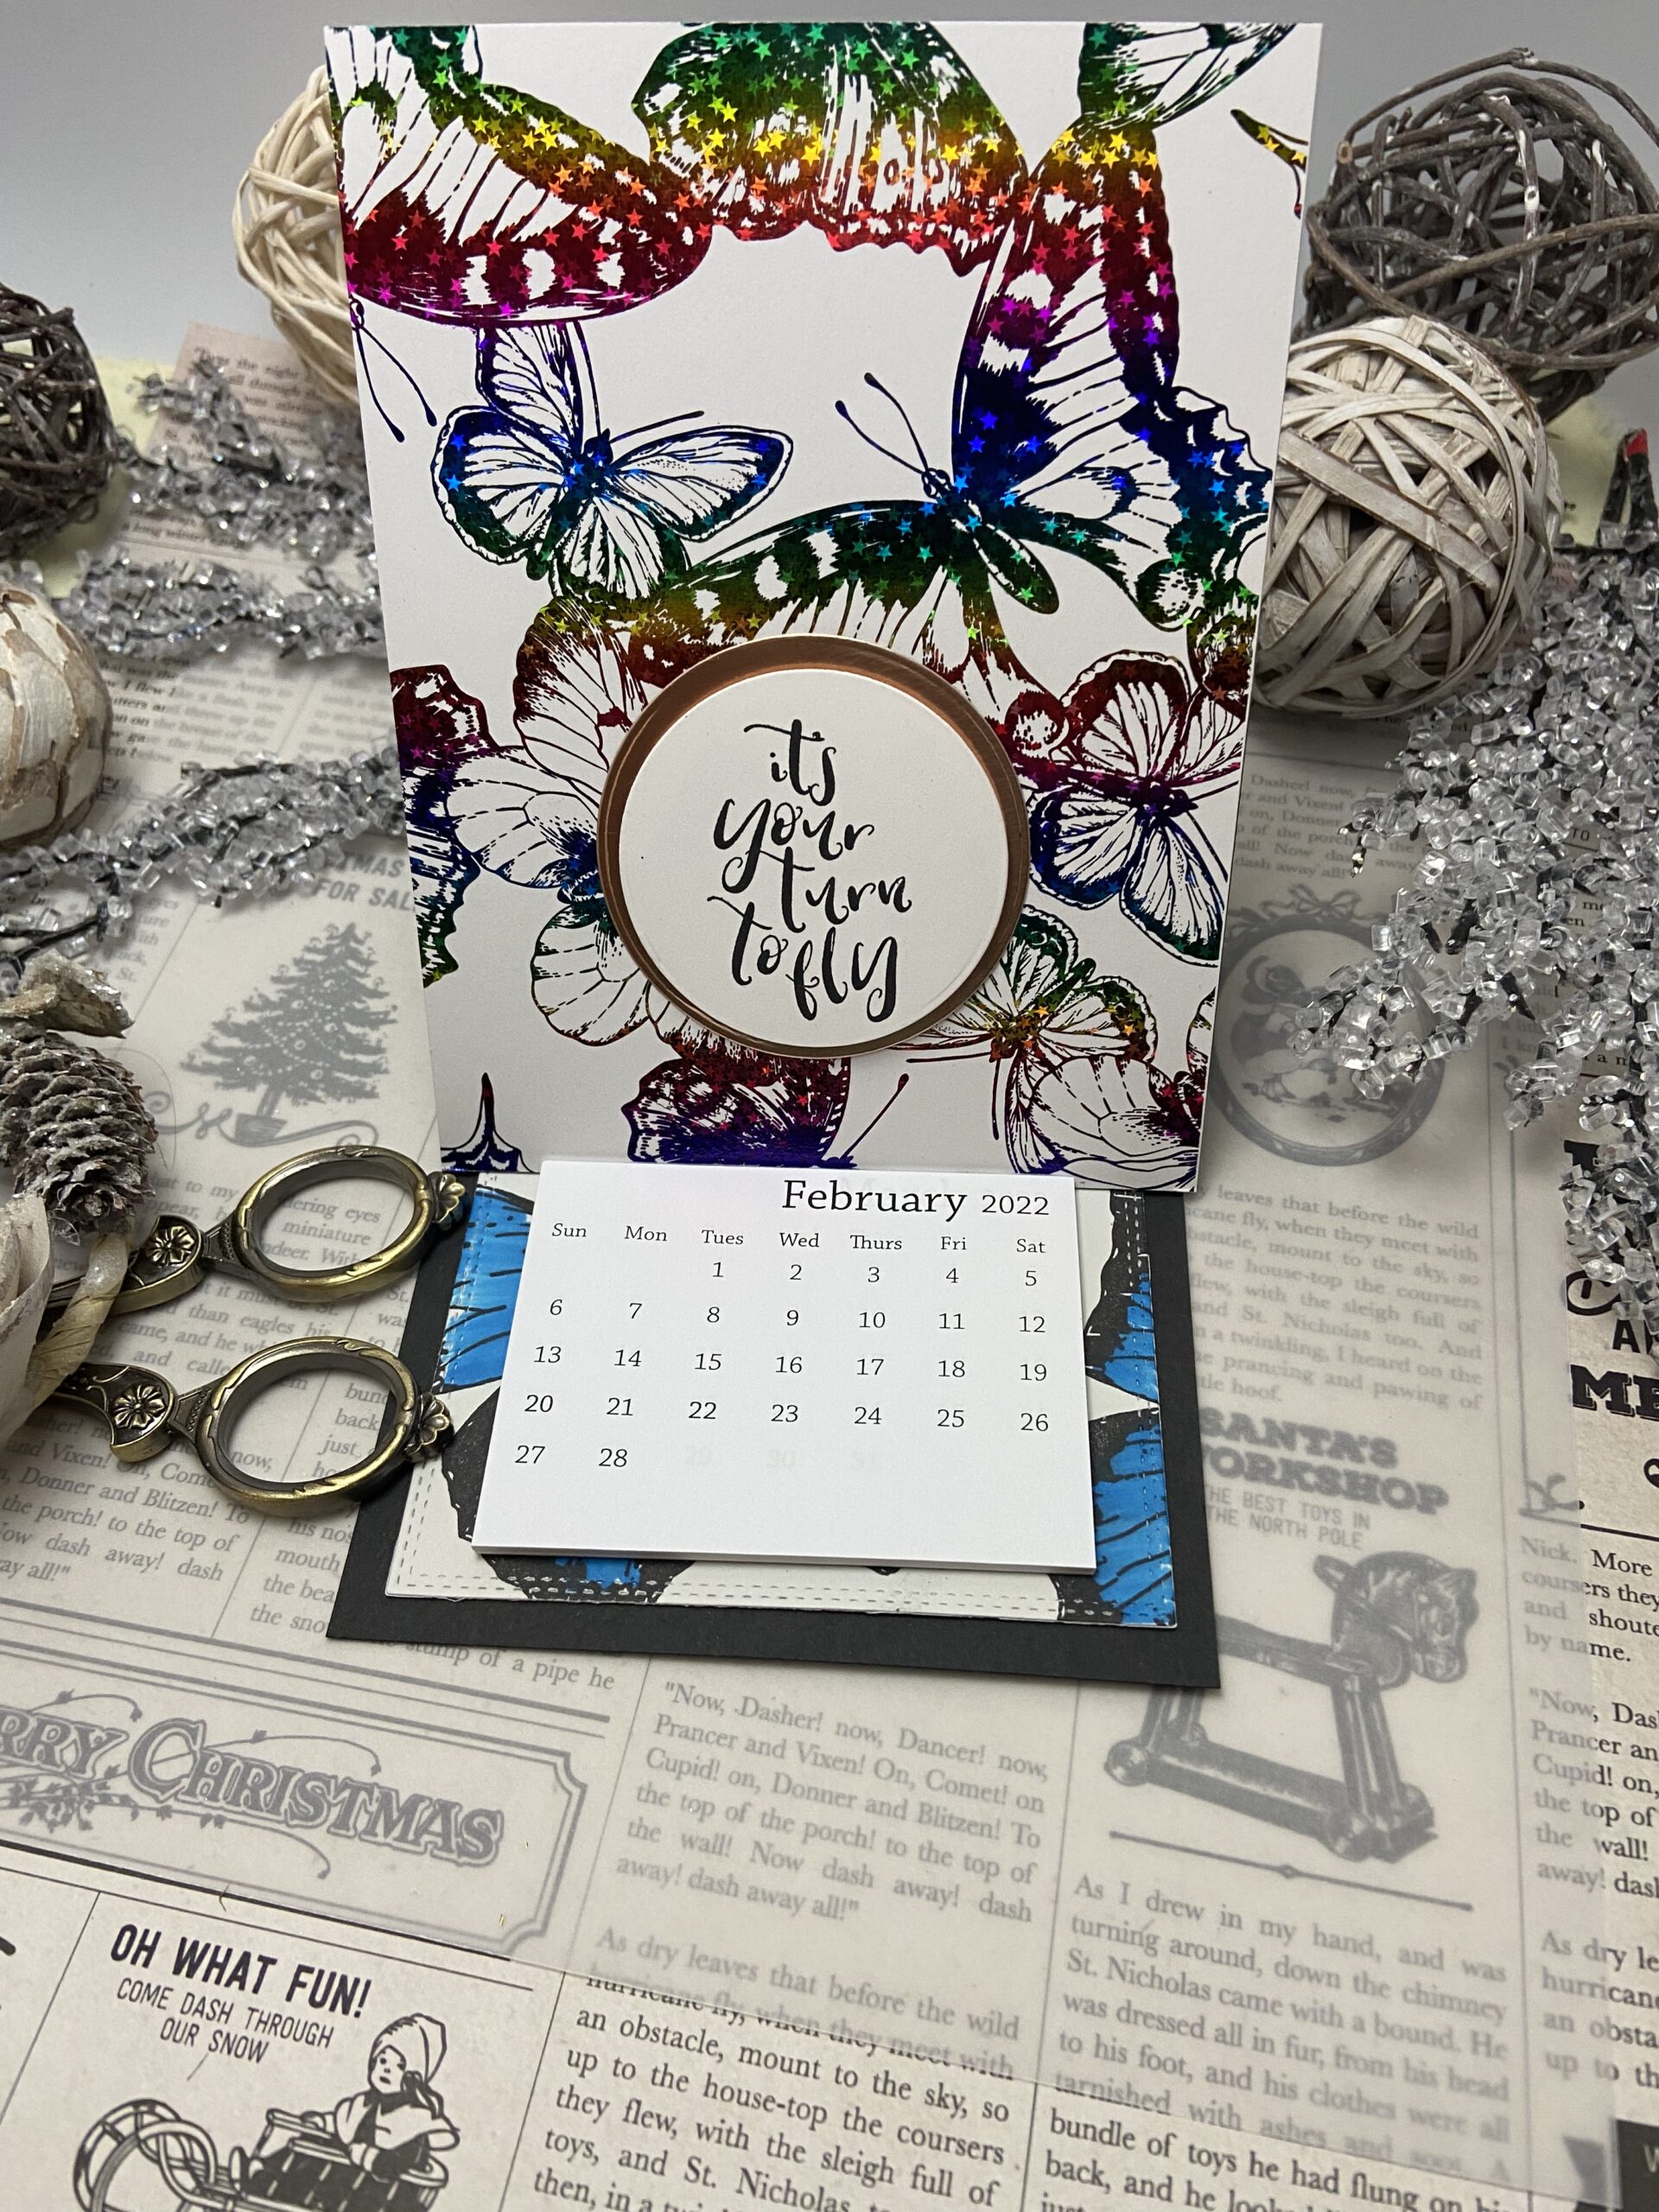
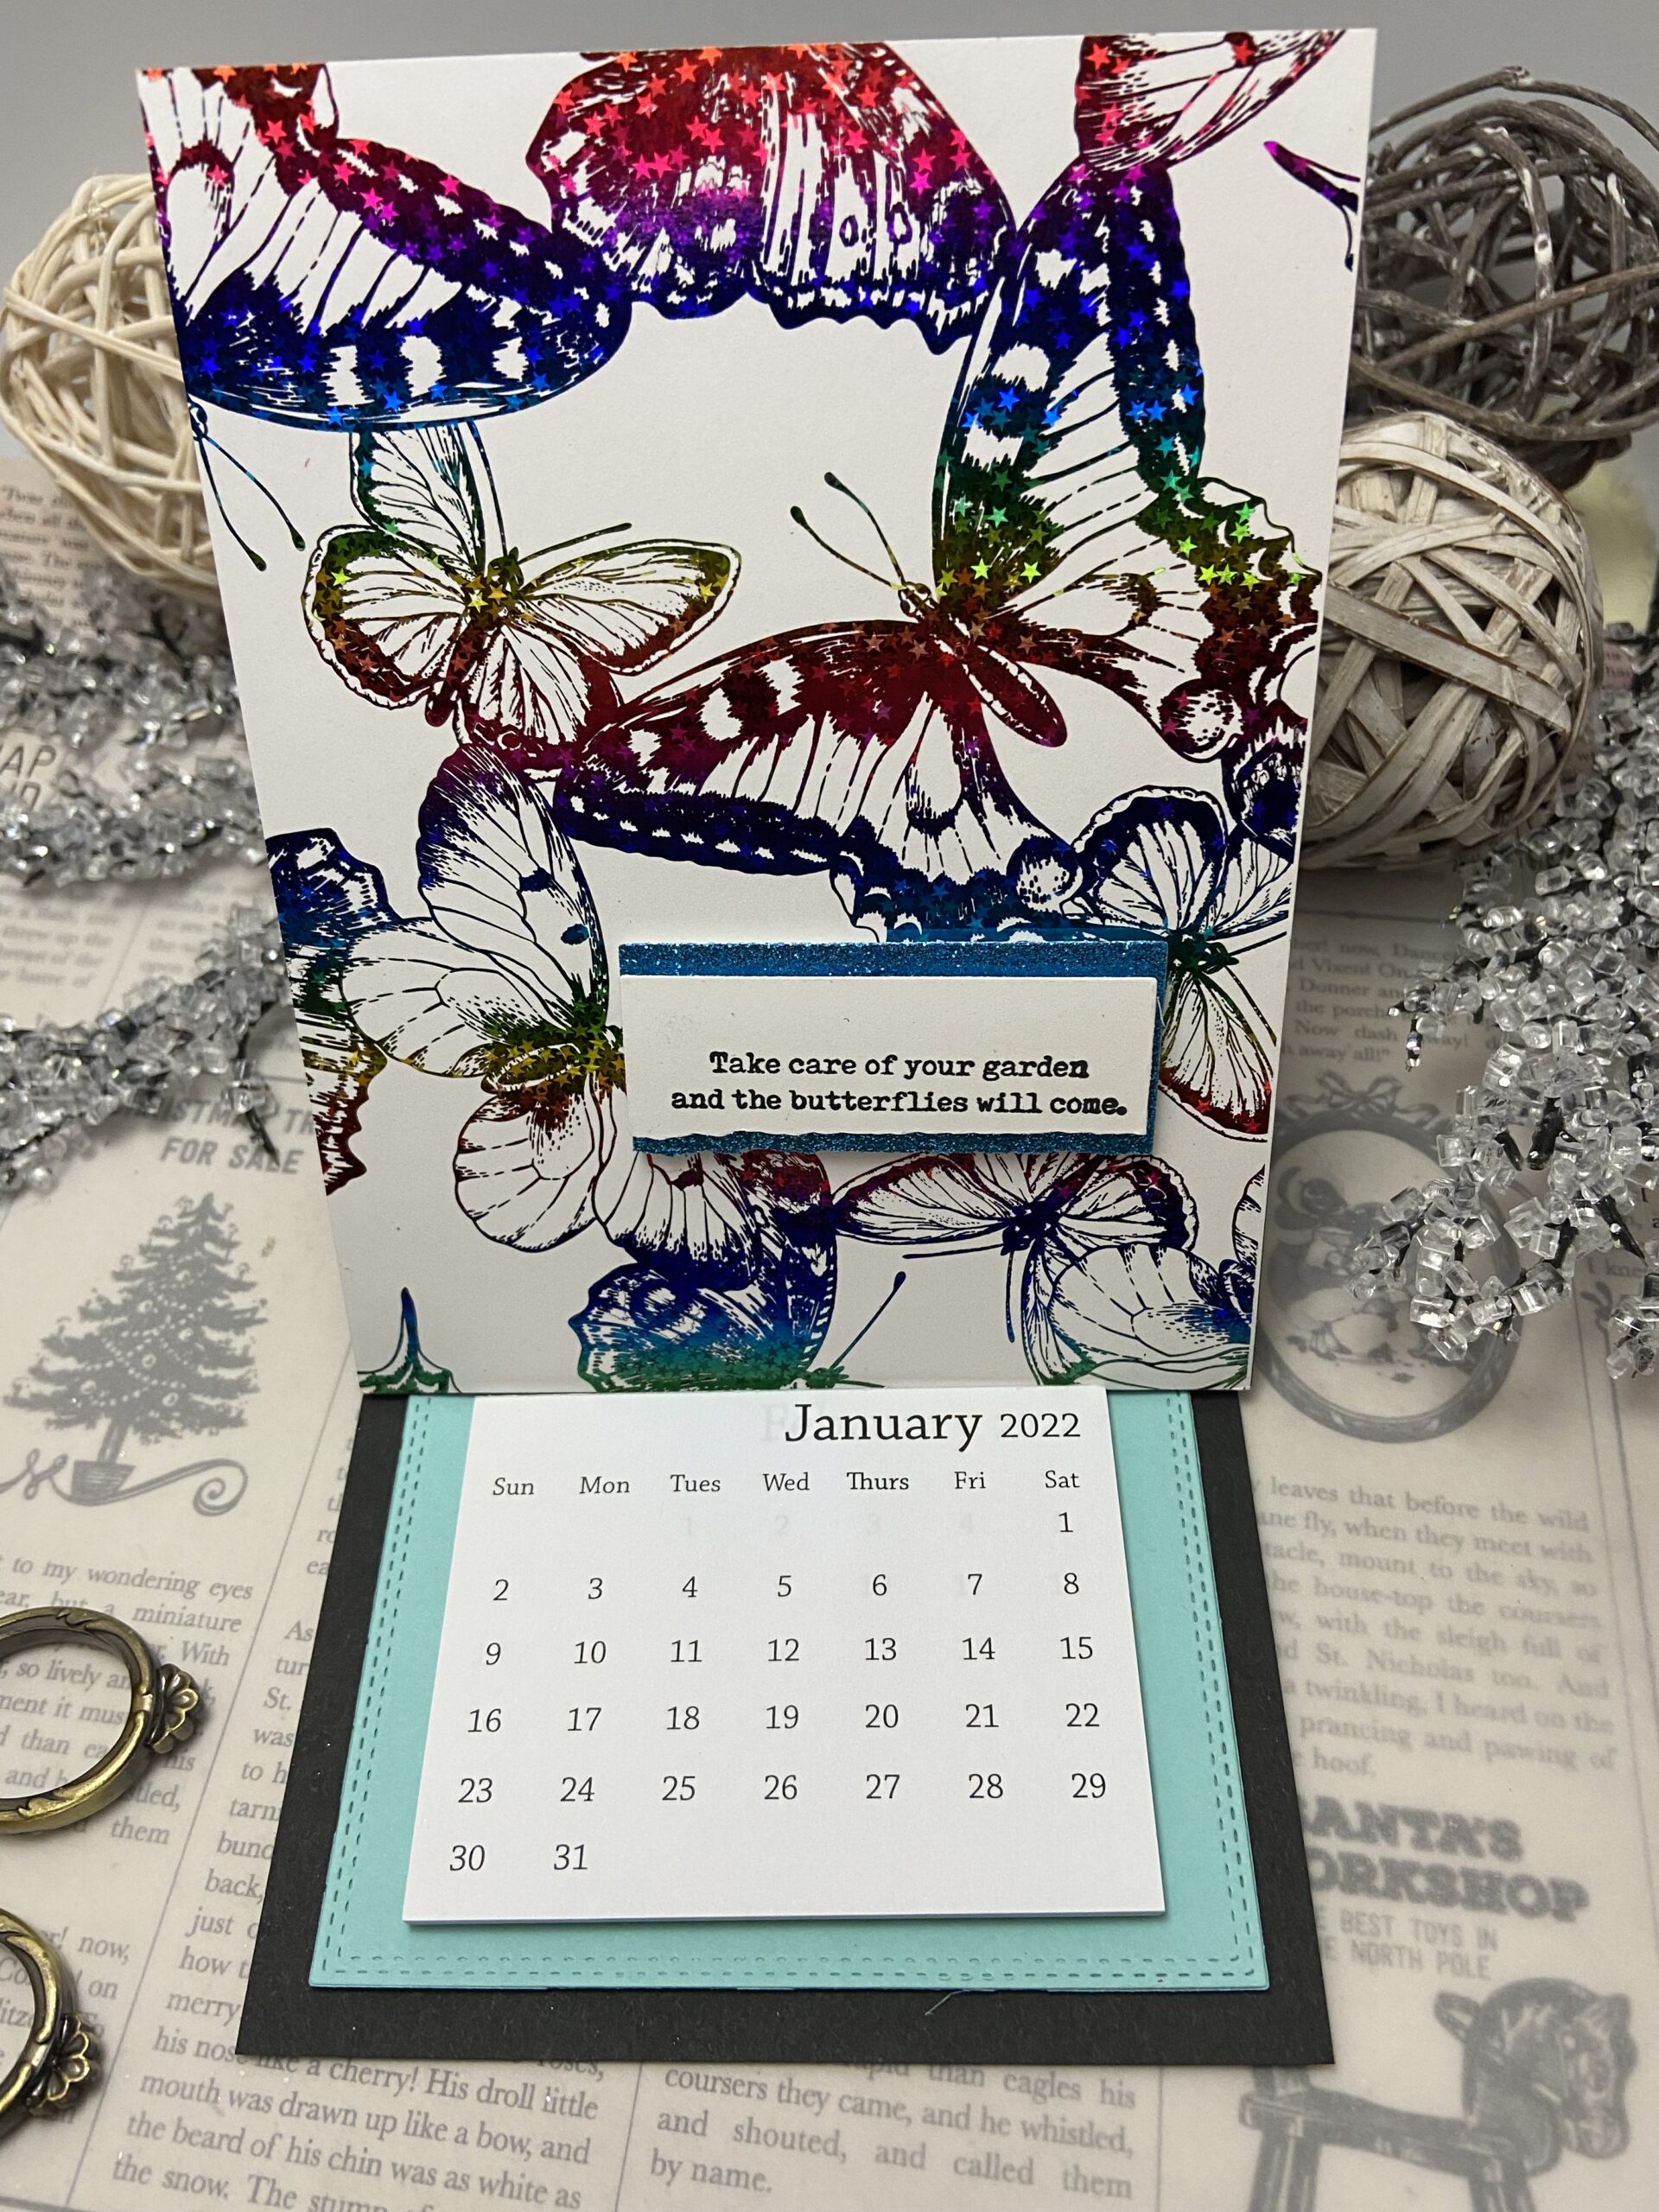
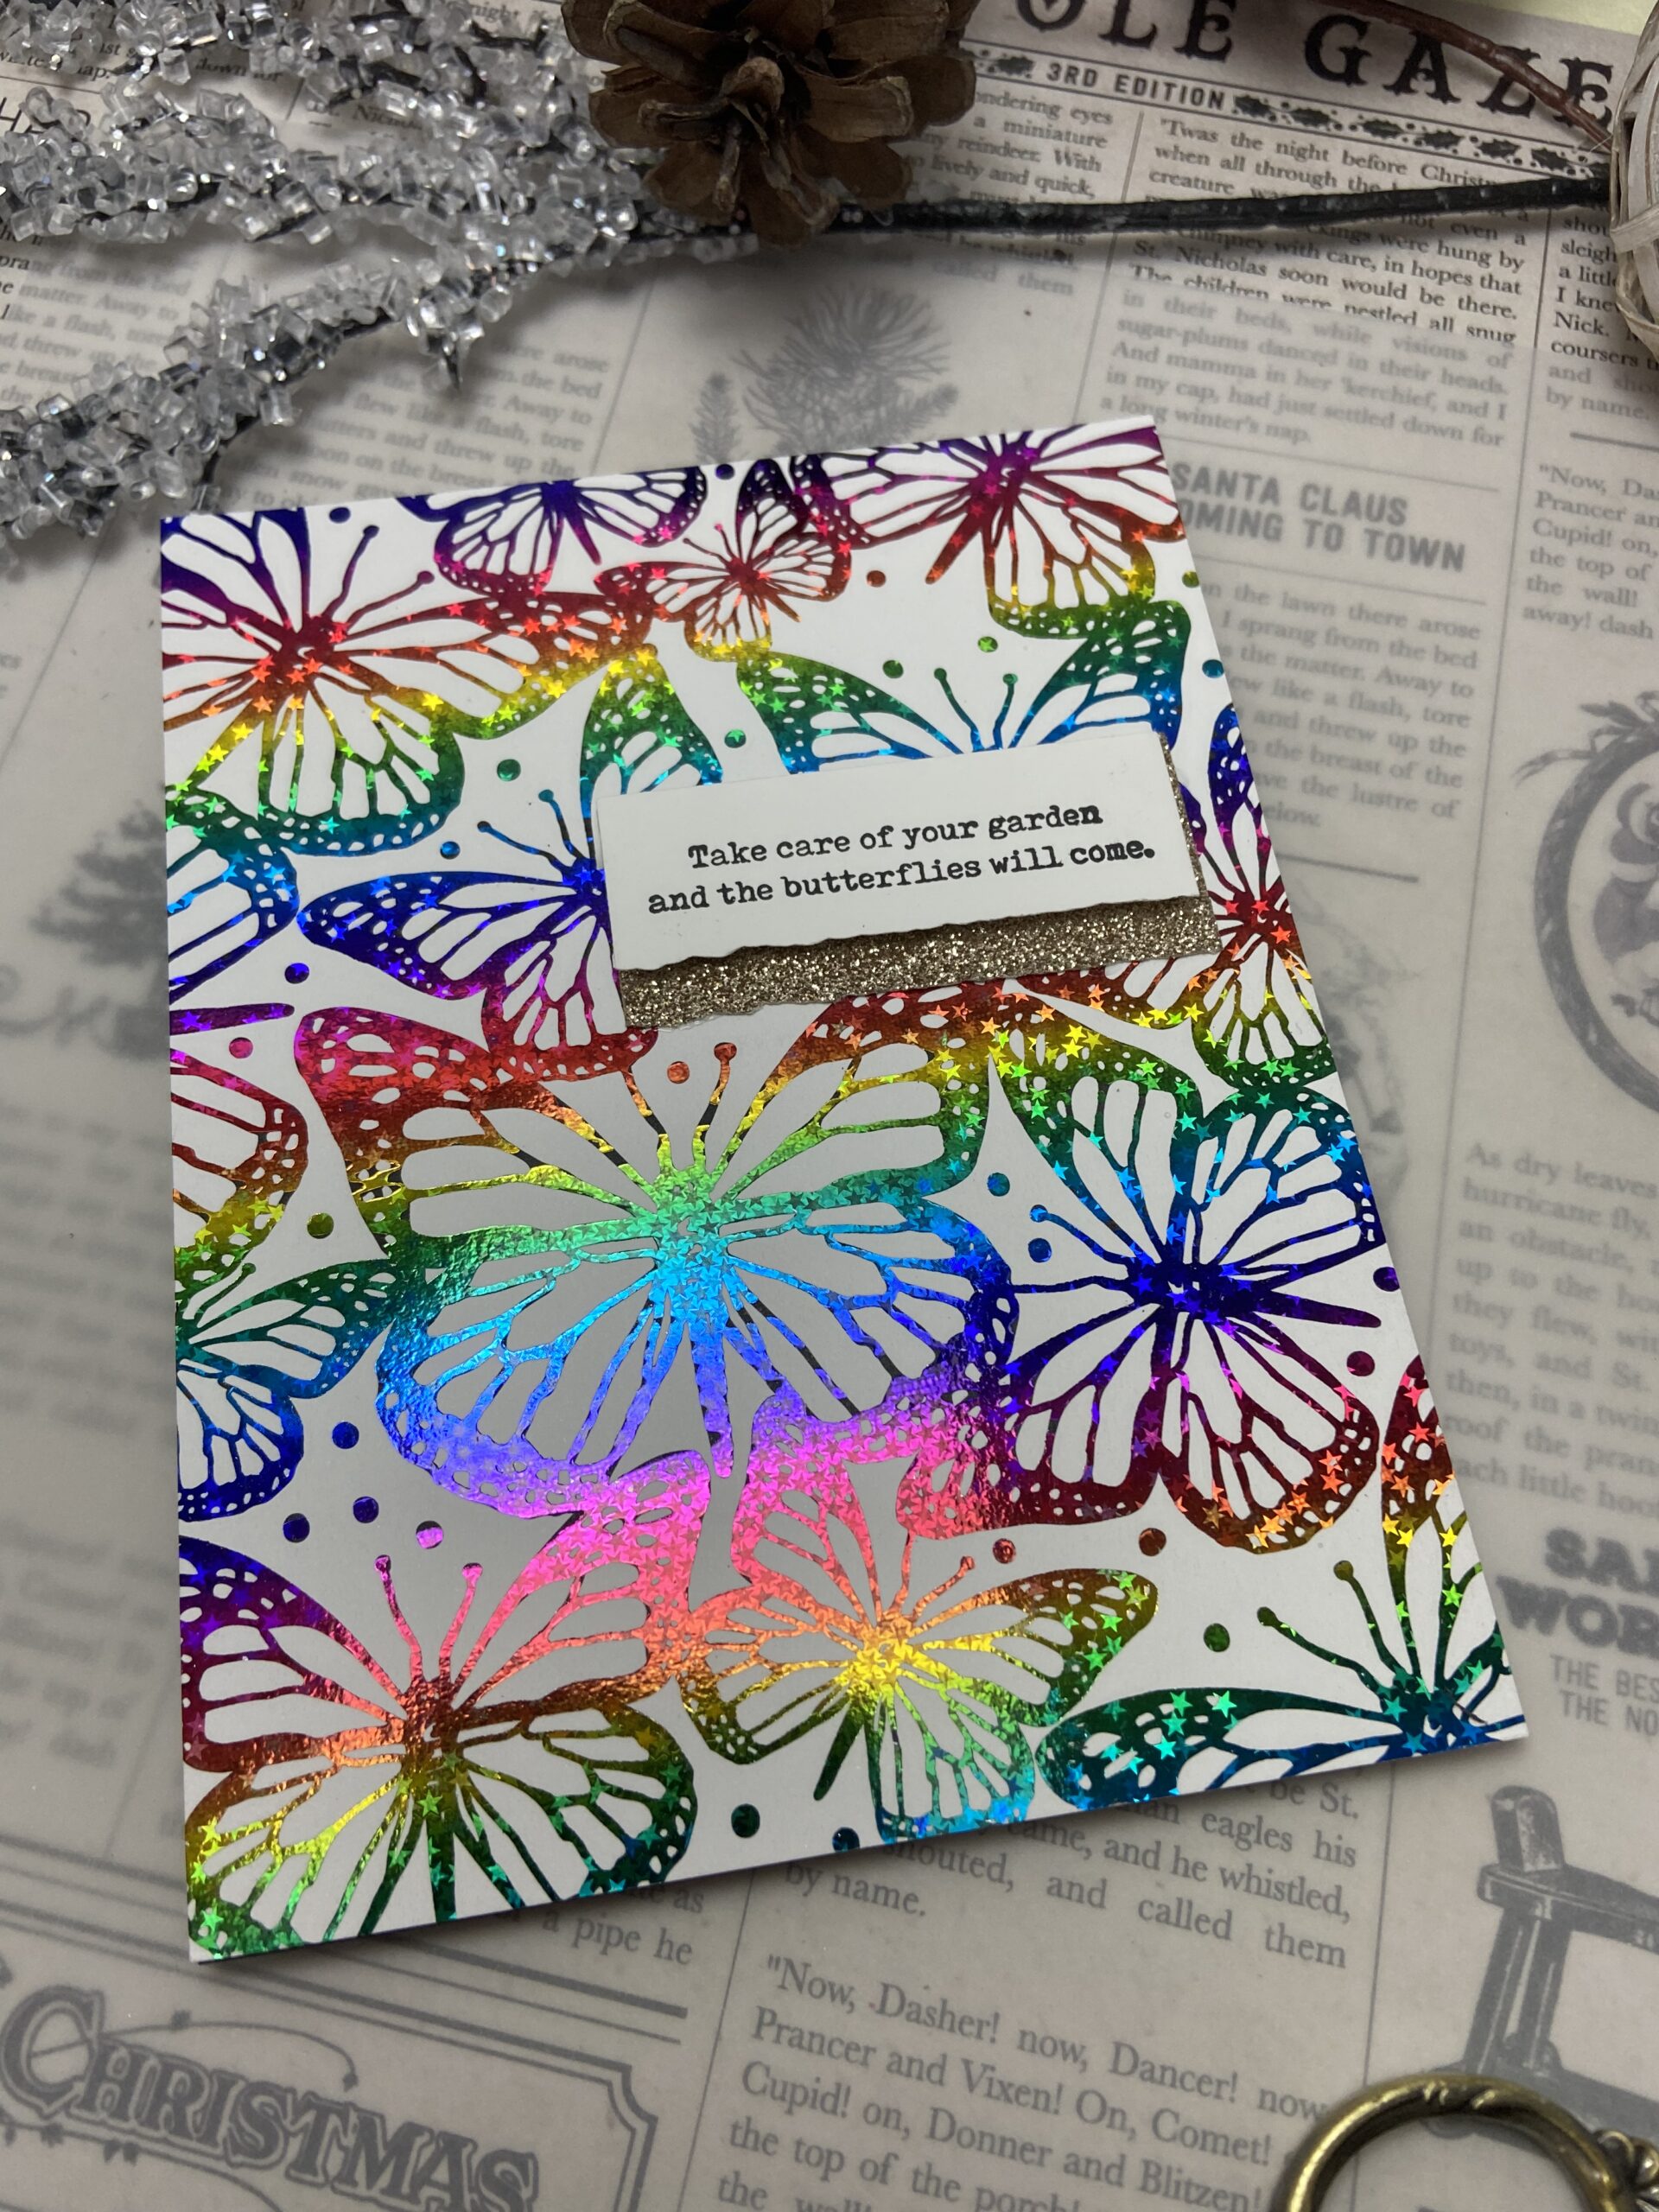
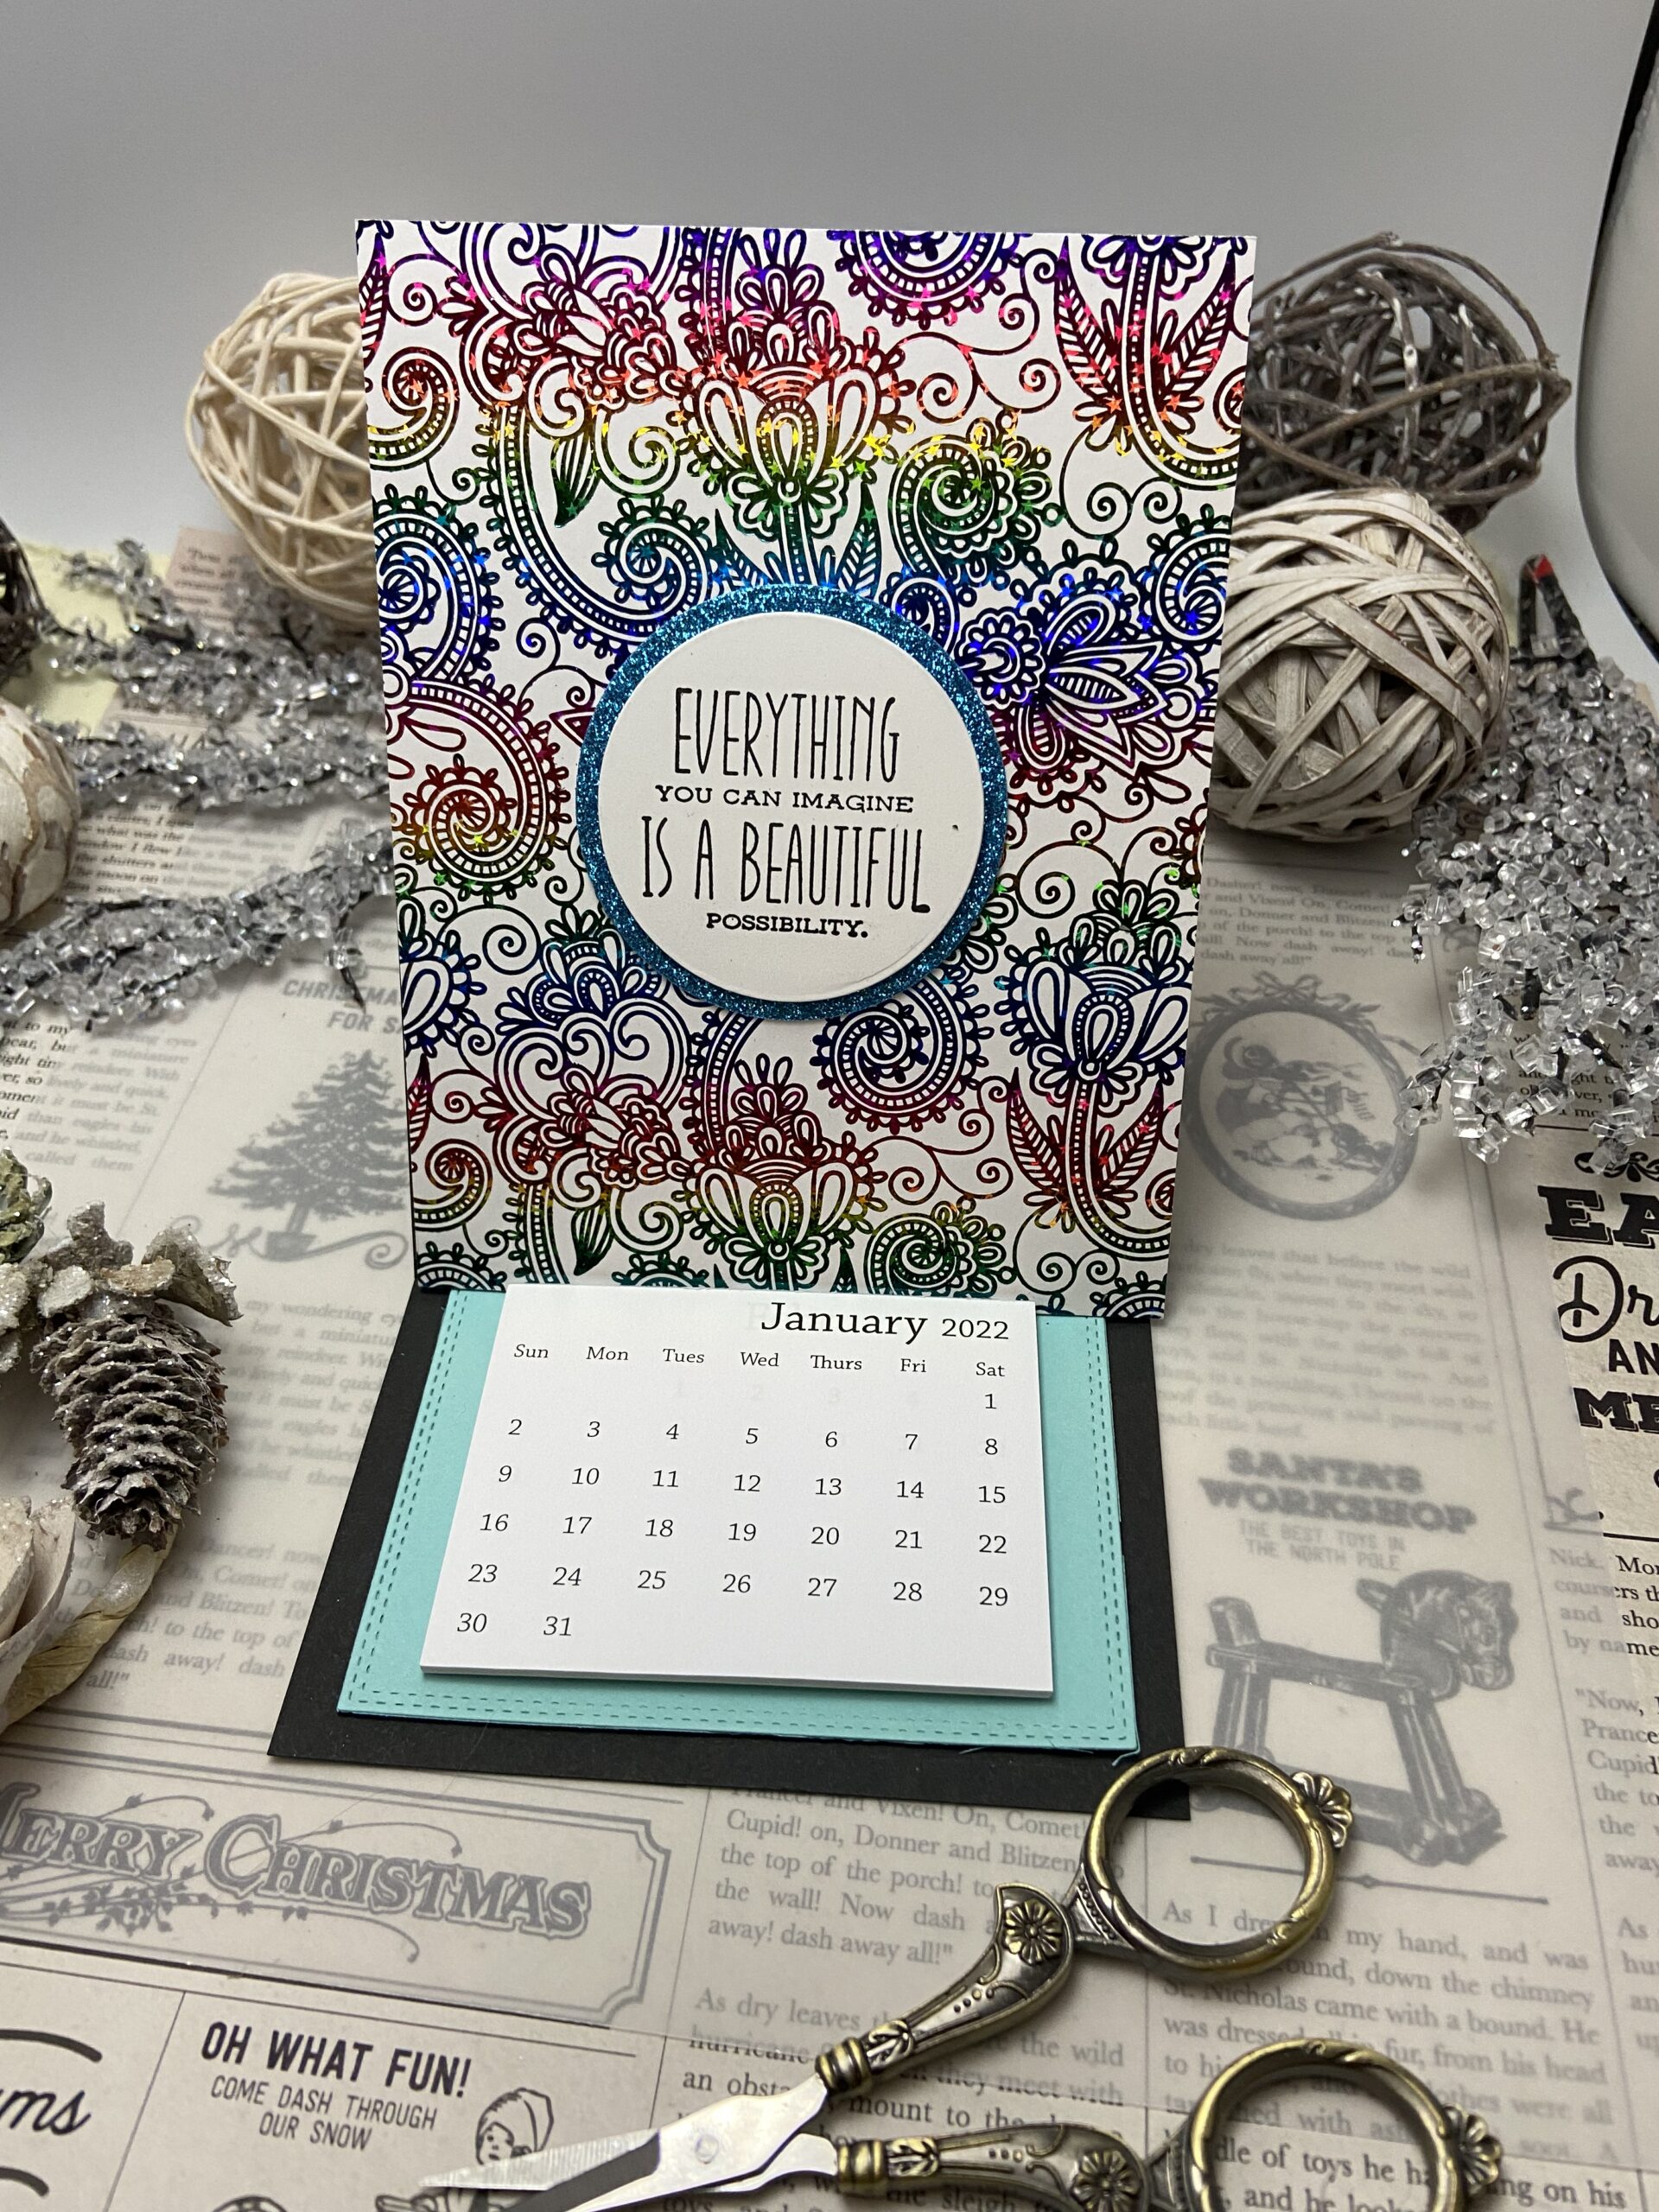
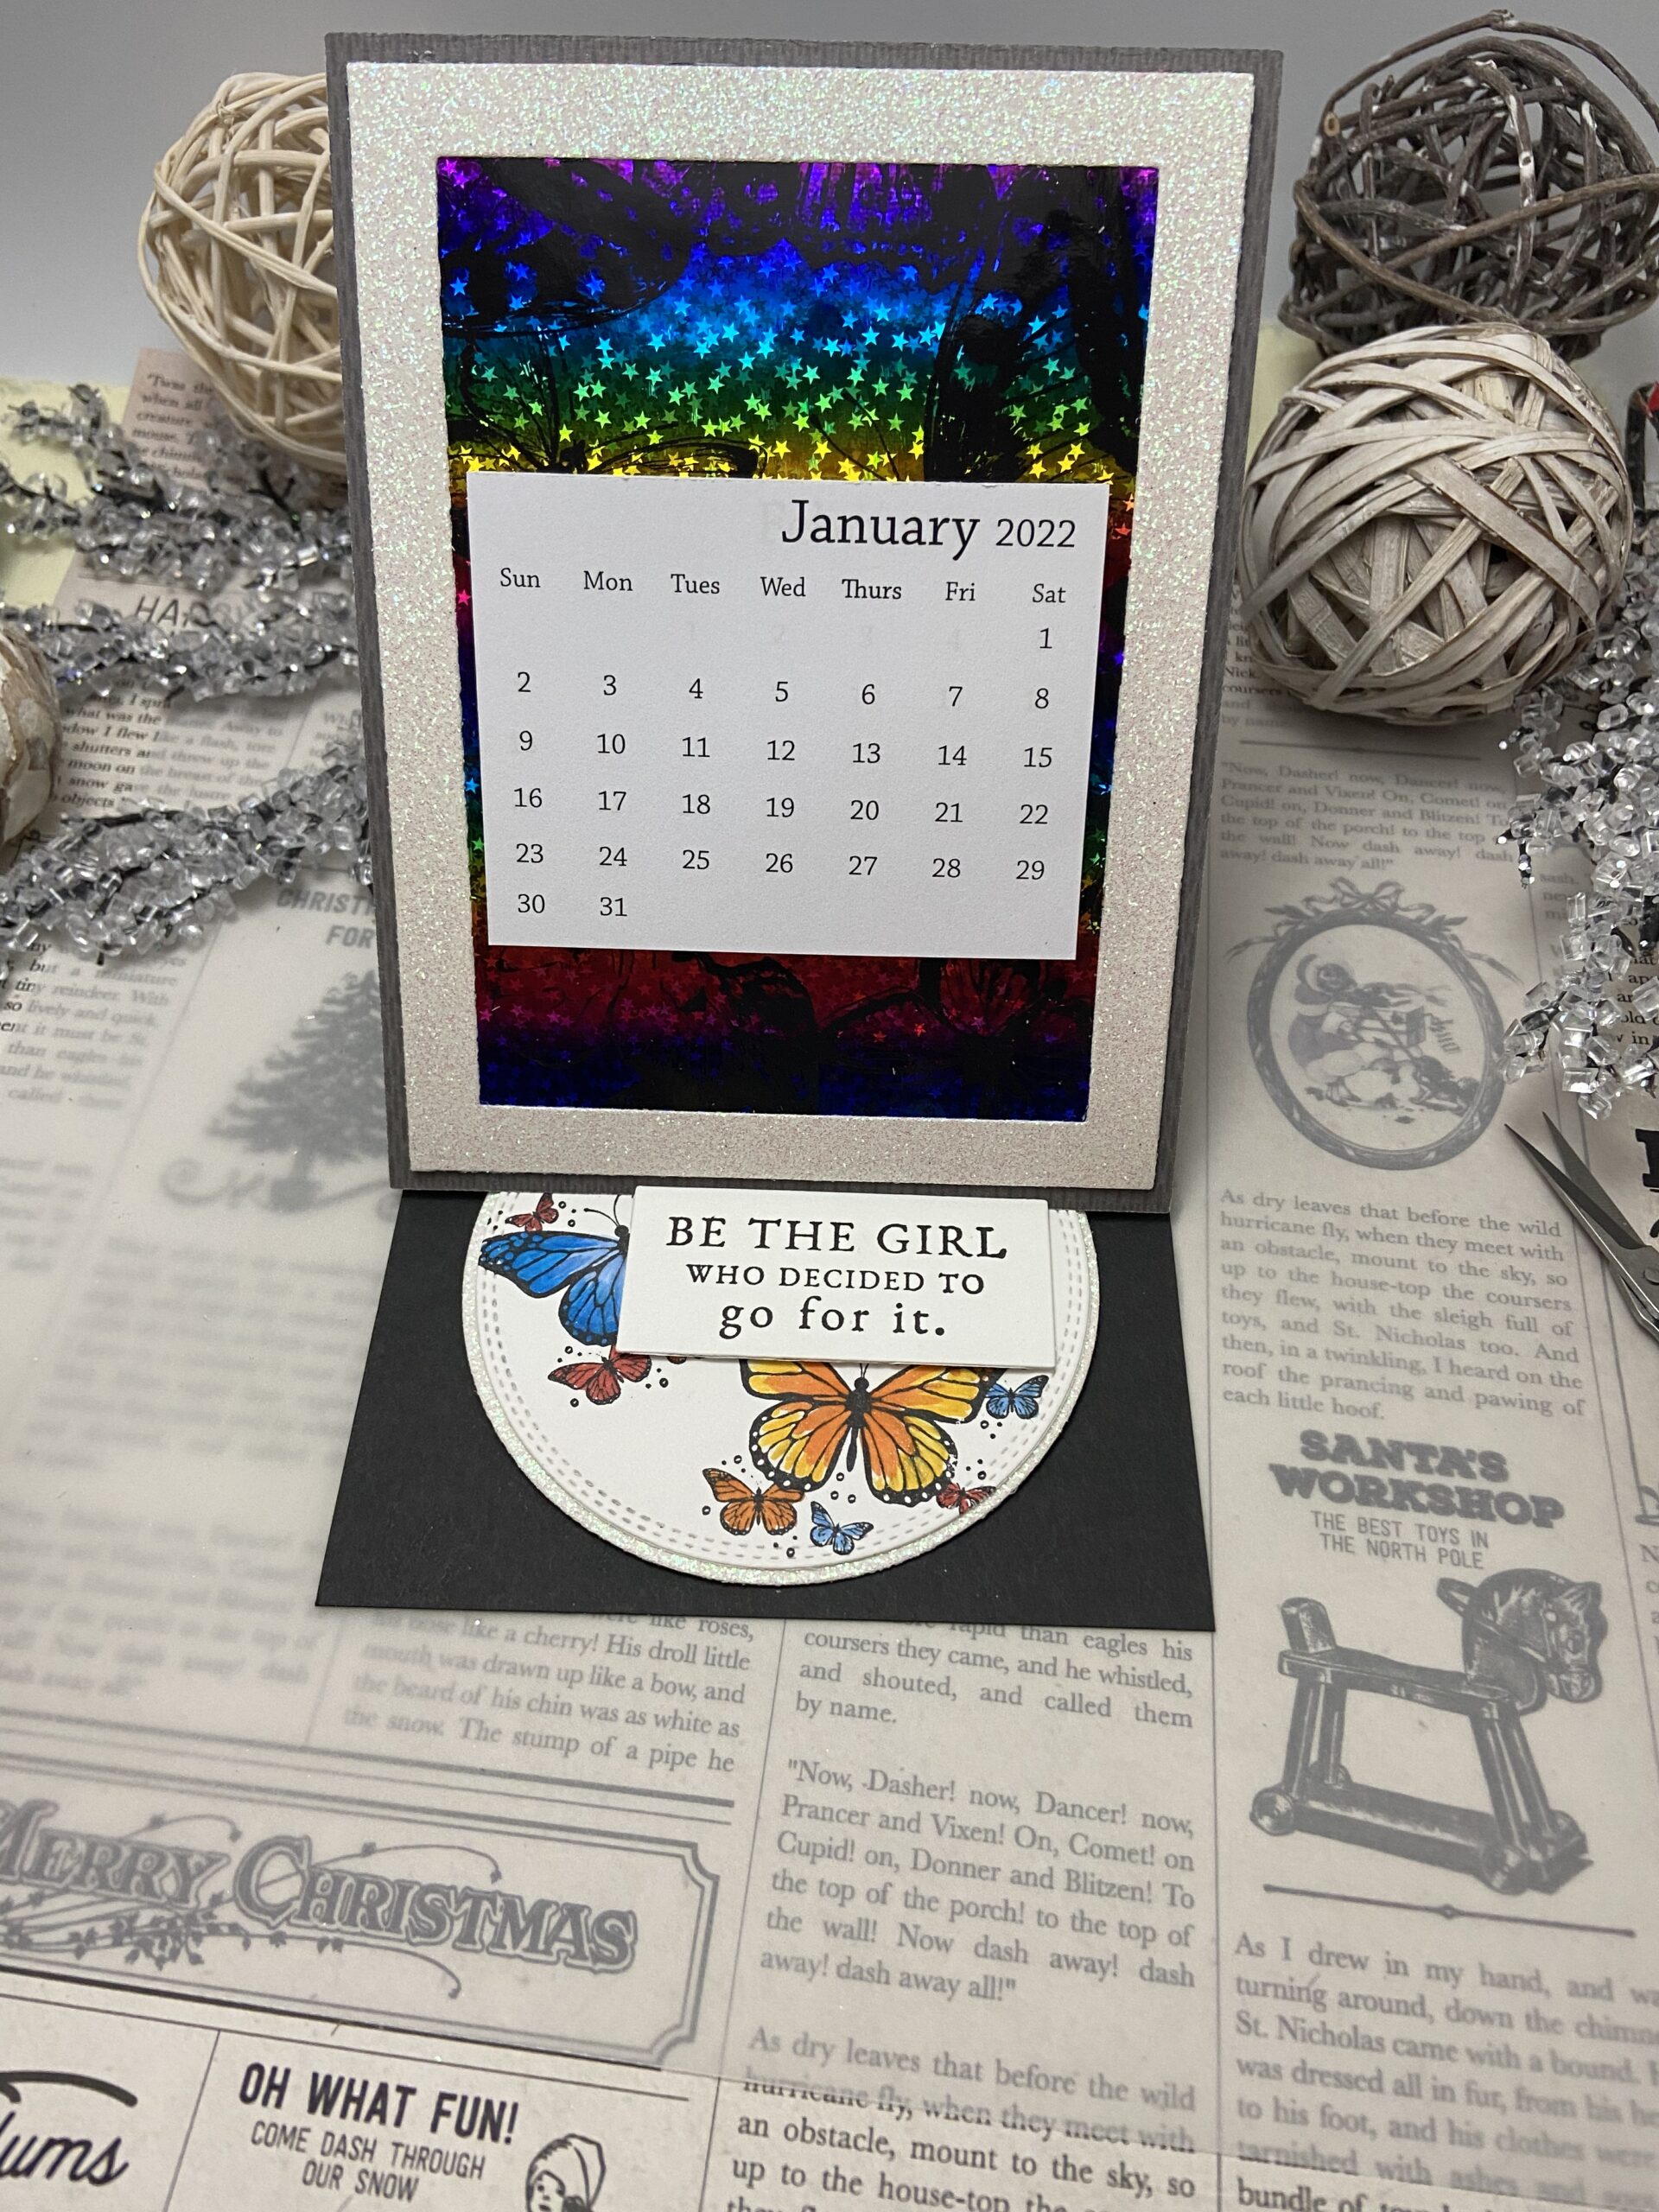
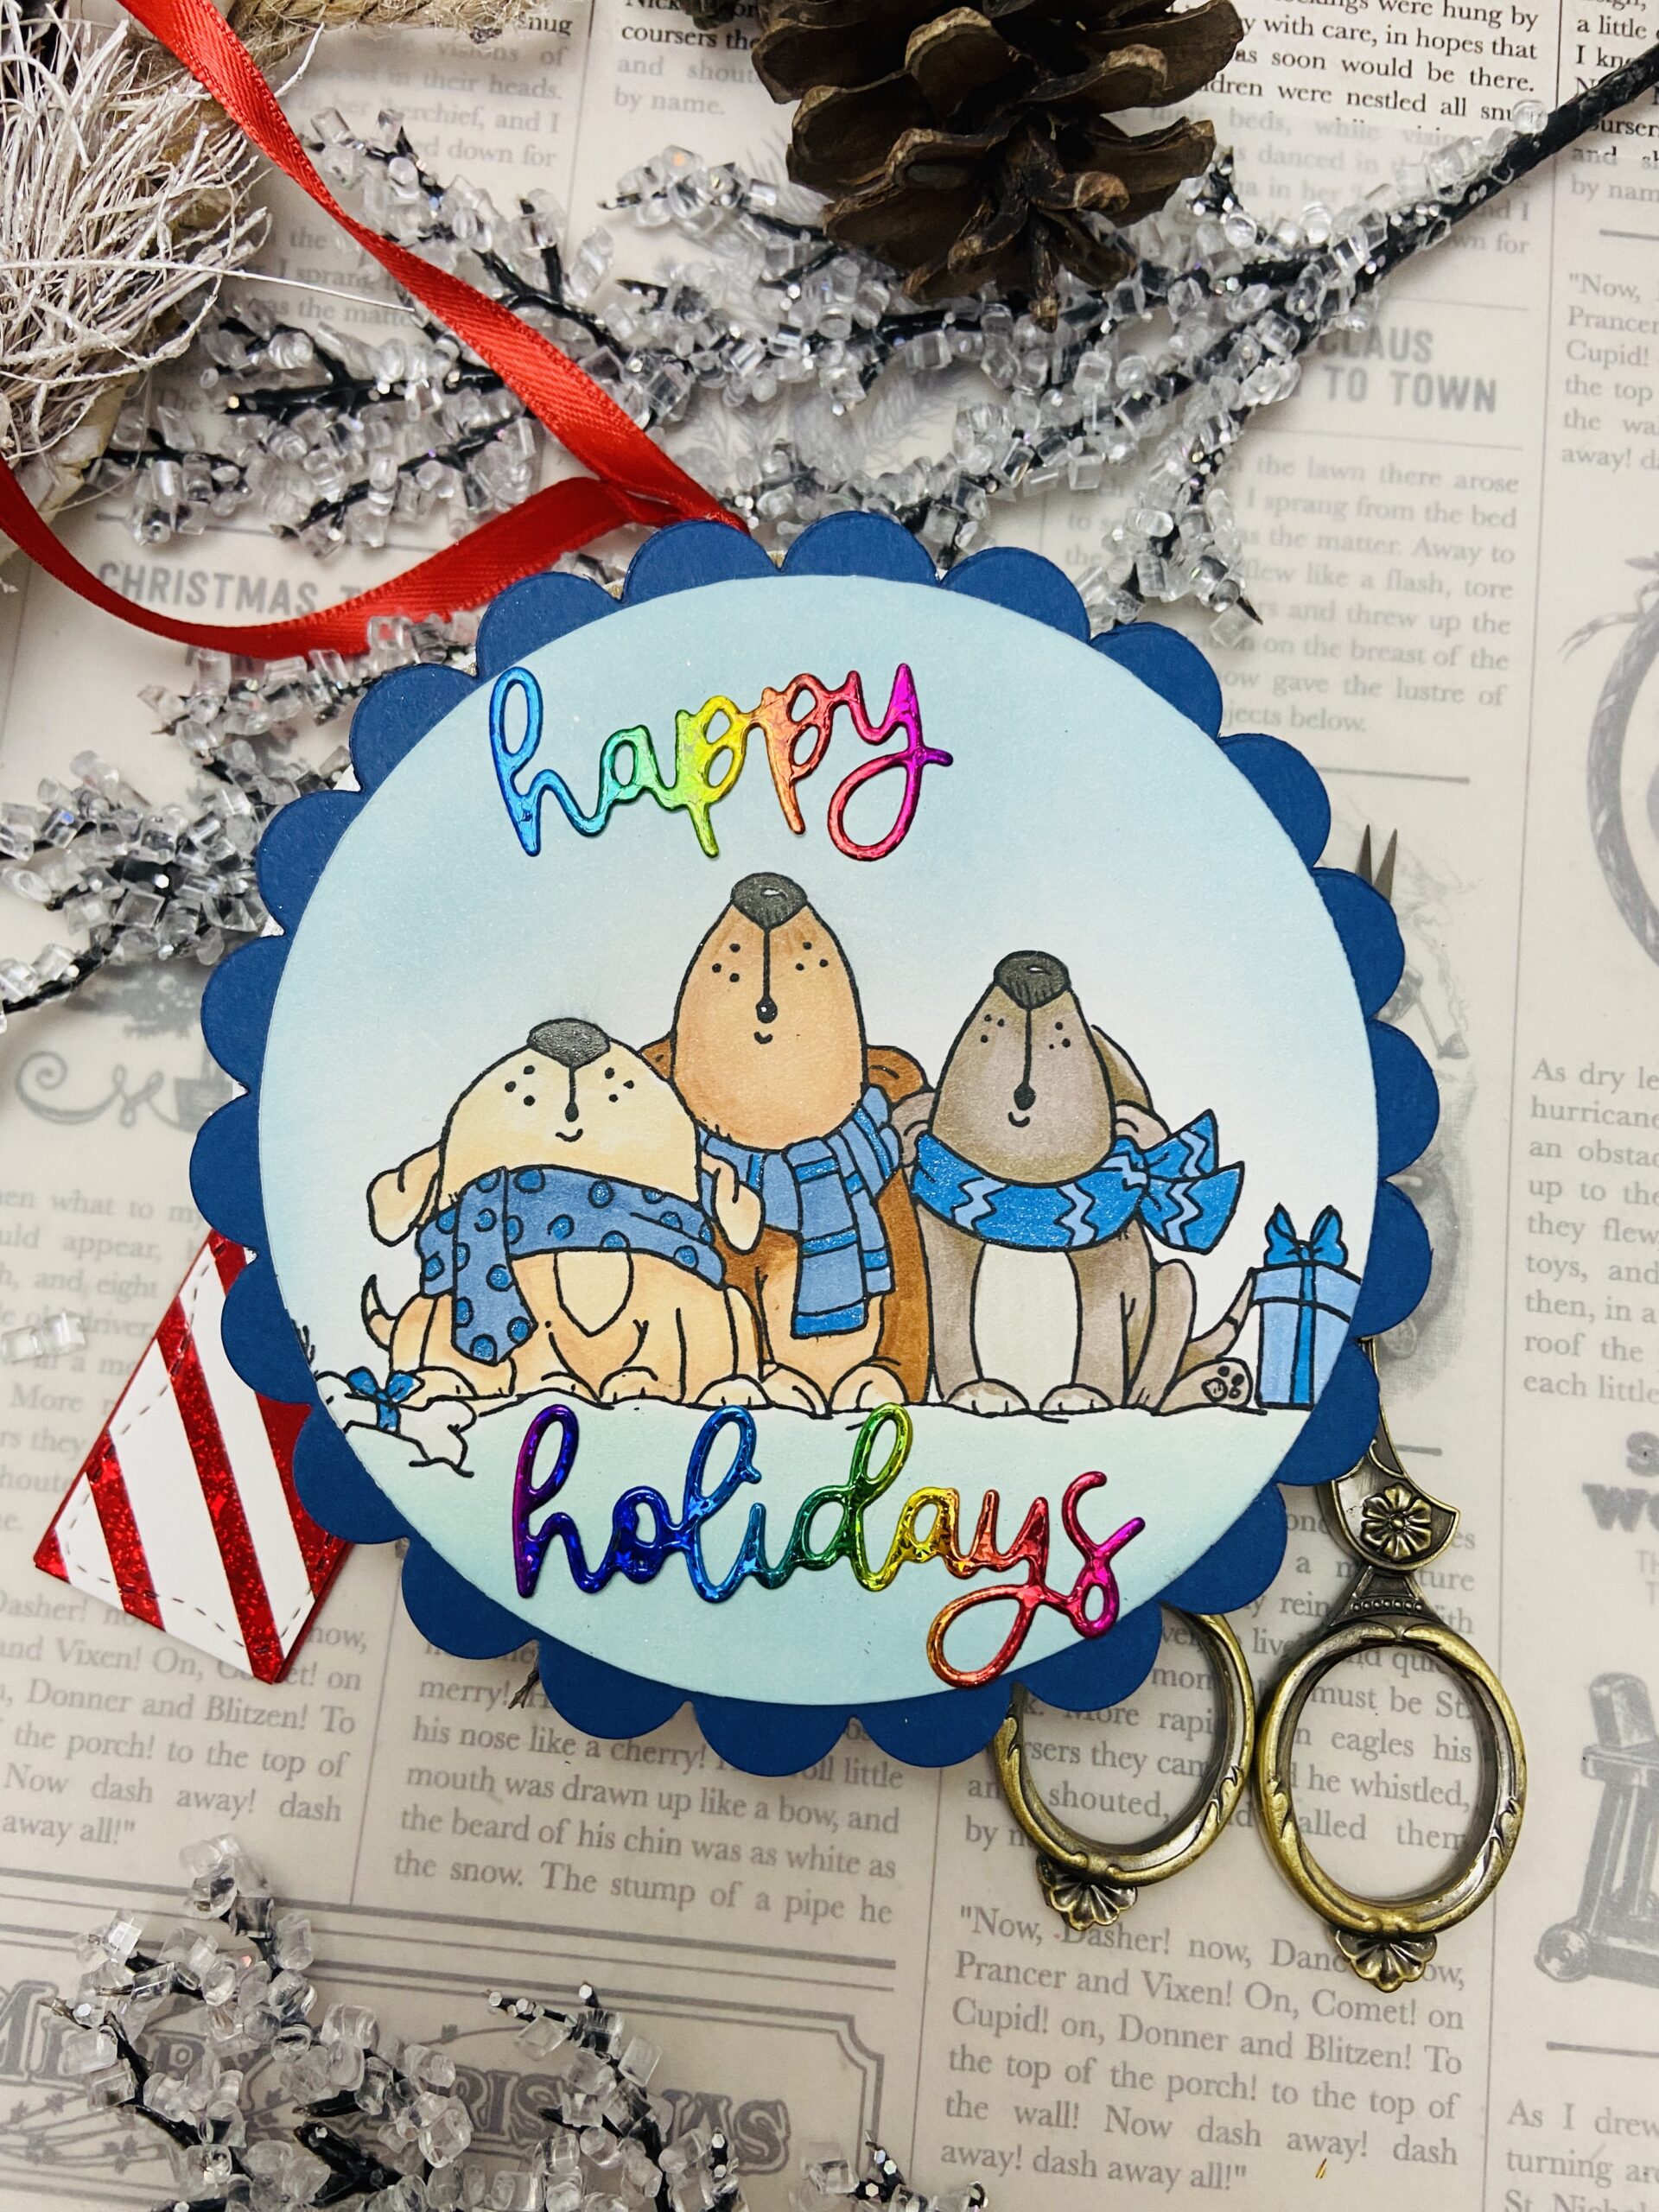
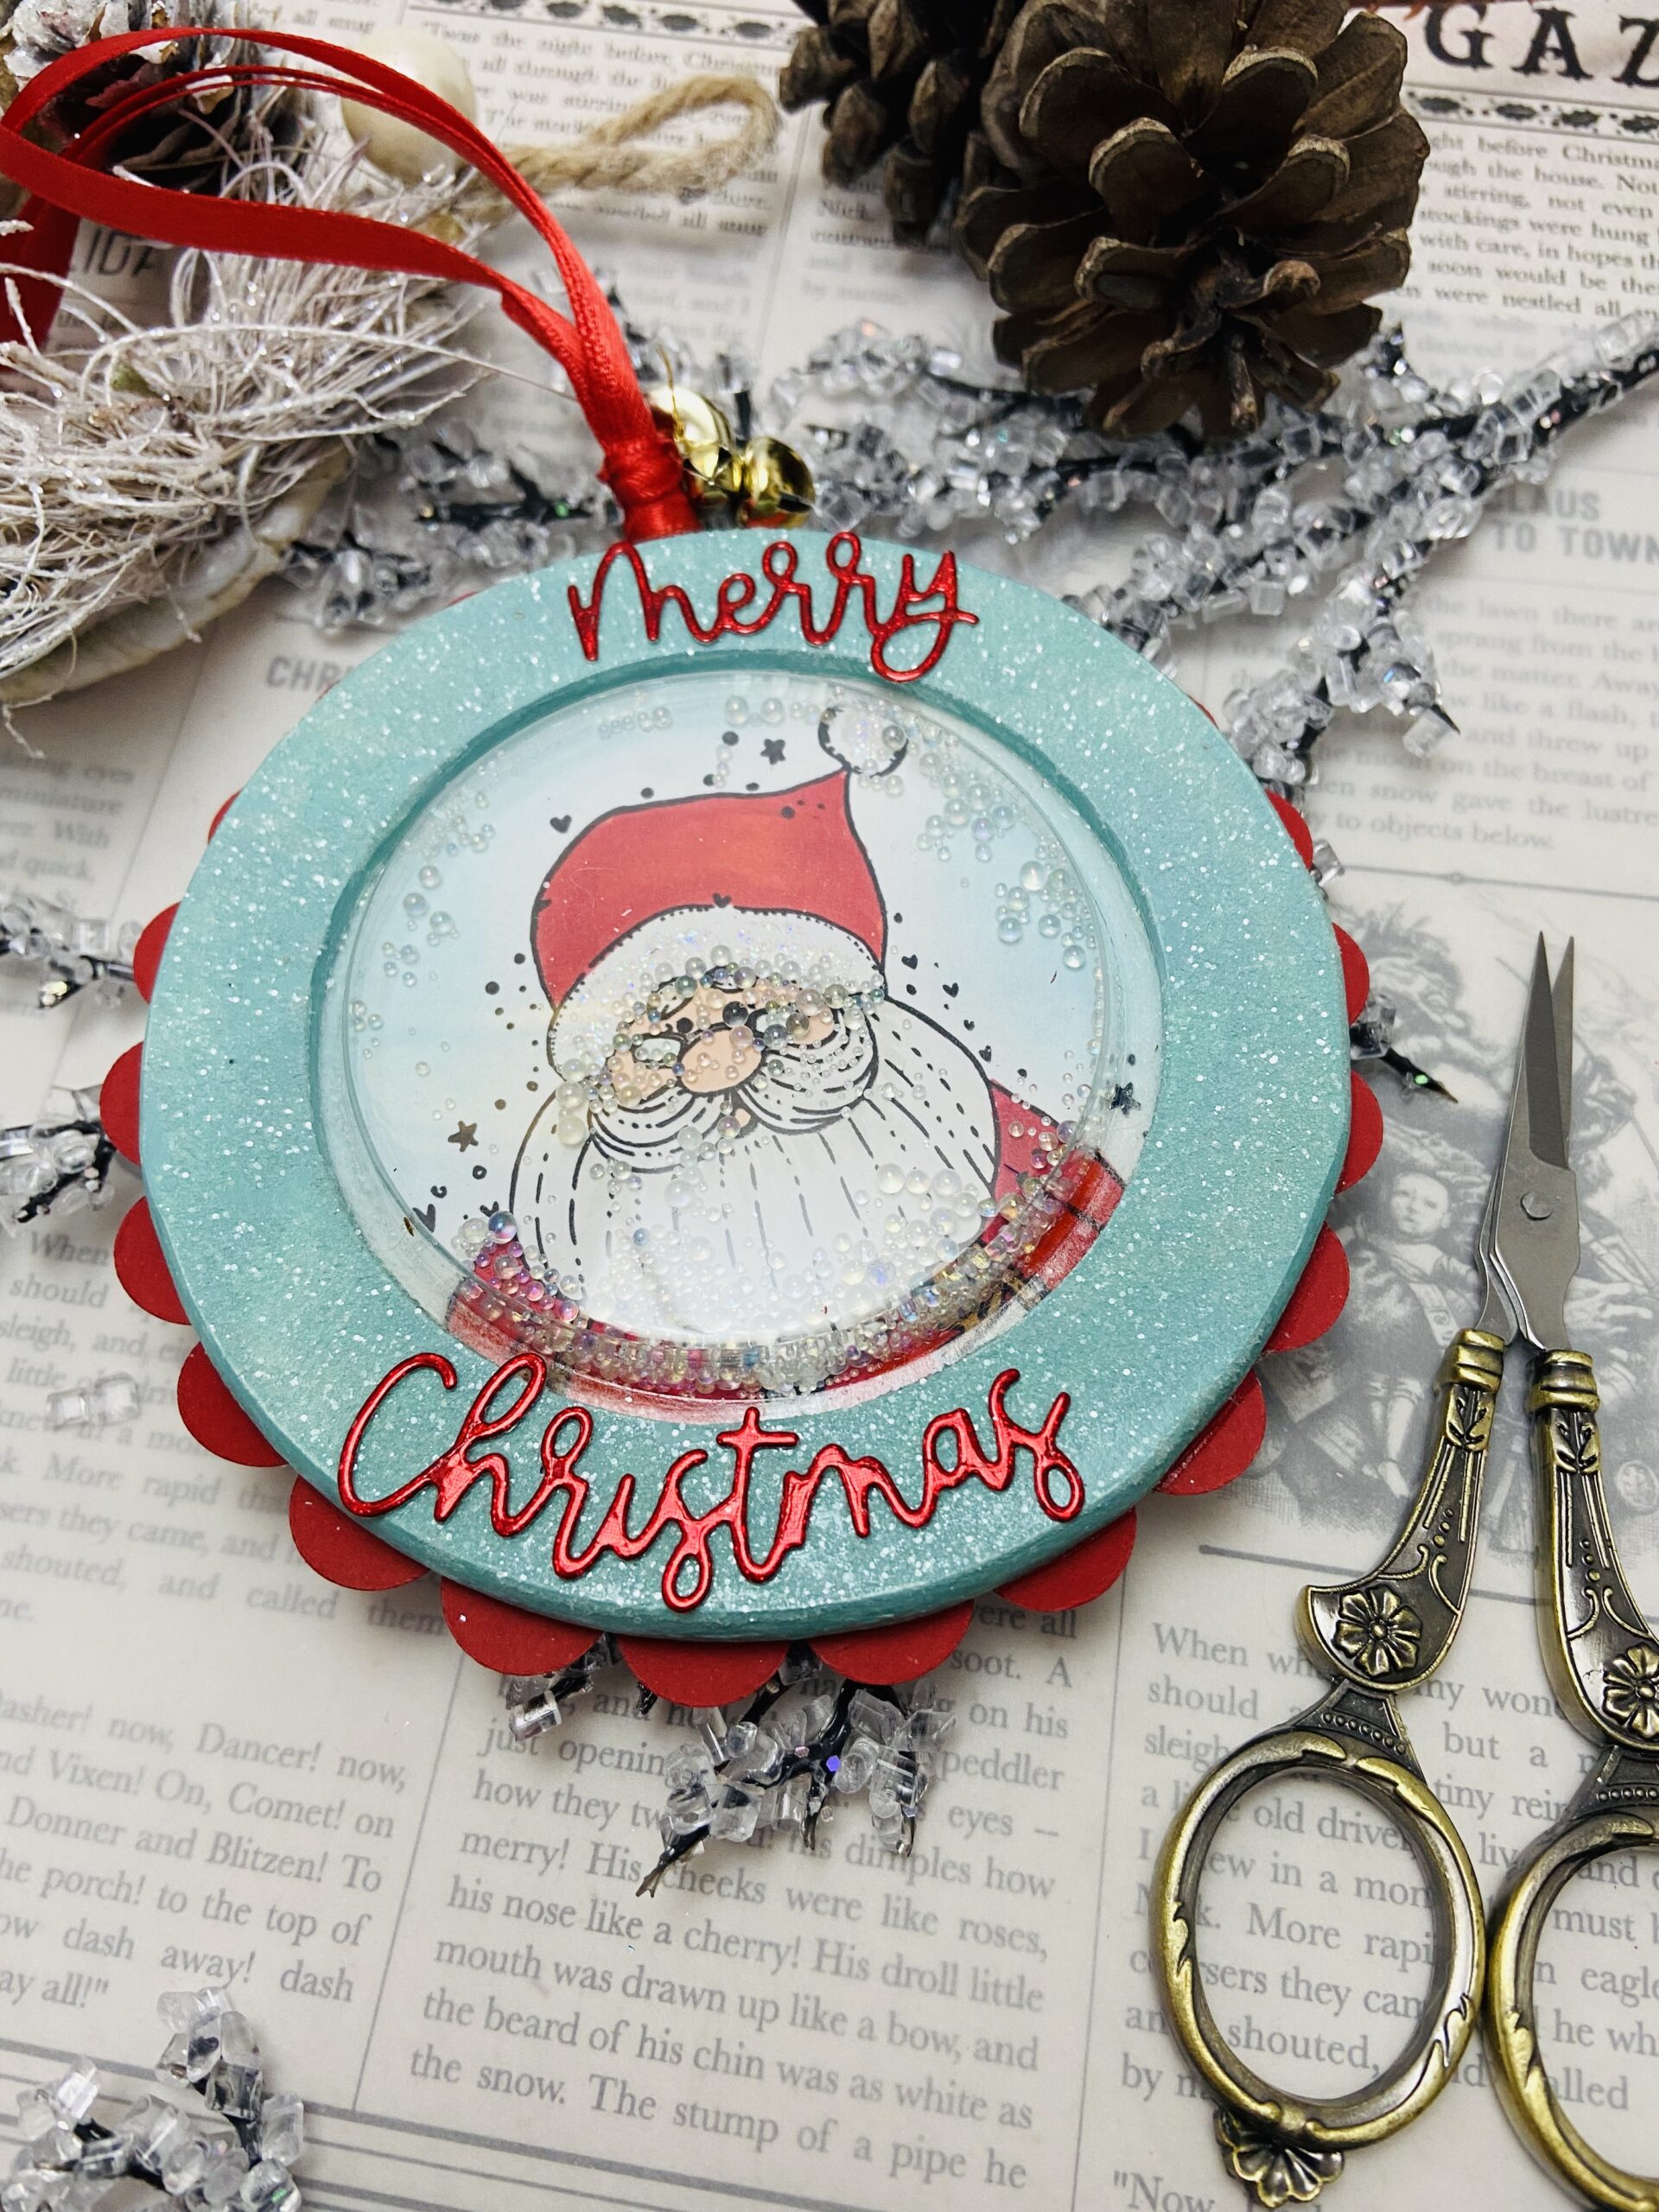
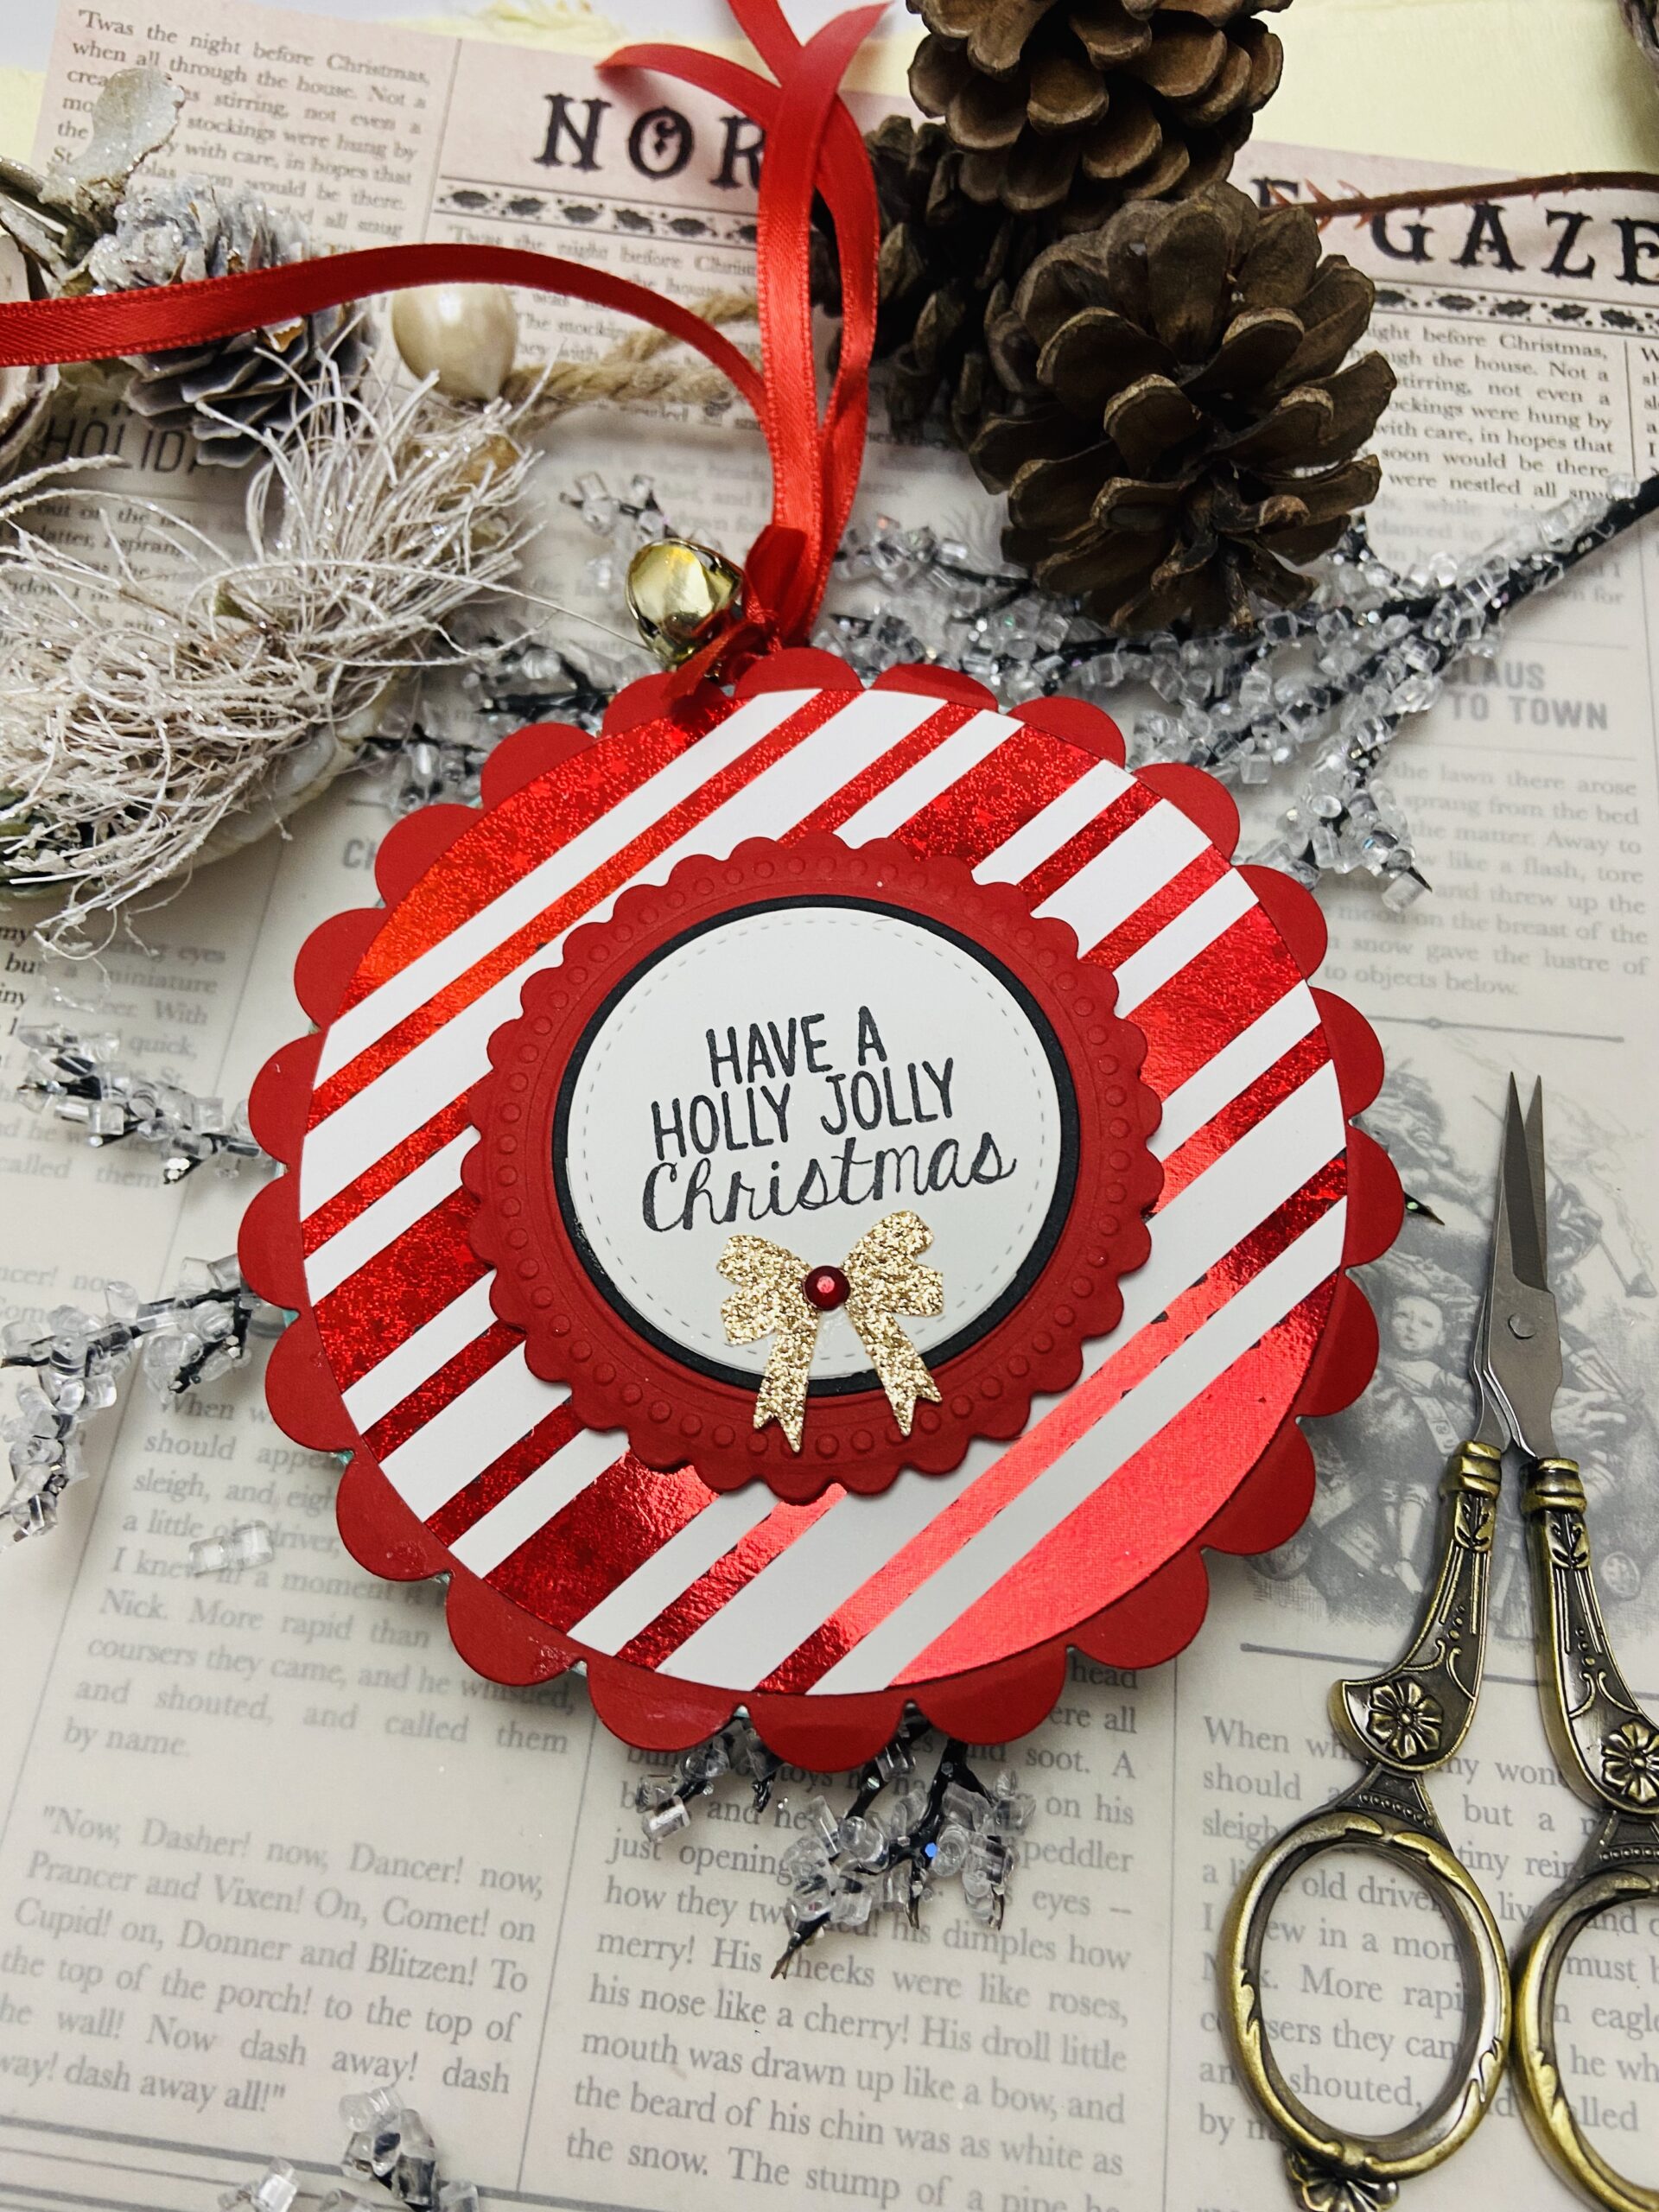
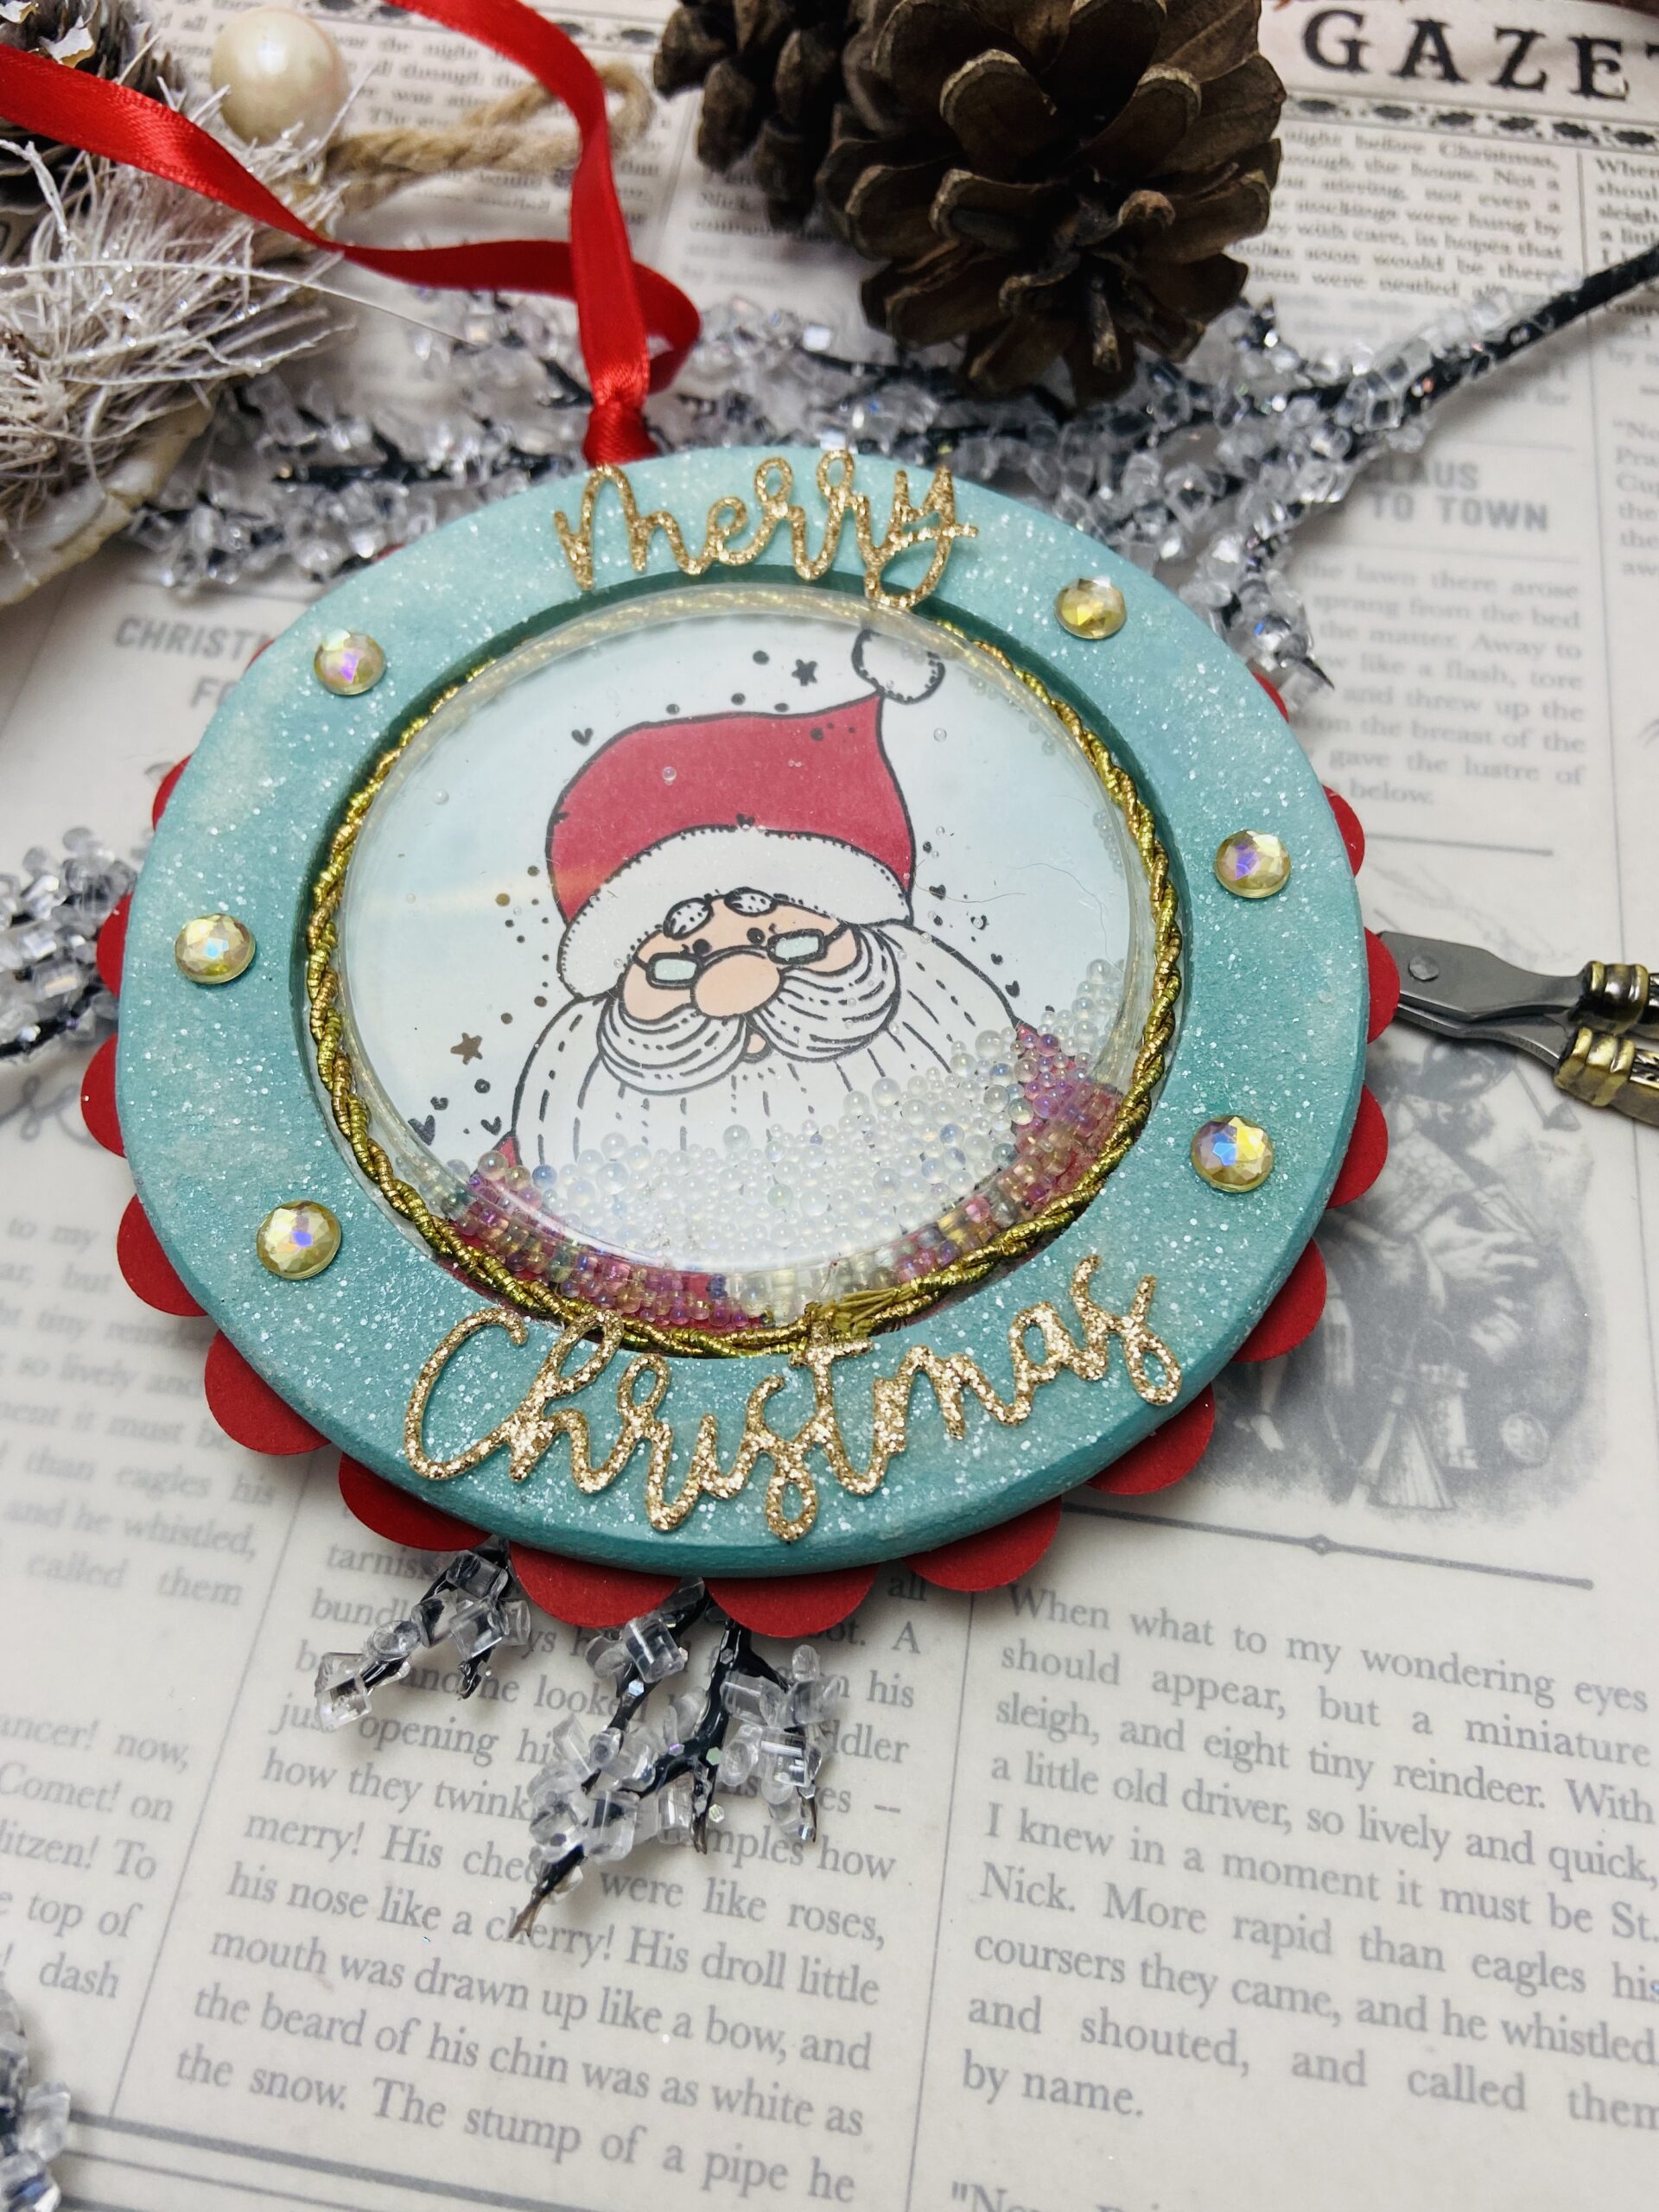
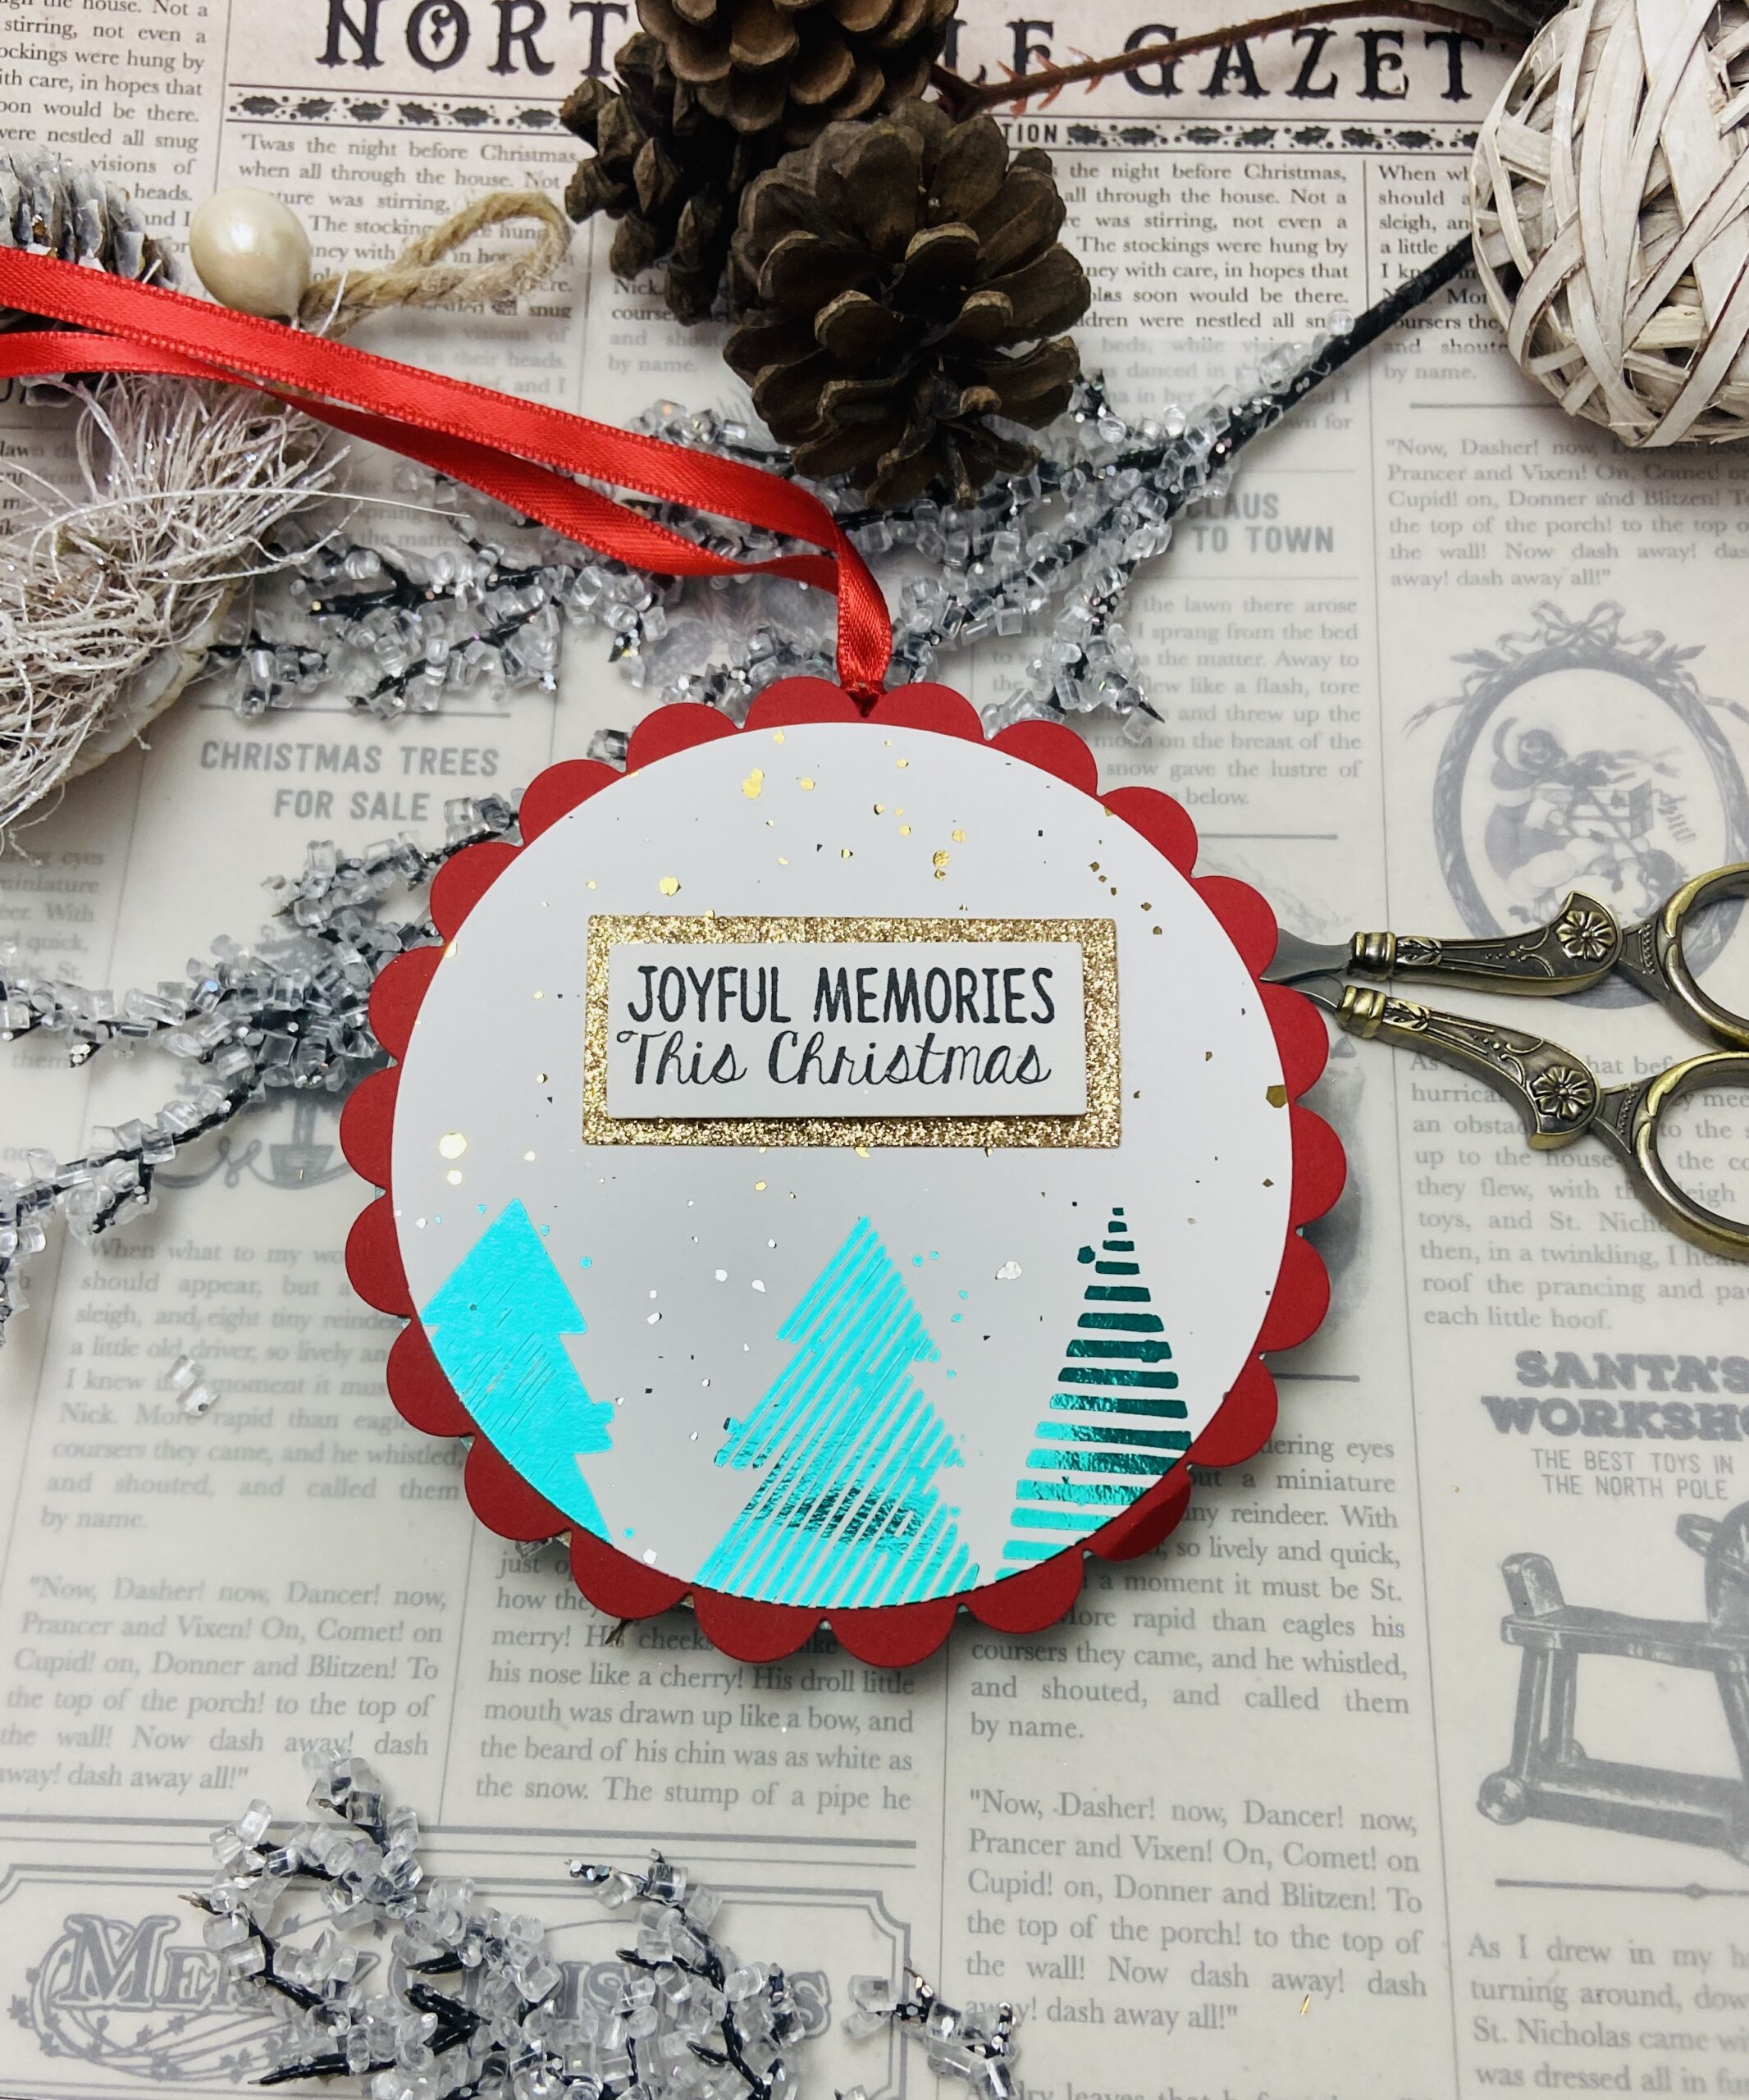
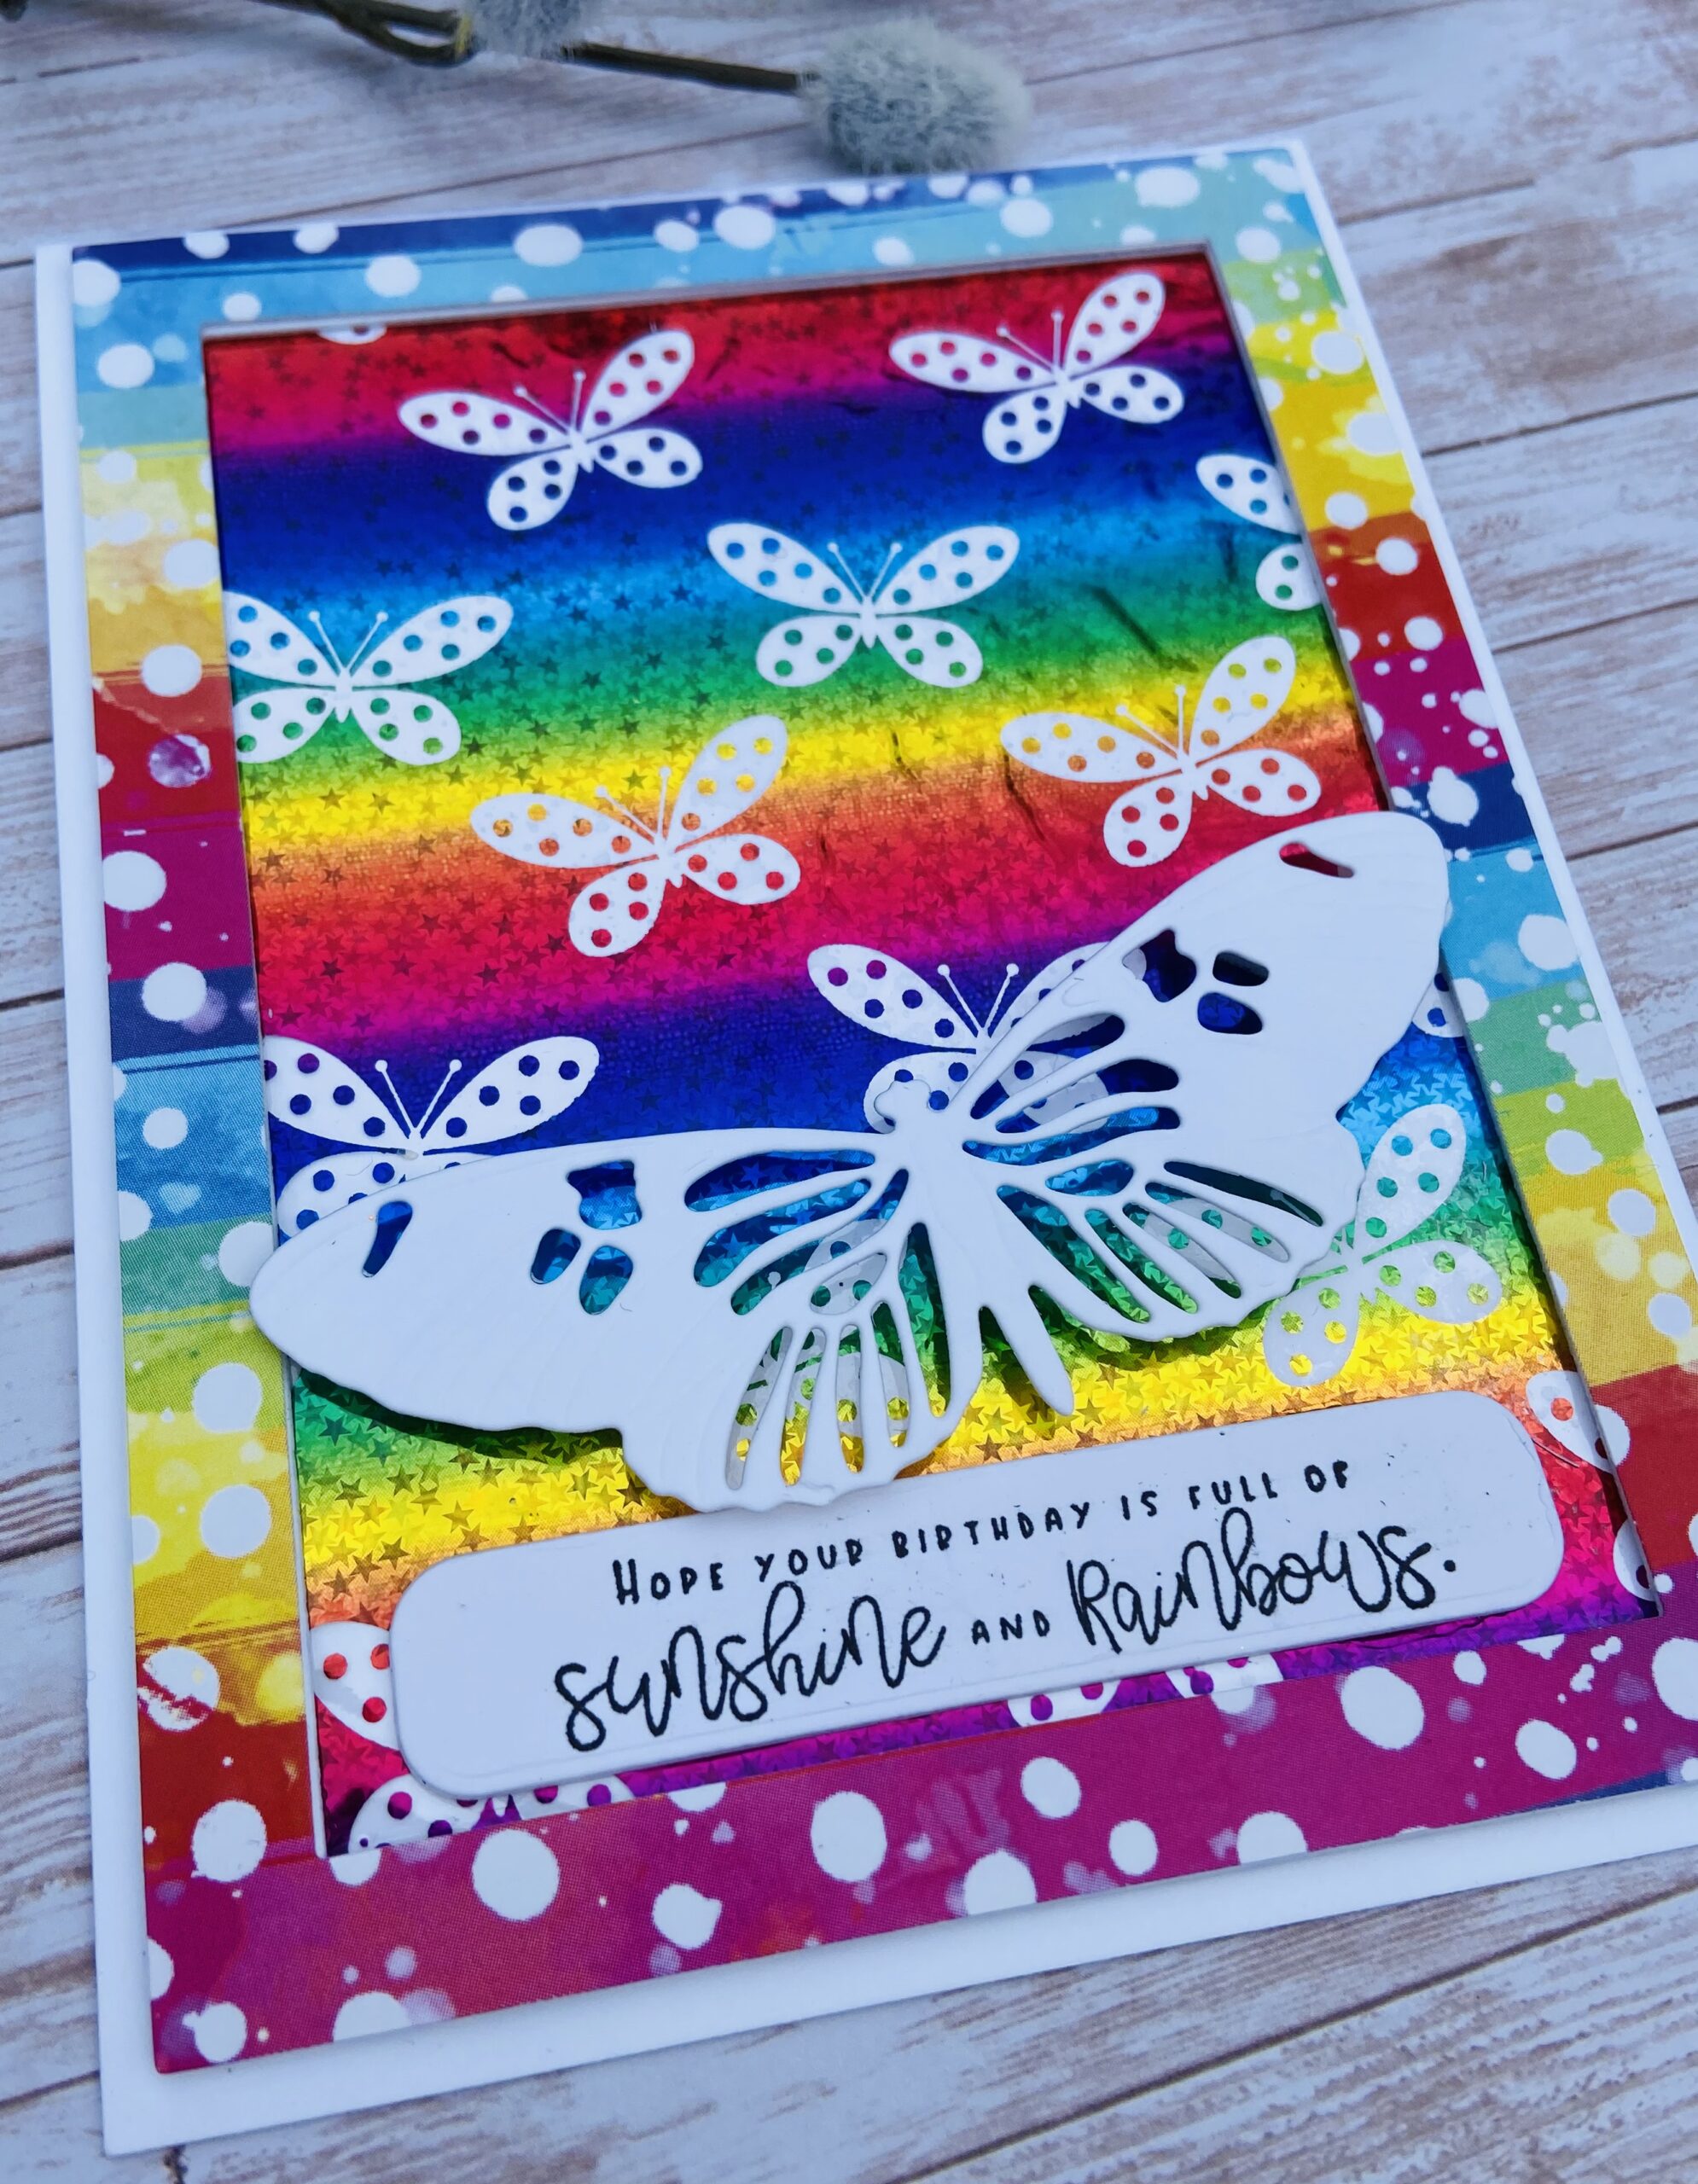
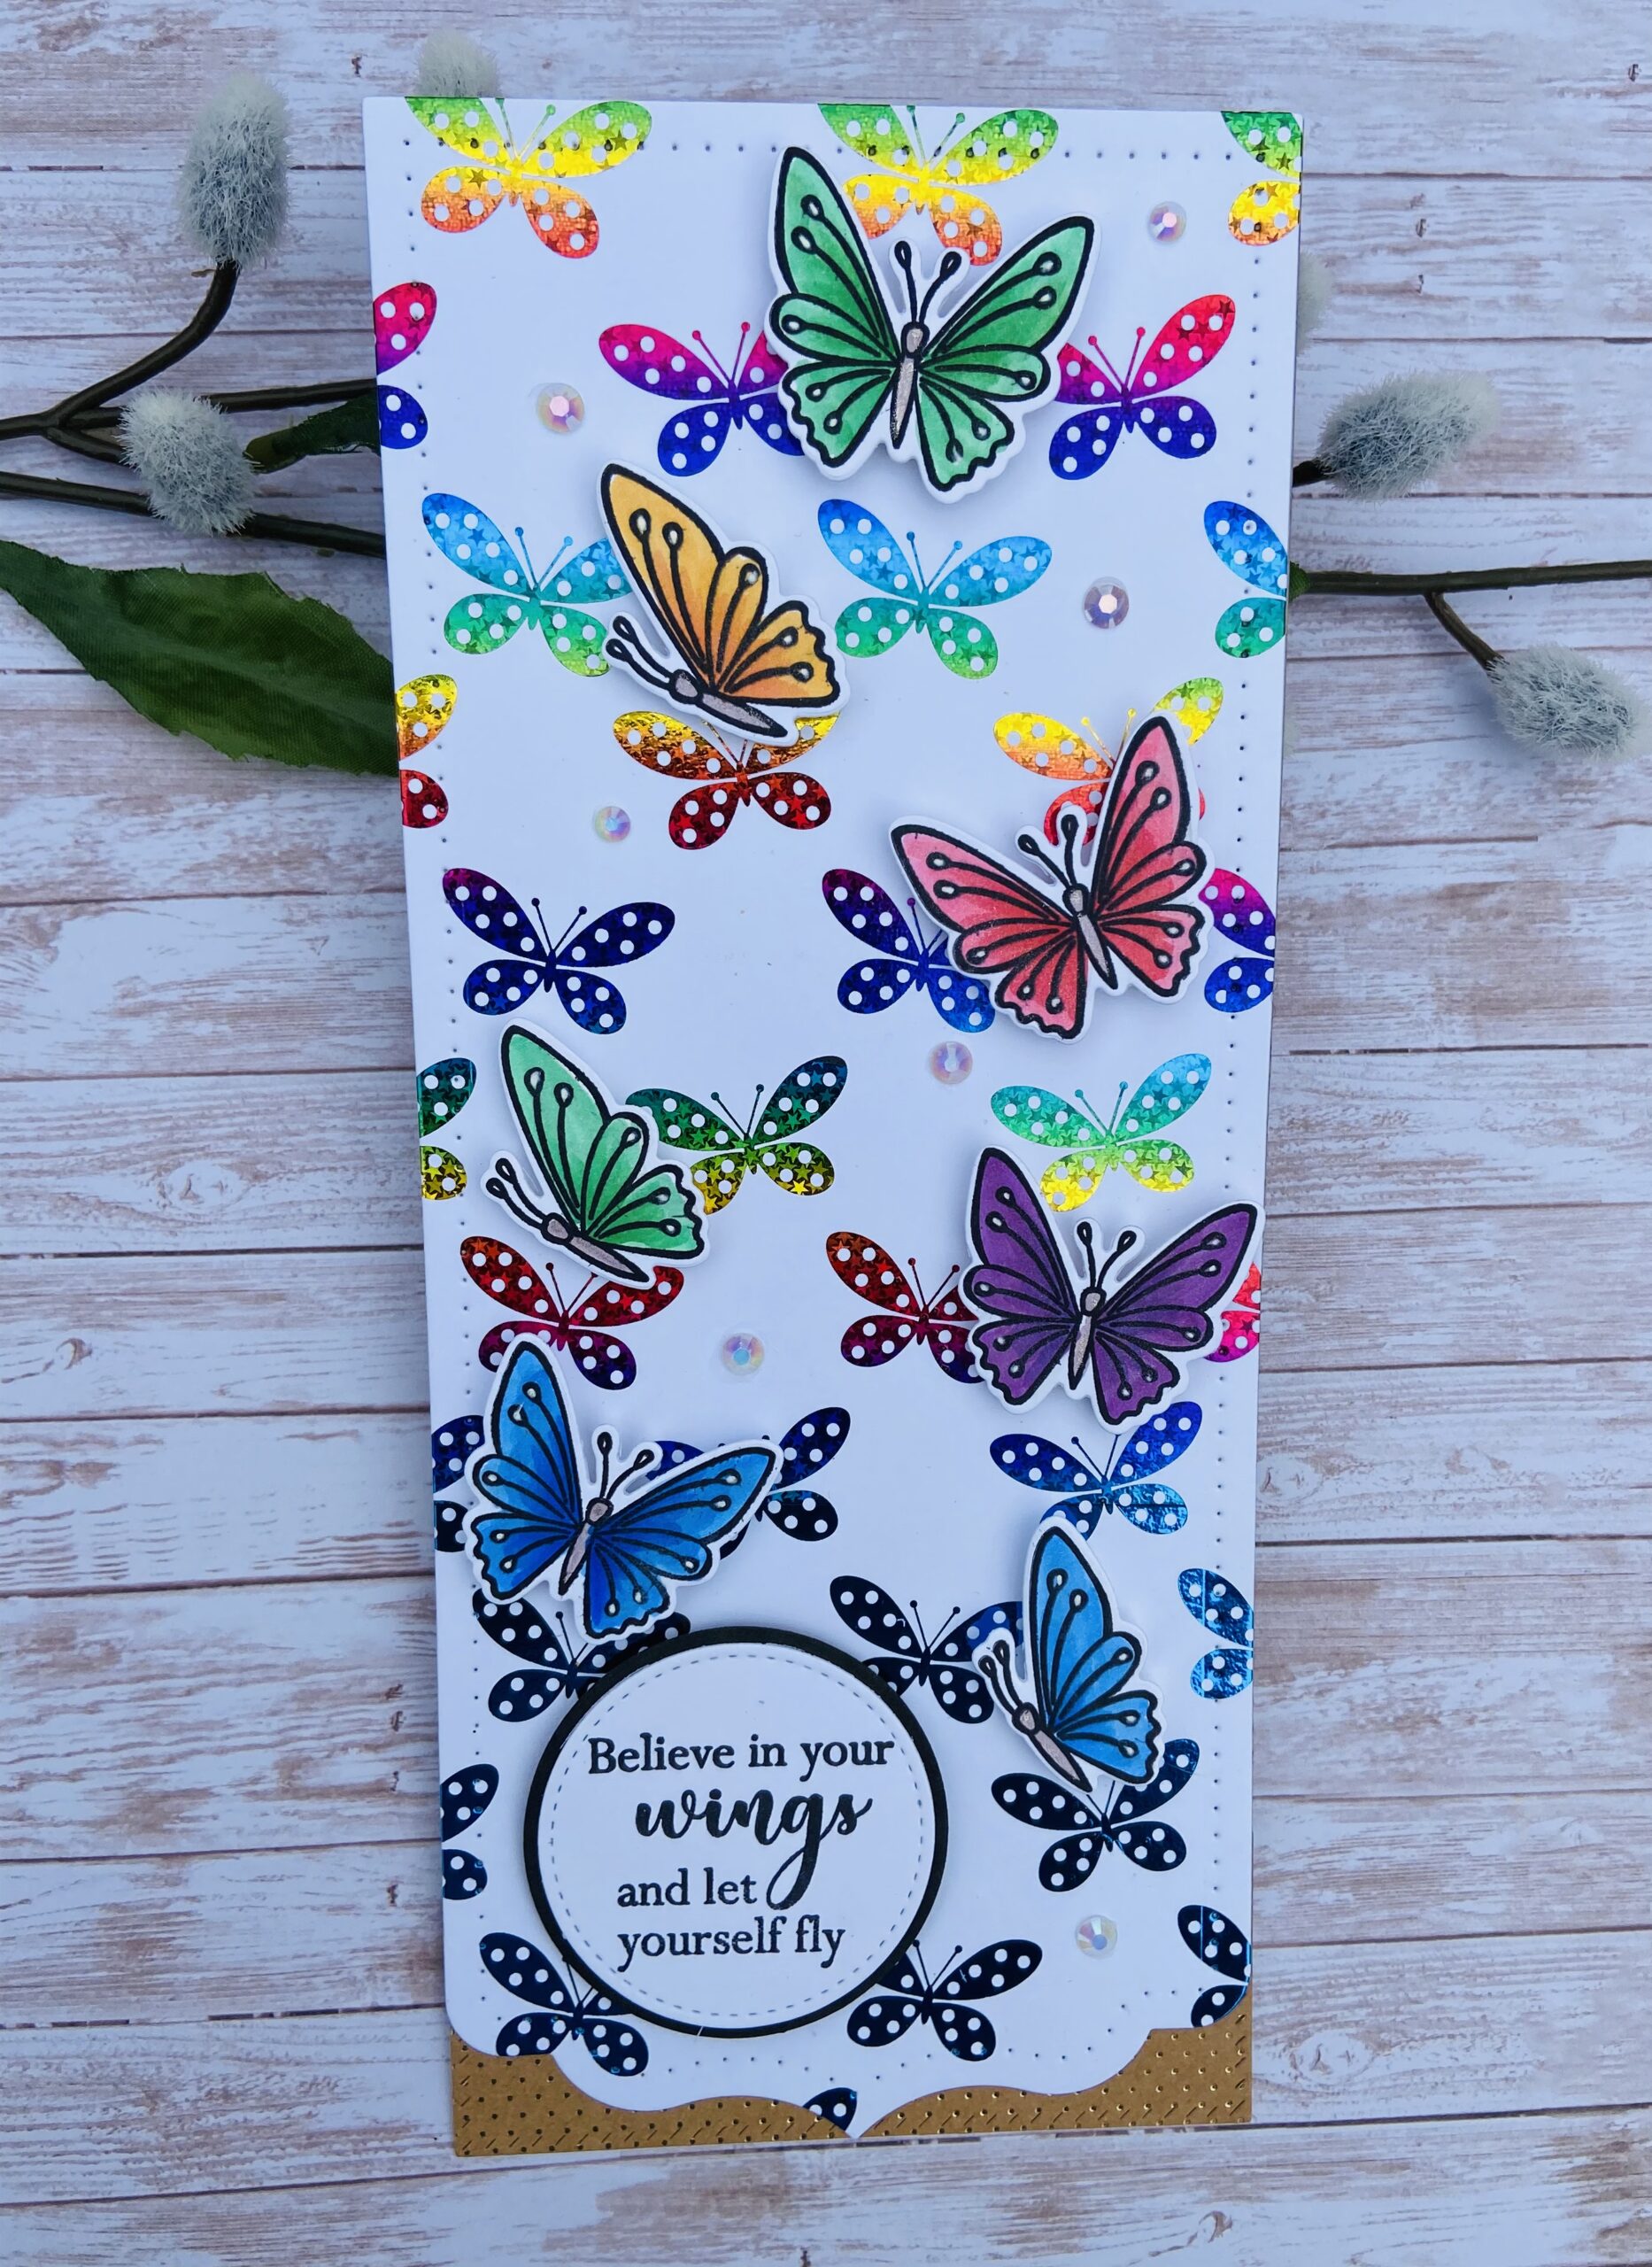
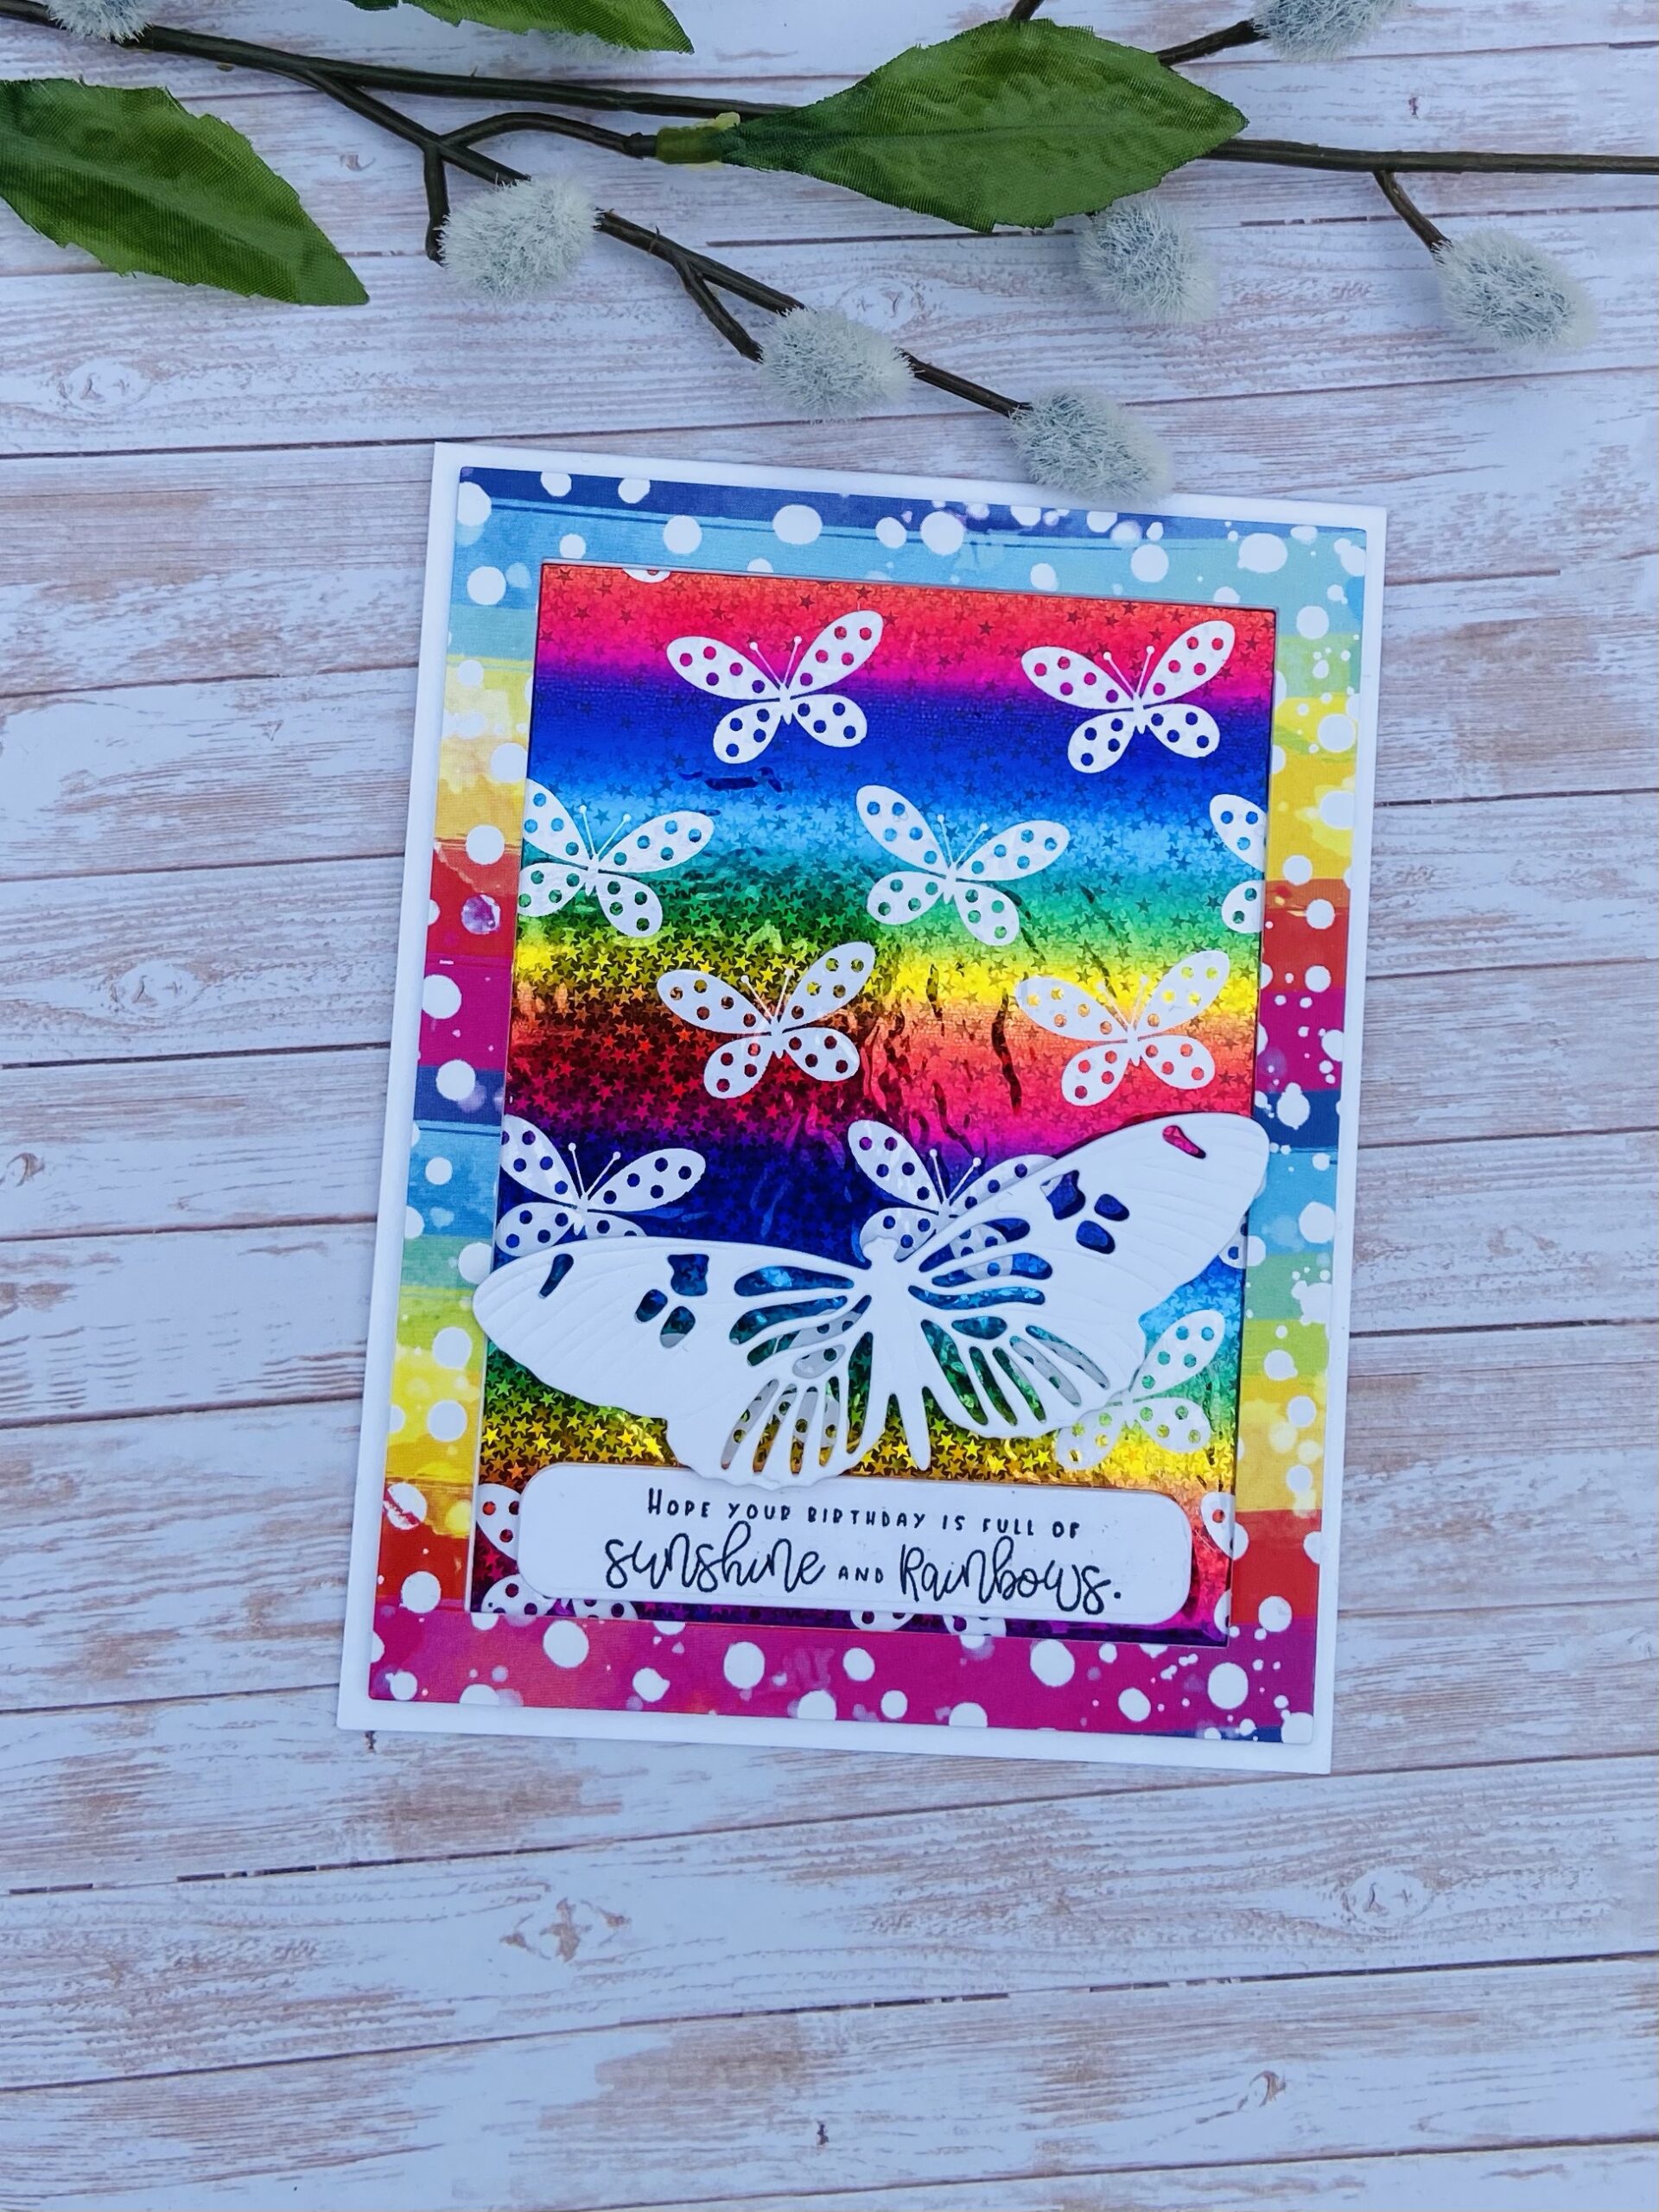
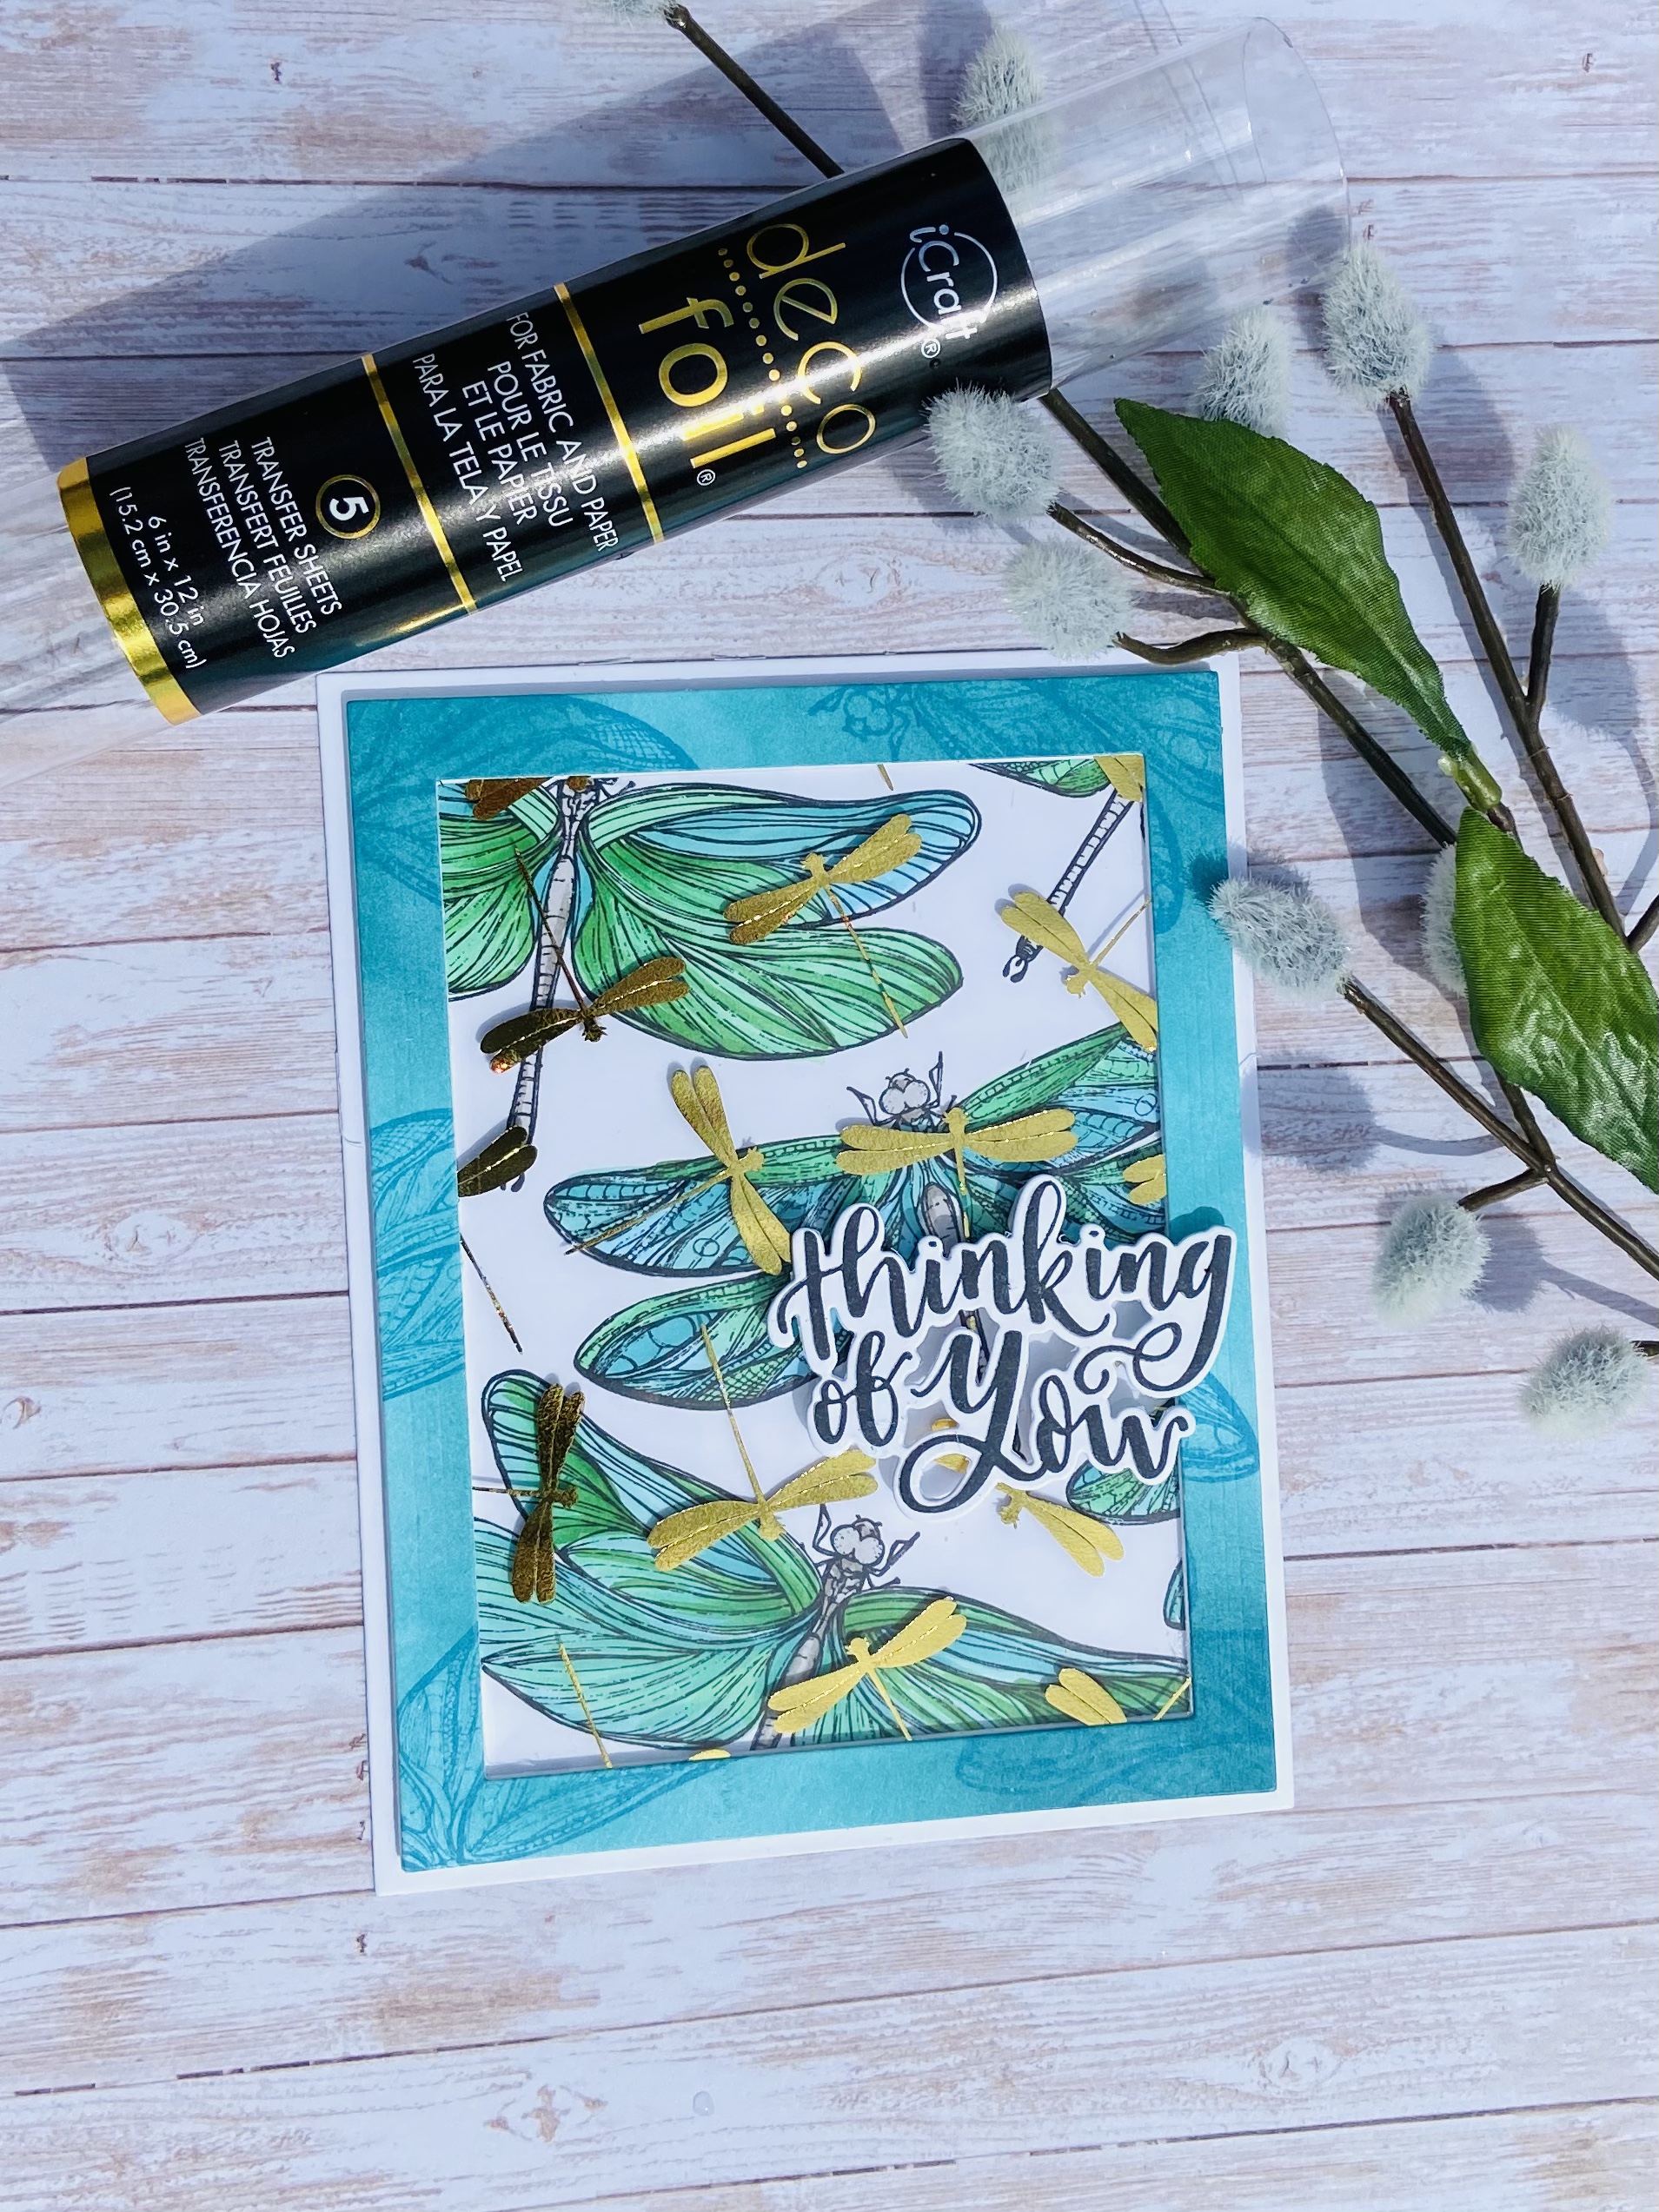
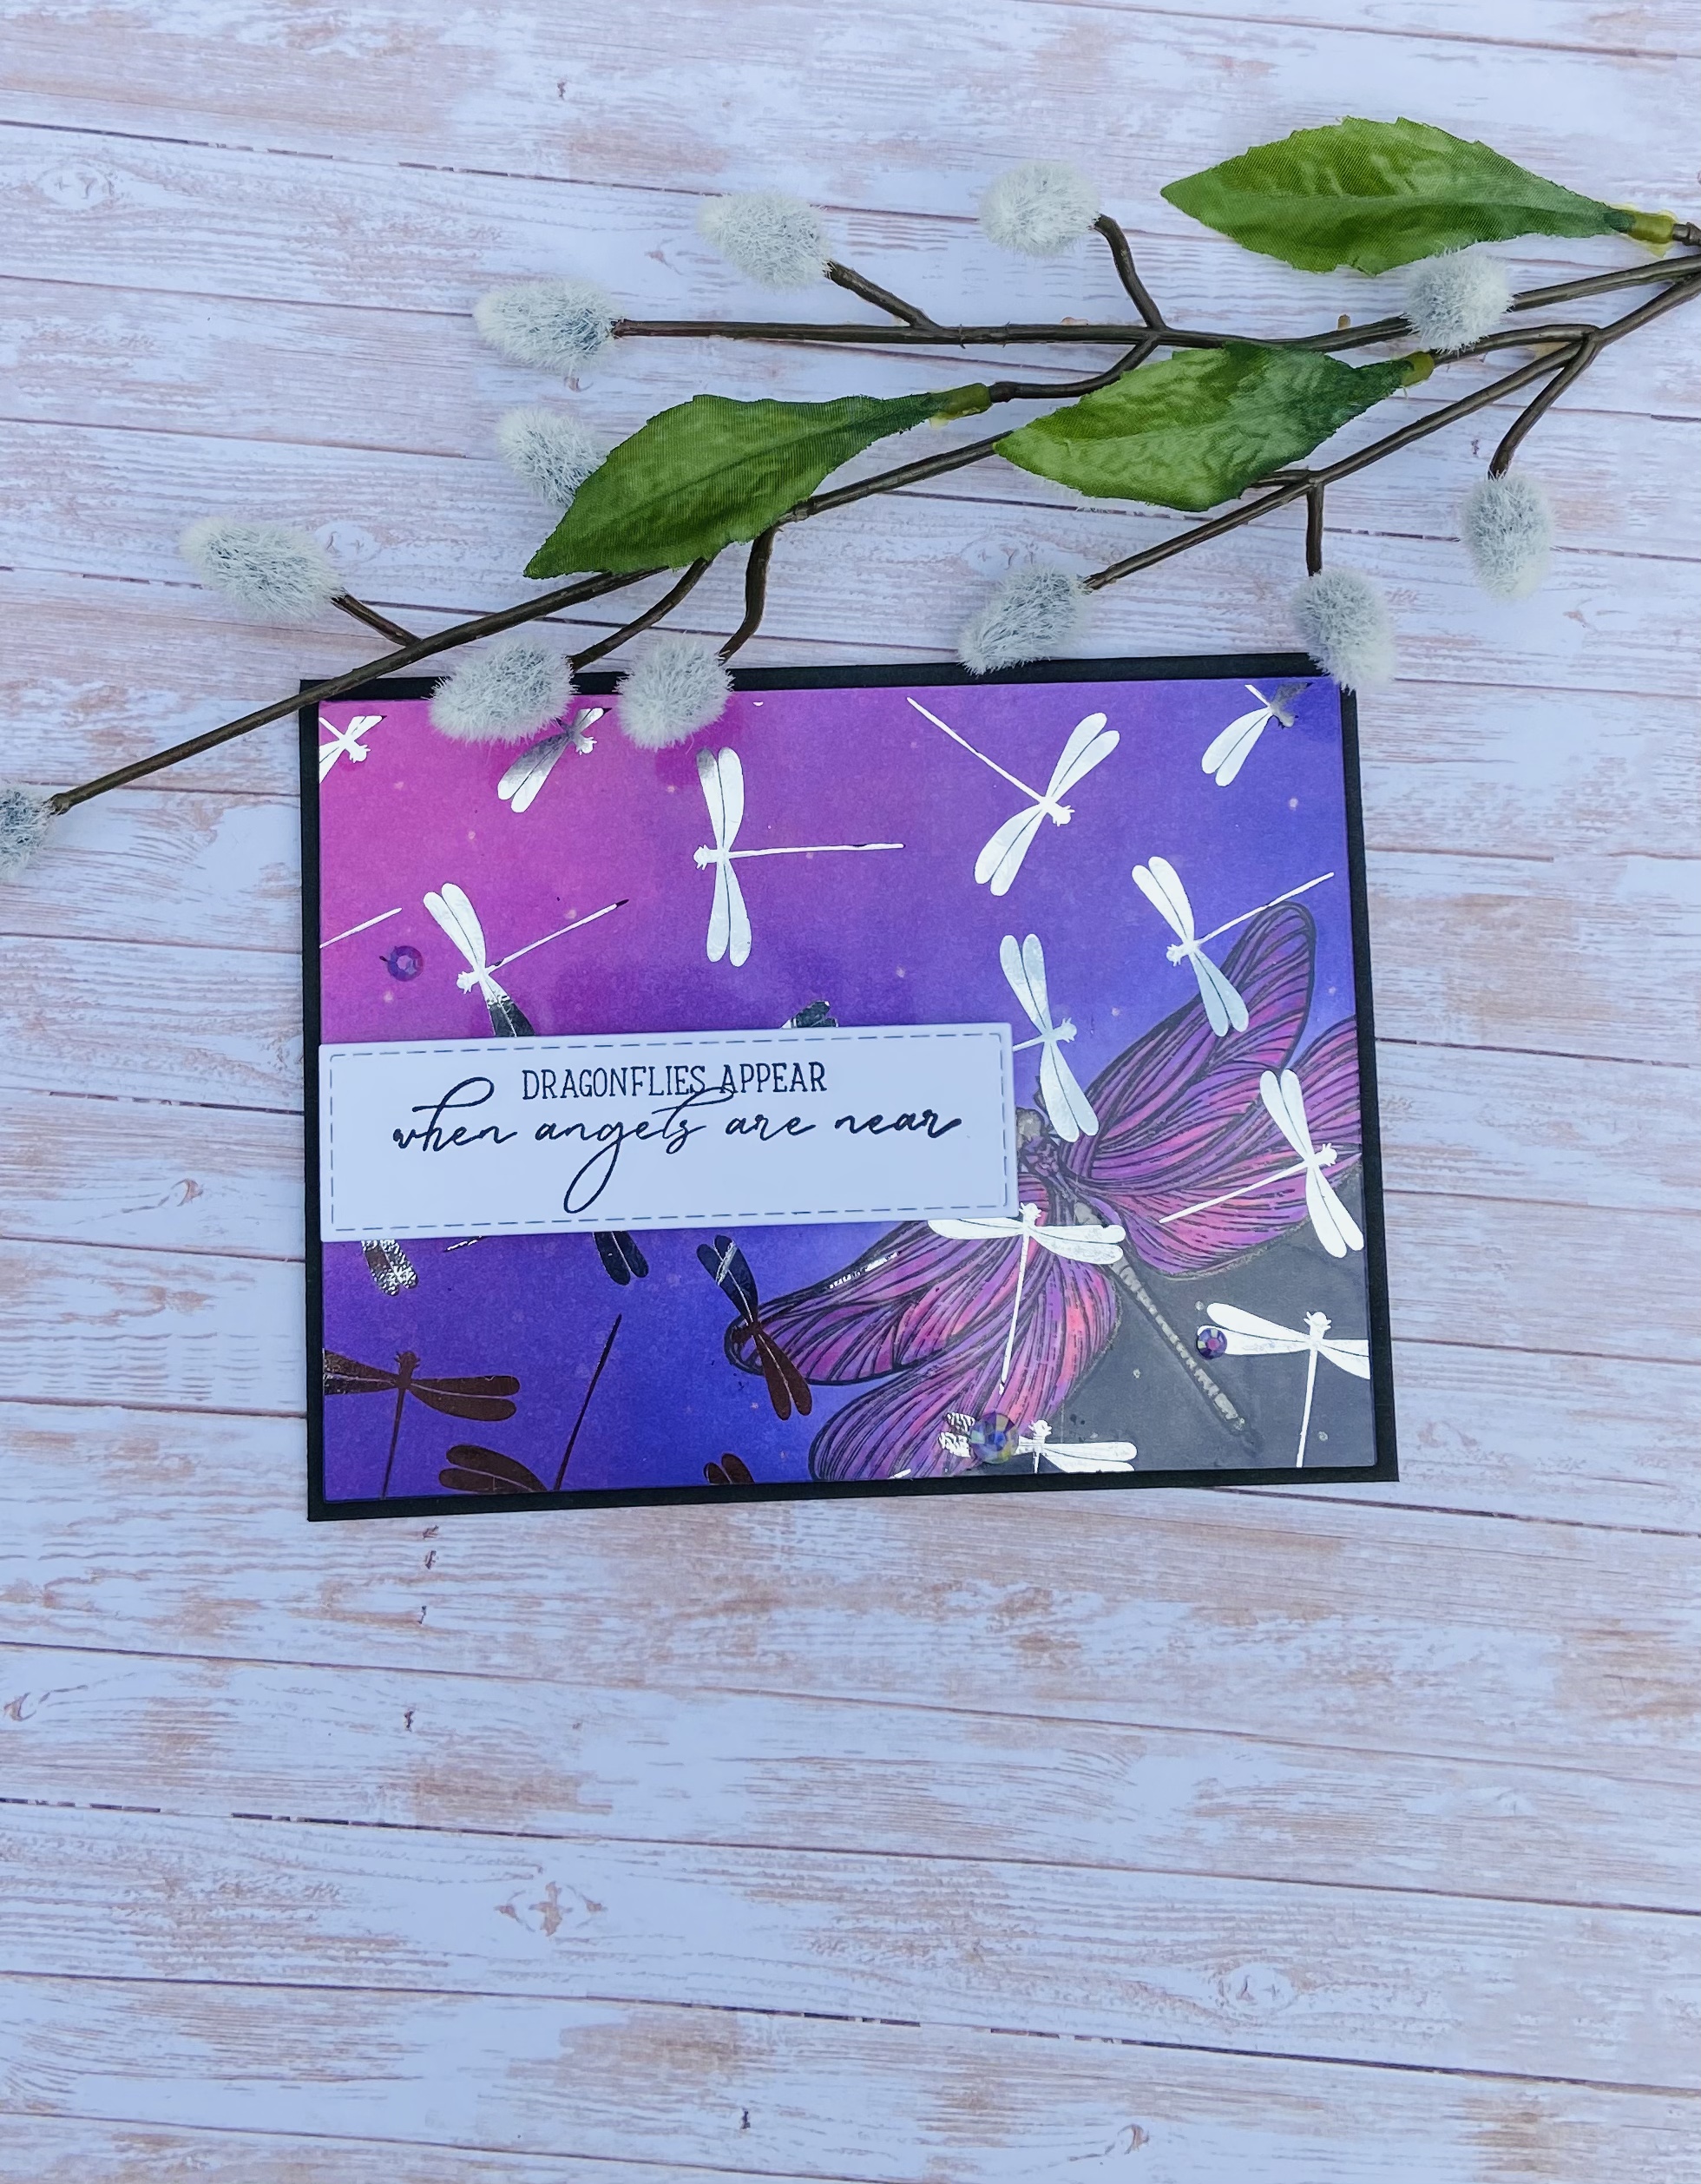
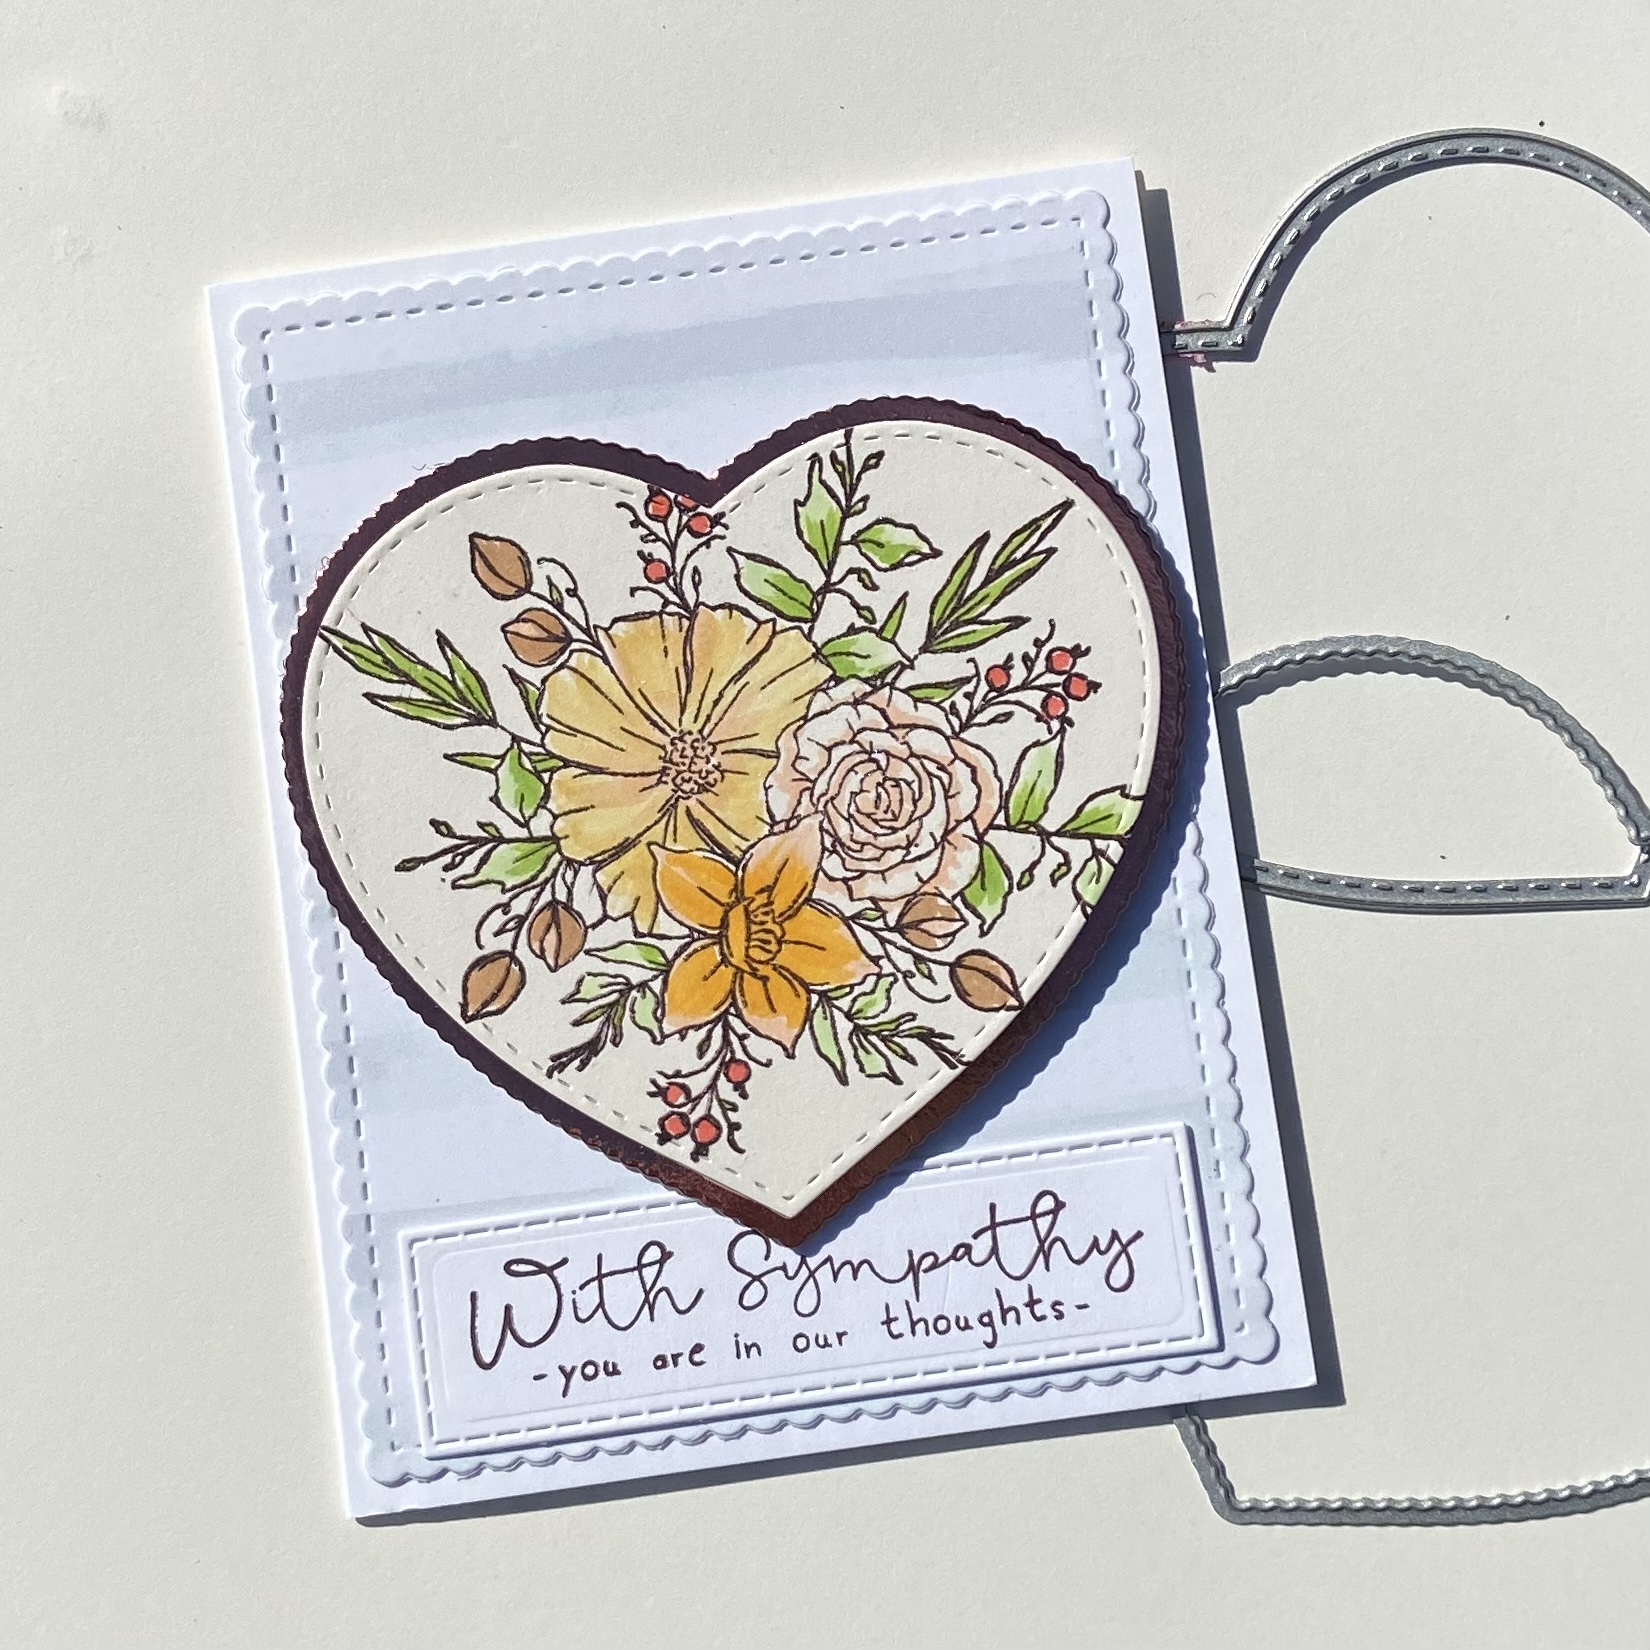
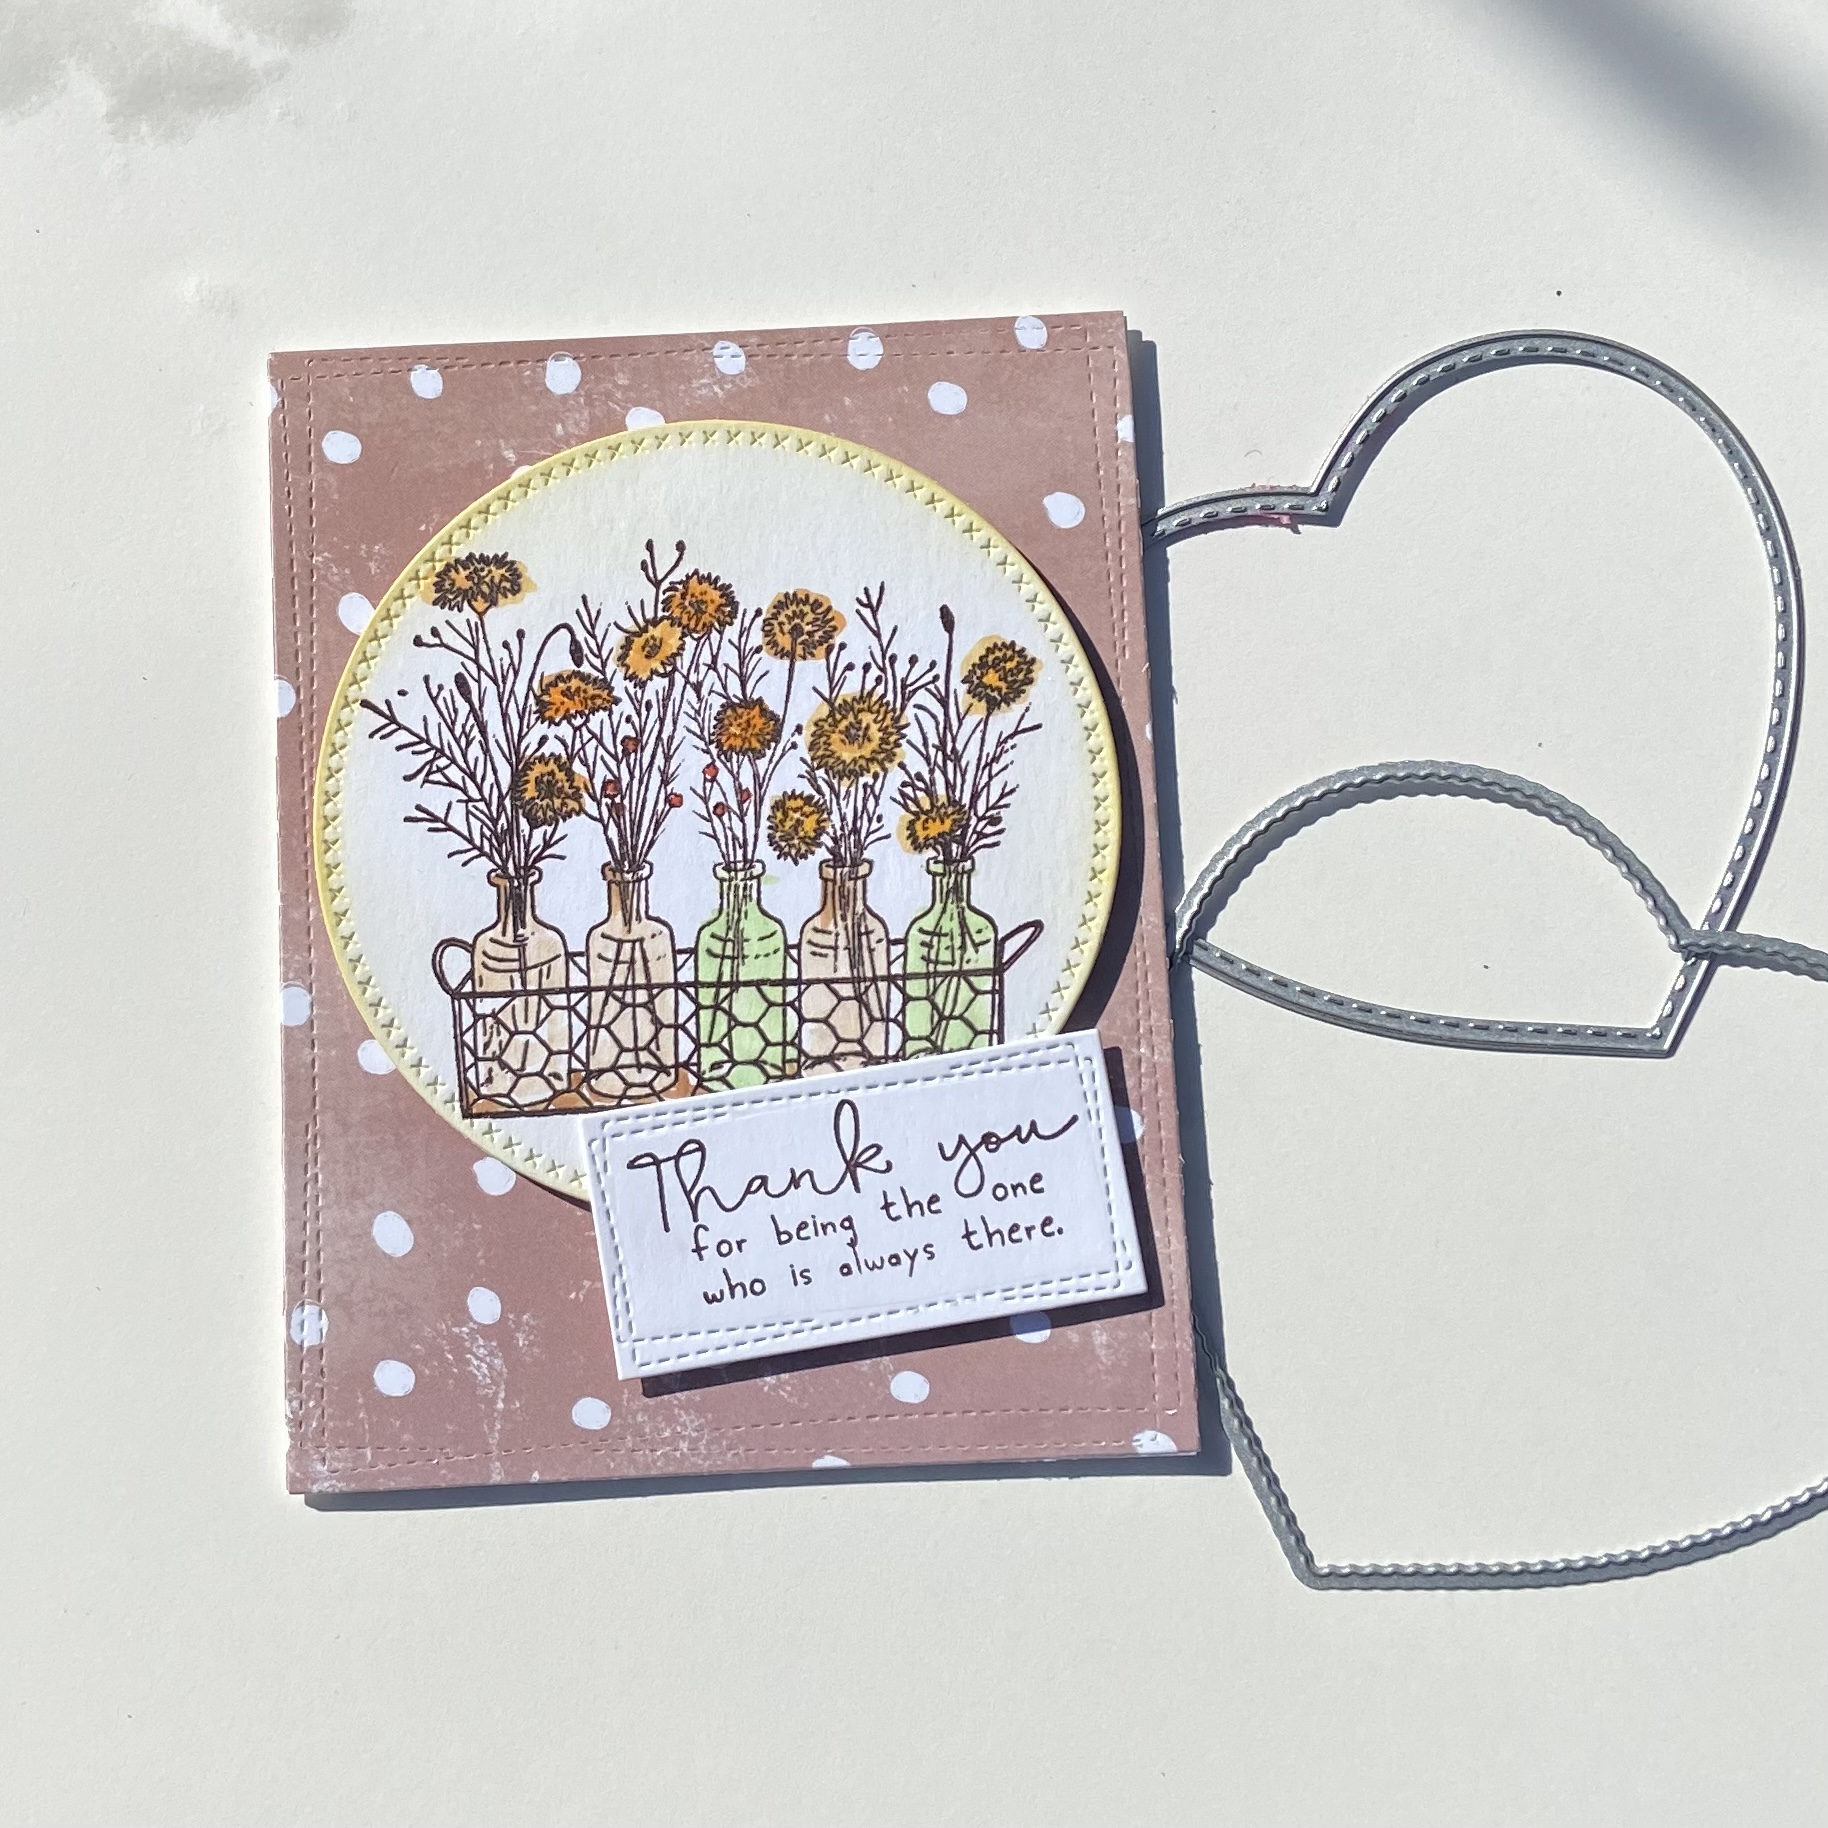
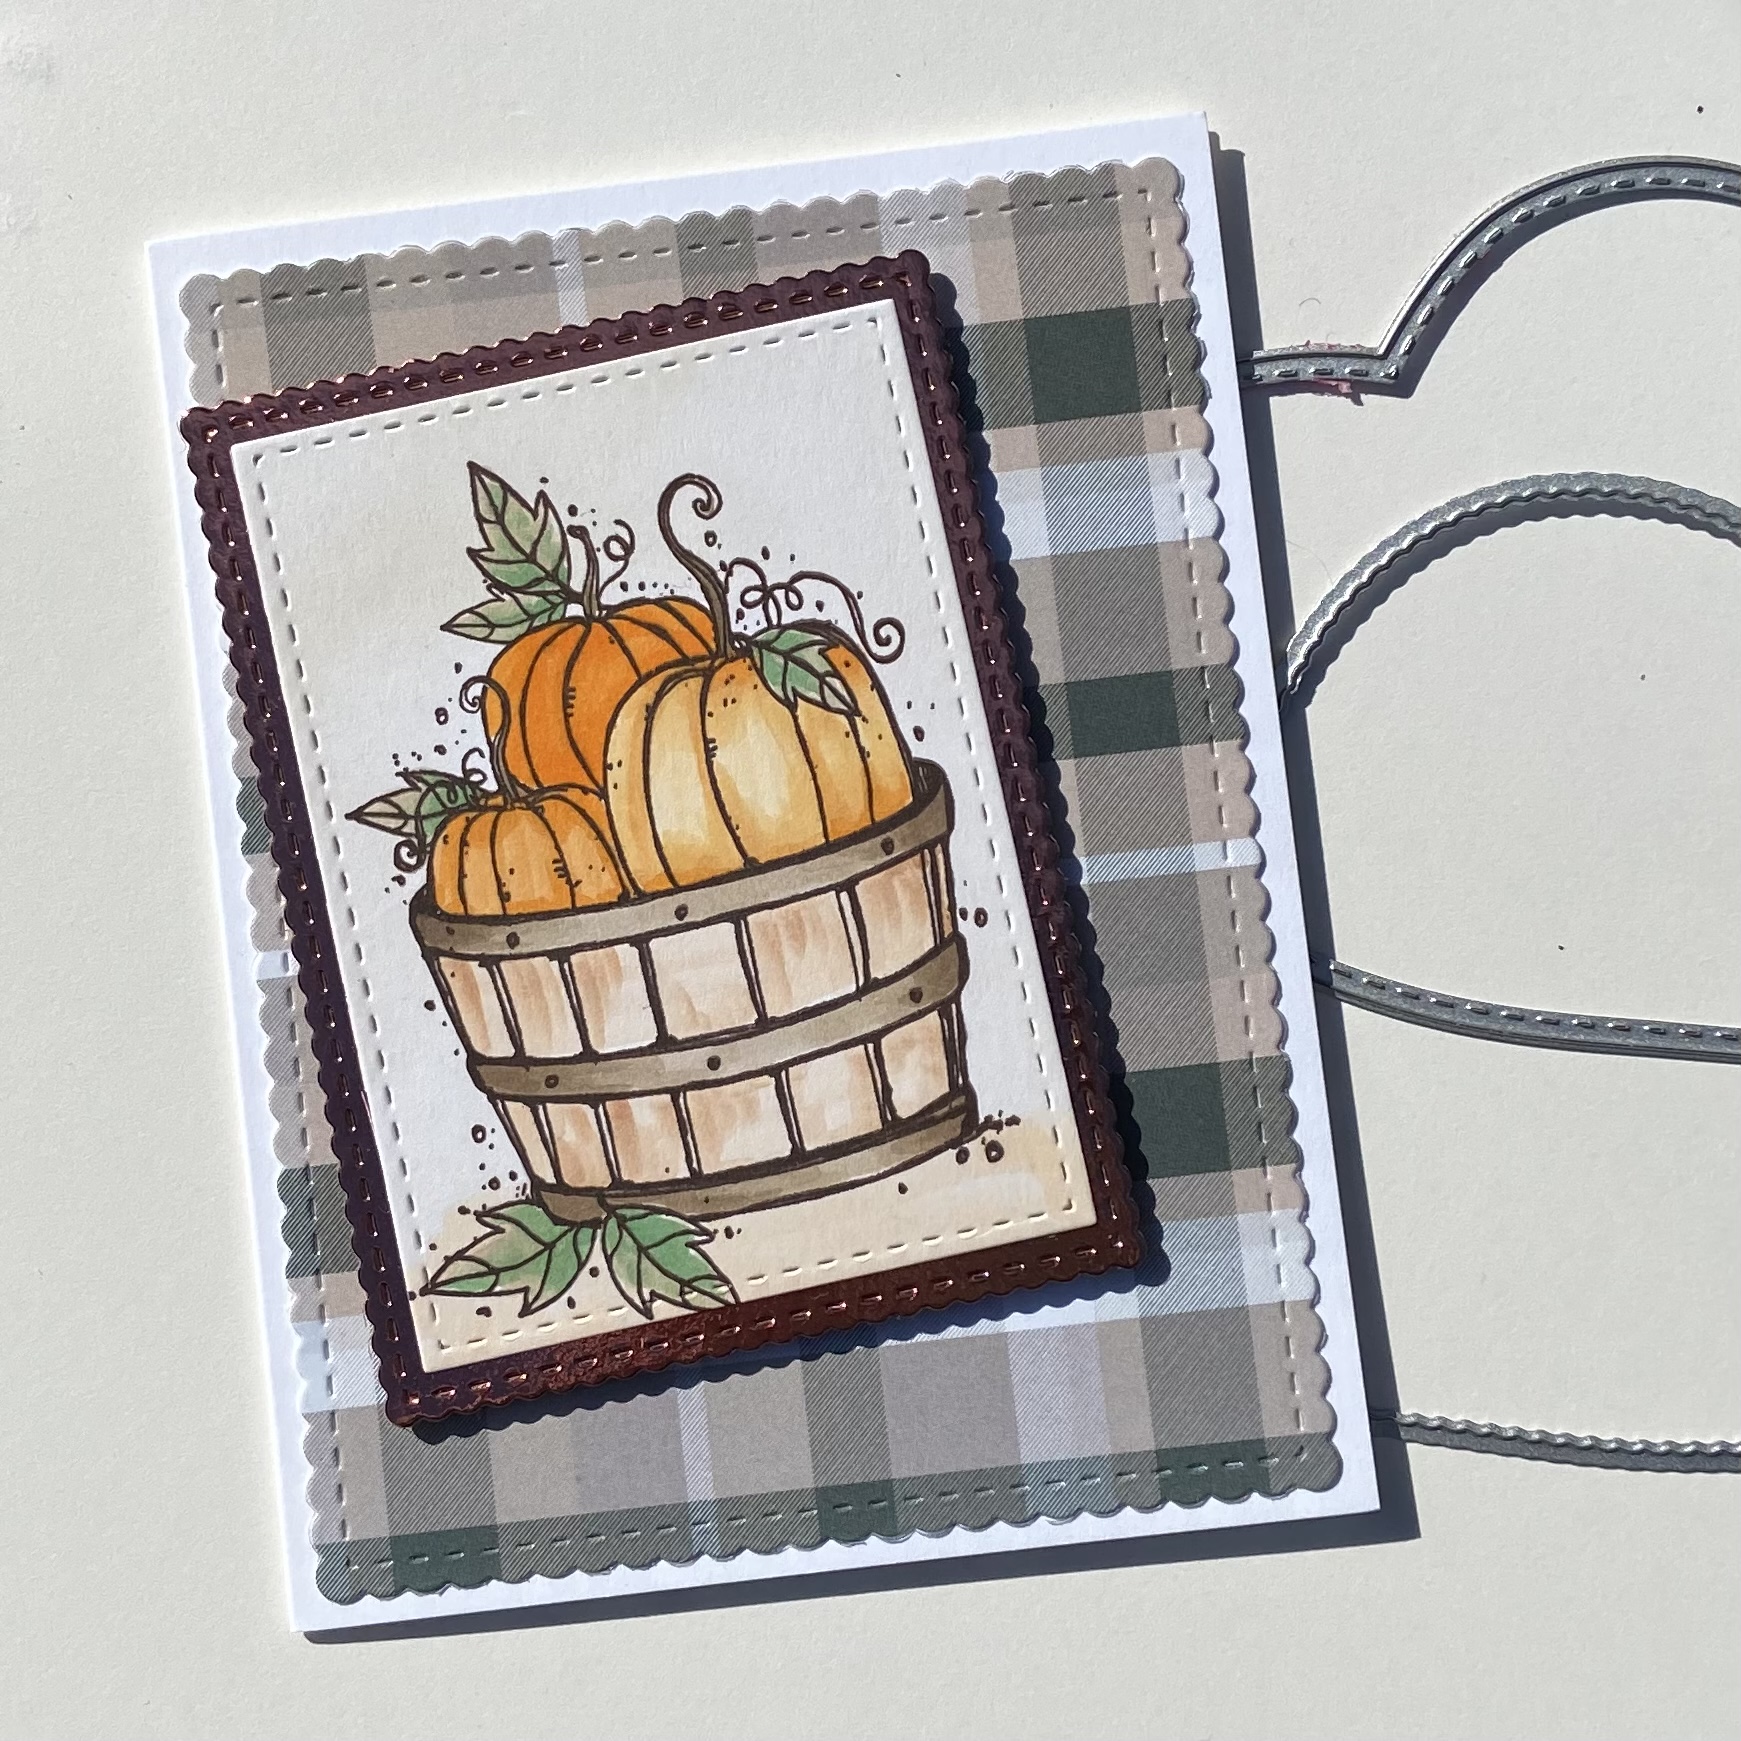
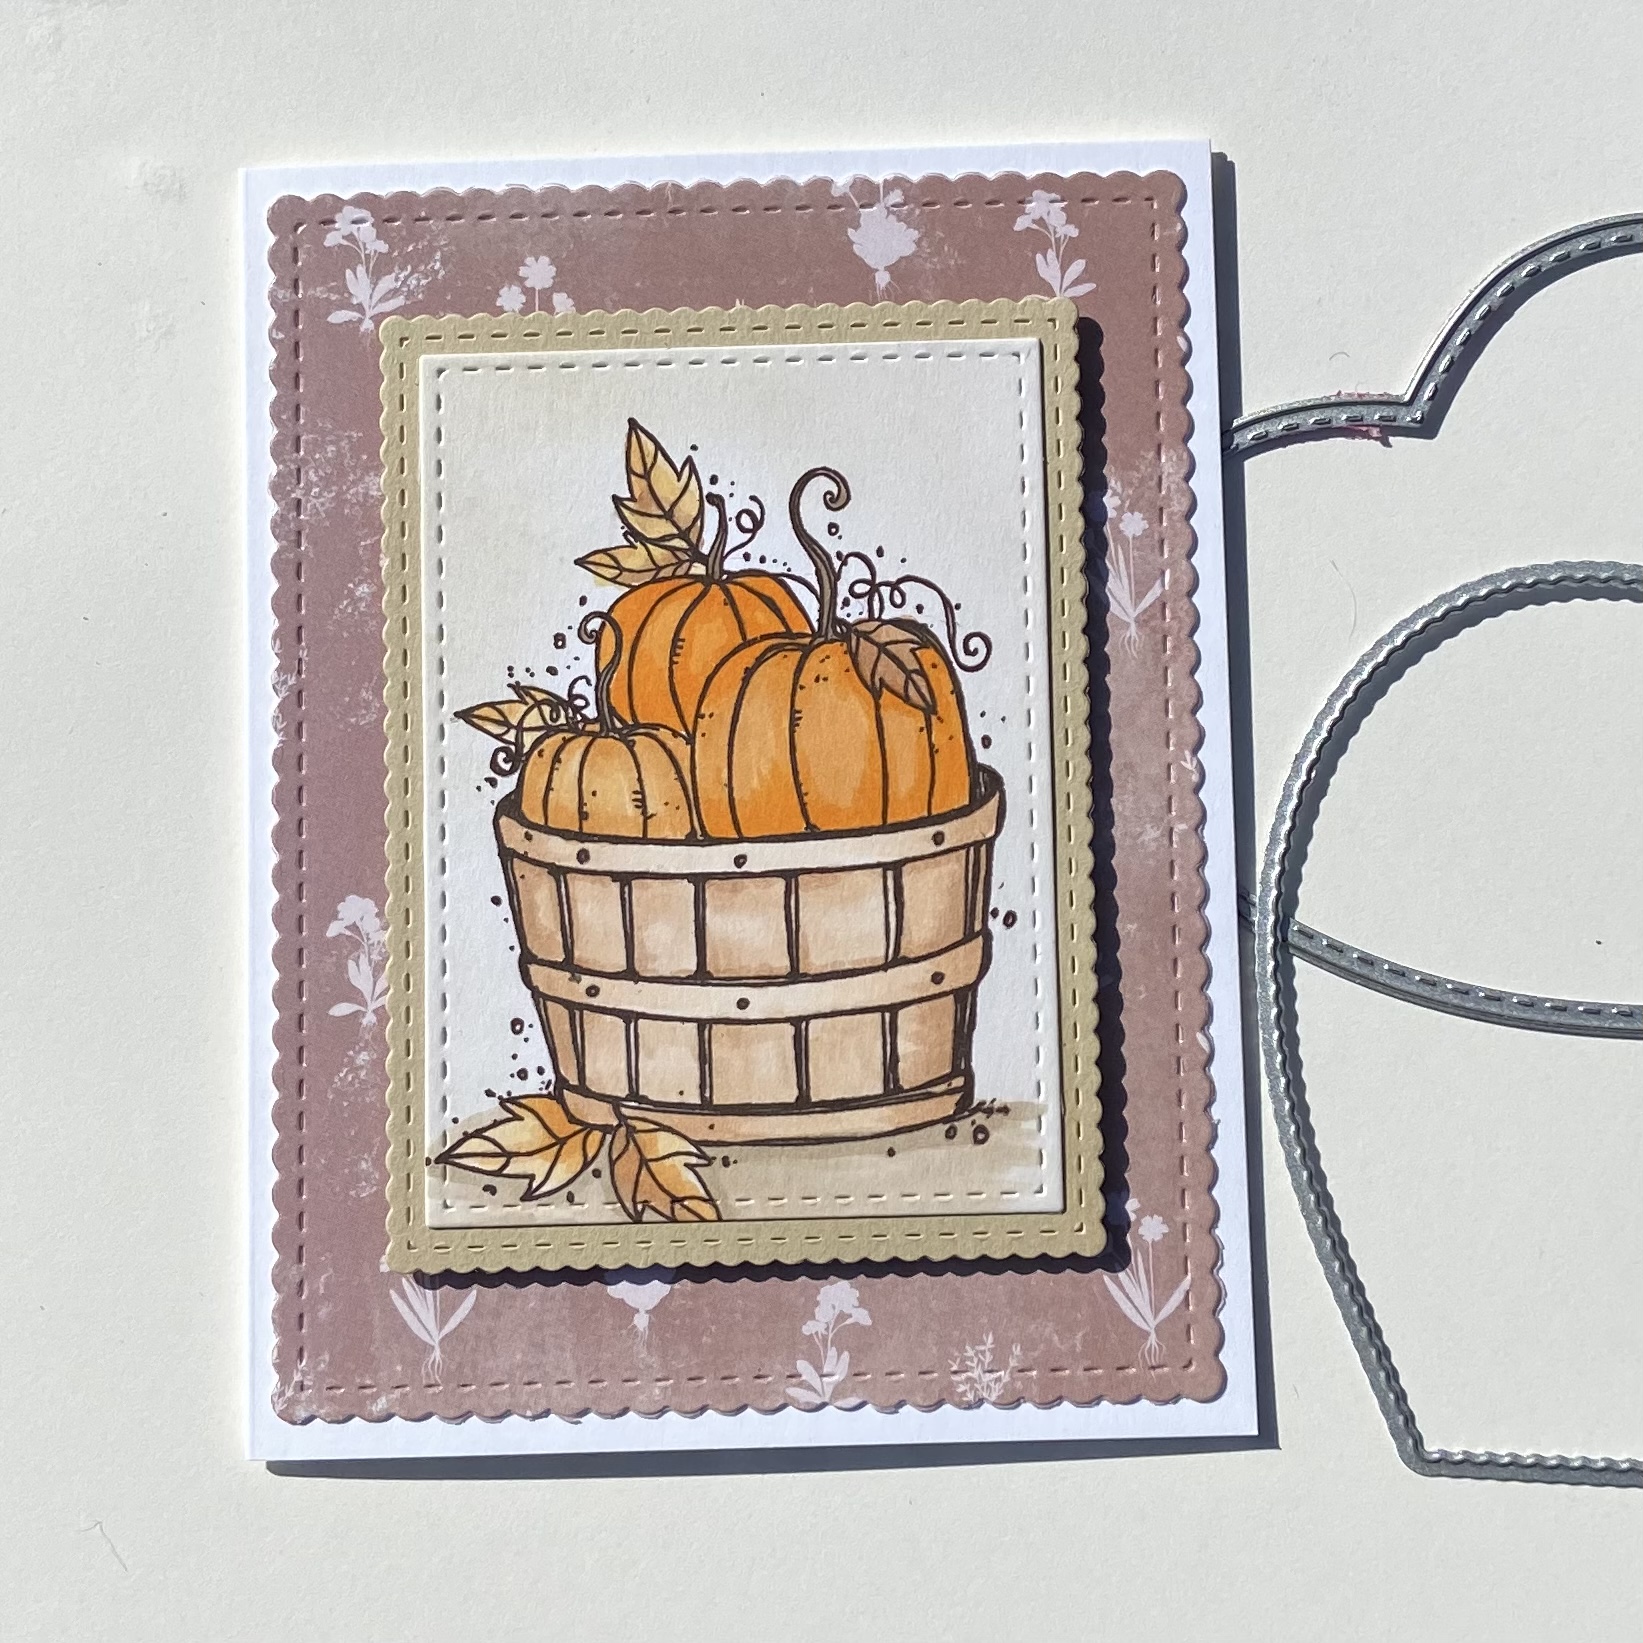
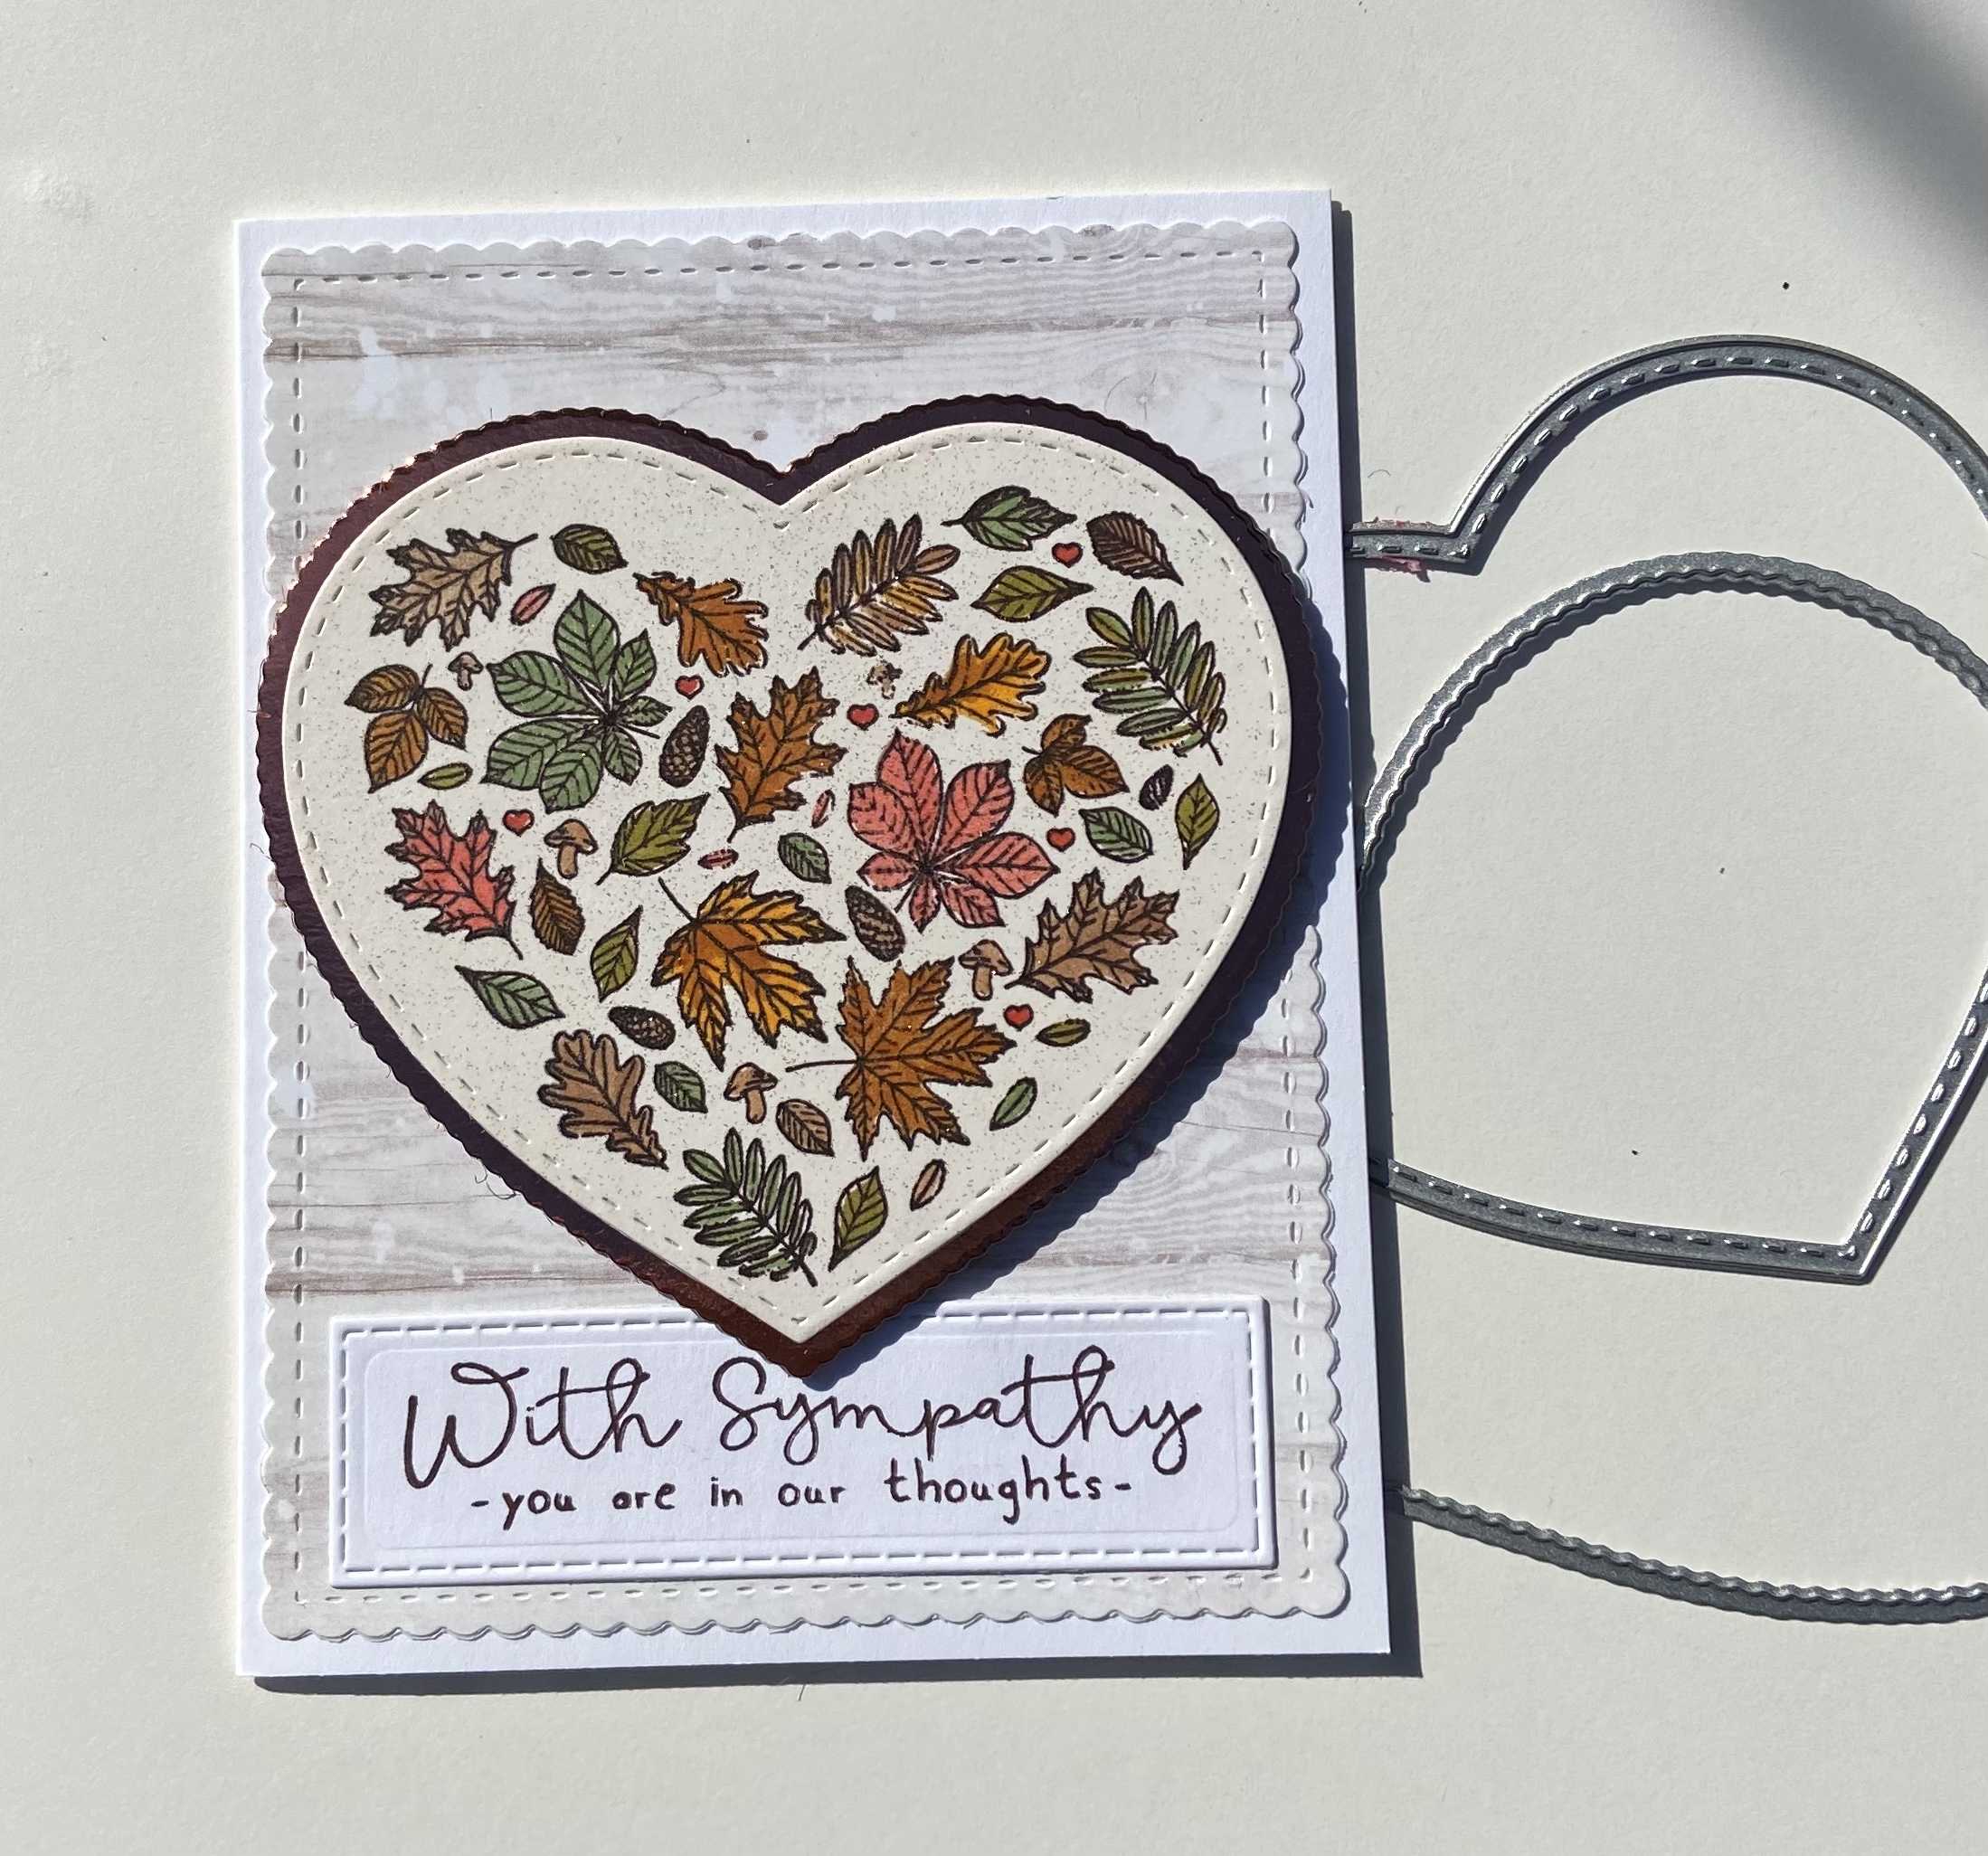
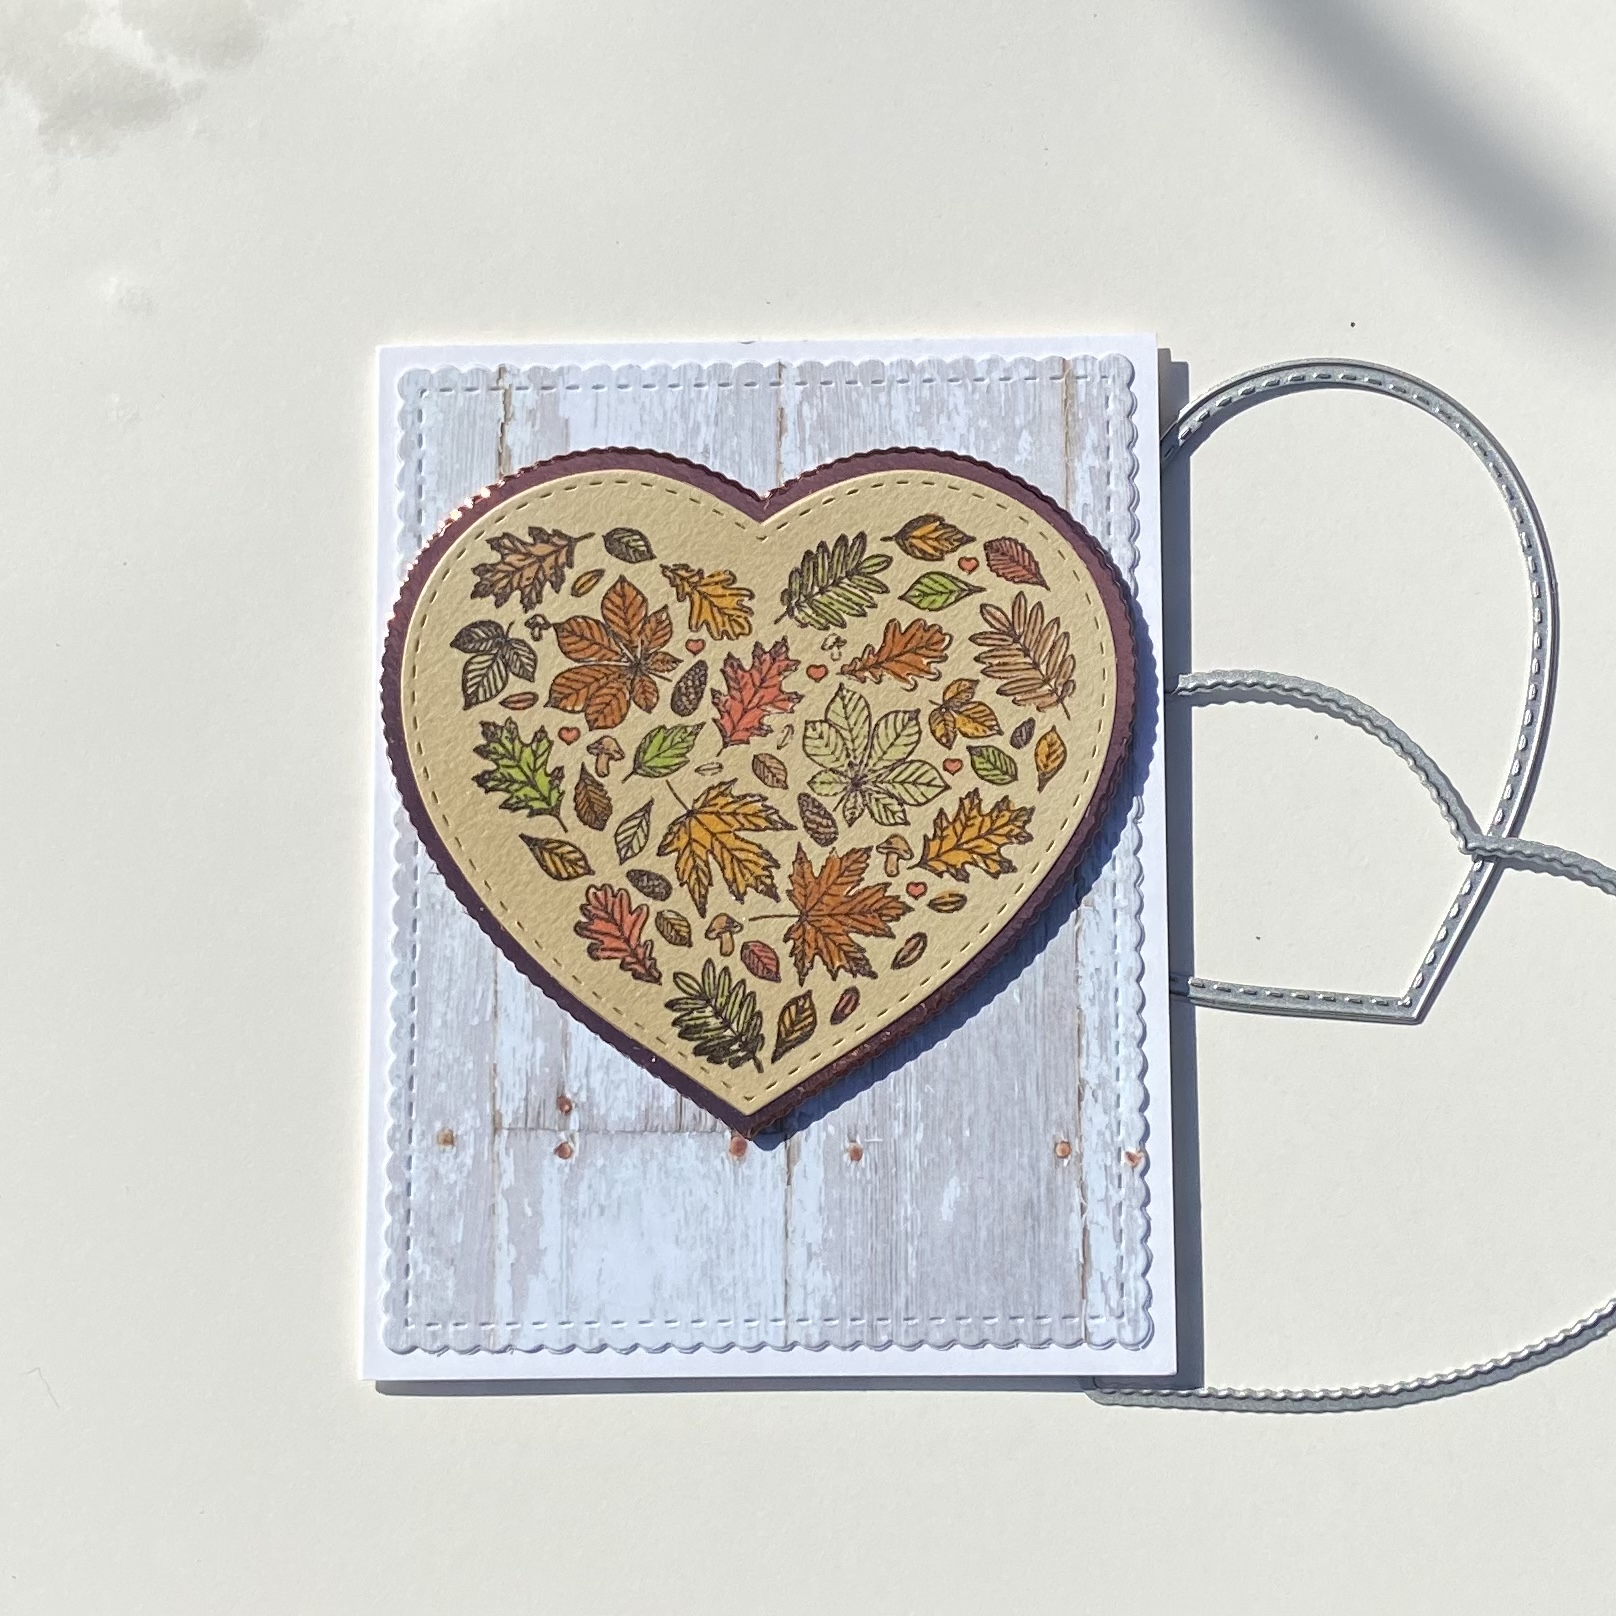
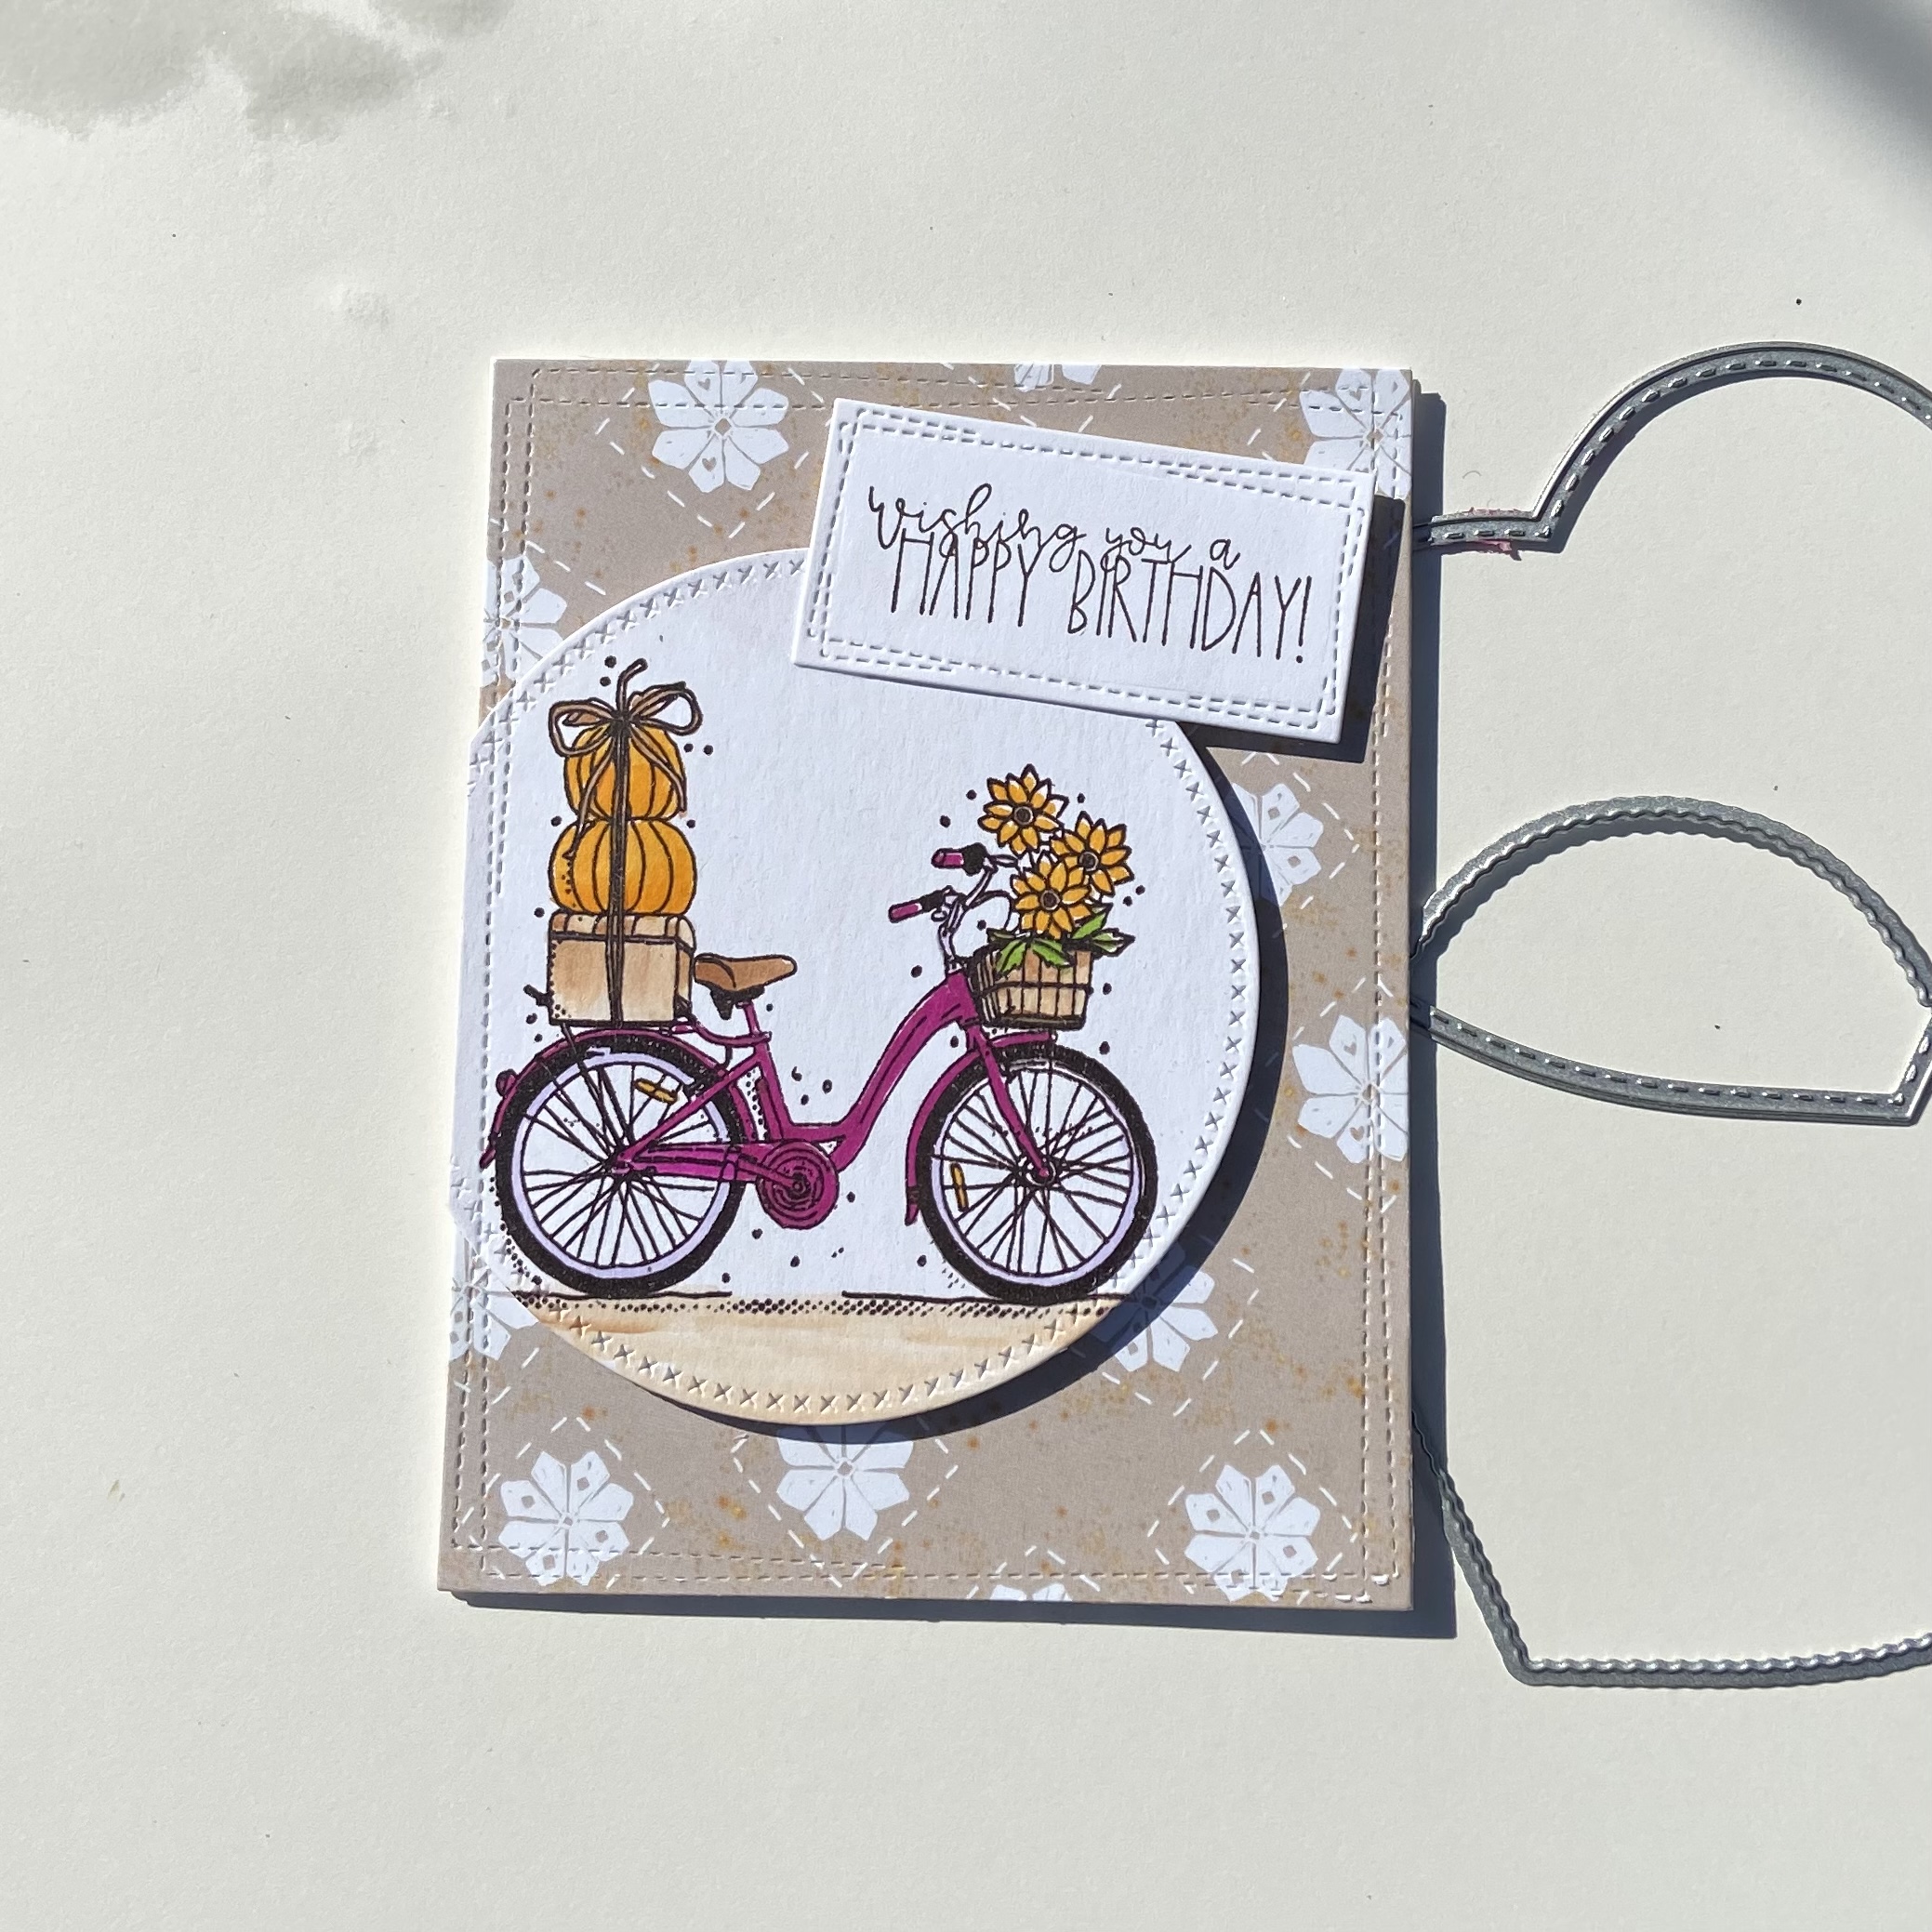
The card layout it very simple a patterned paper background and a stamped image die cut focal point. I really enjoy coloring so I will stamp out a bunch of images and color them when I have time. Once I have a pile of colored images, I spray them with Thermoweb Ultra Fine Glitter Spray and die cut them out.

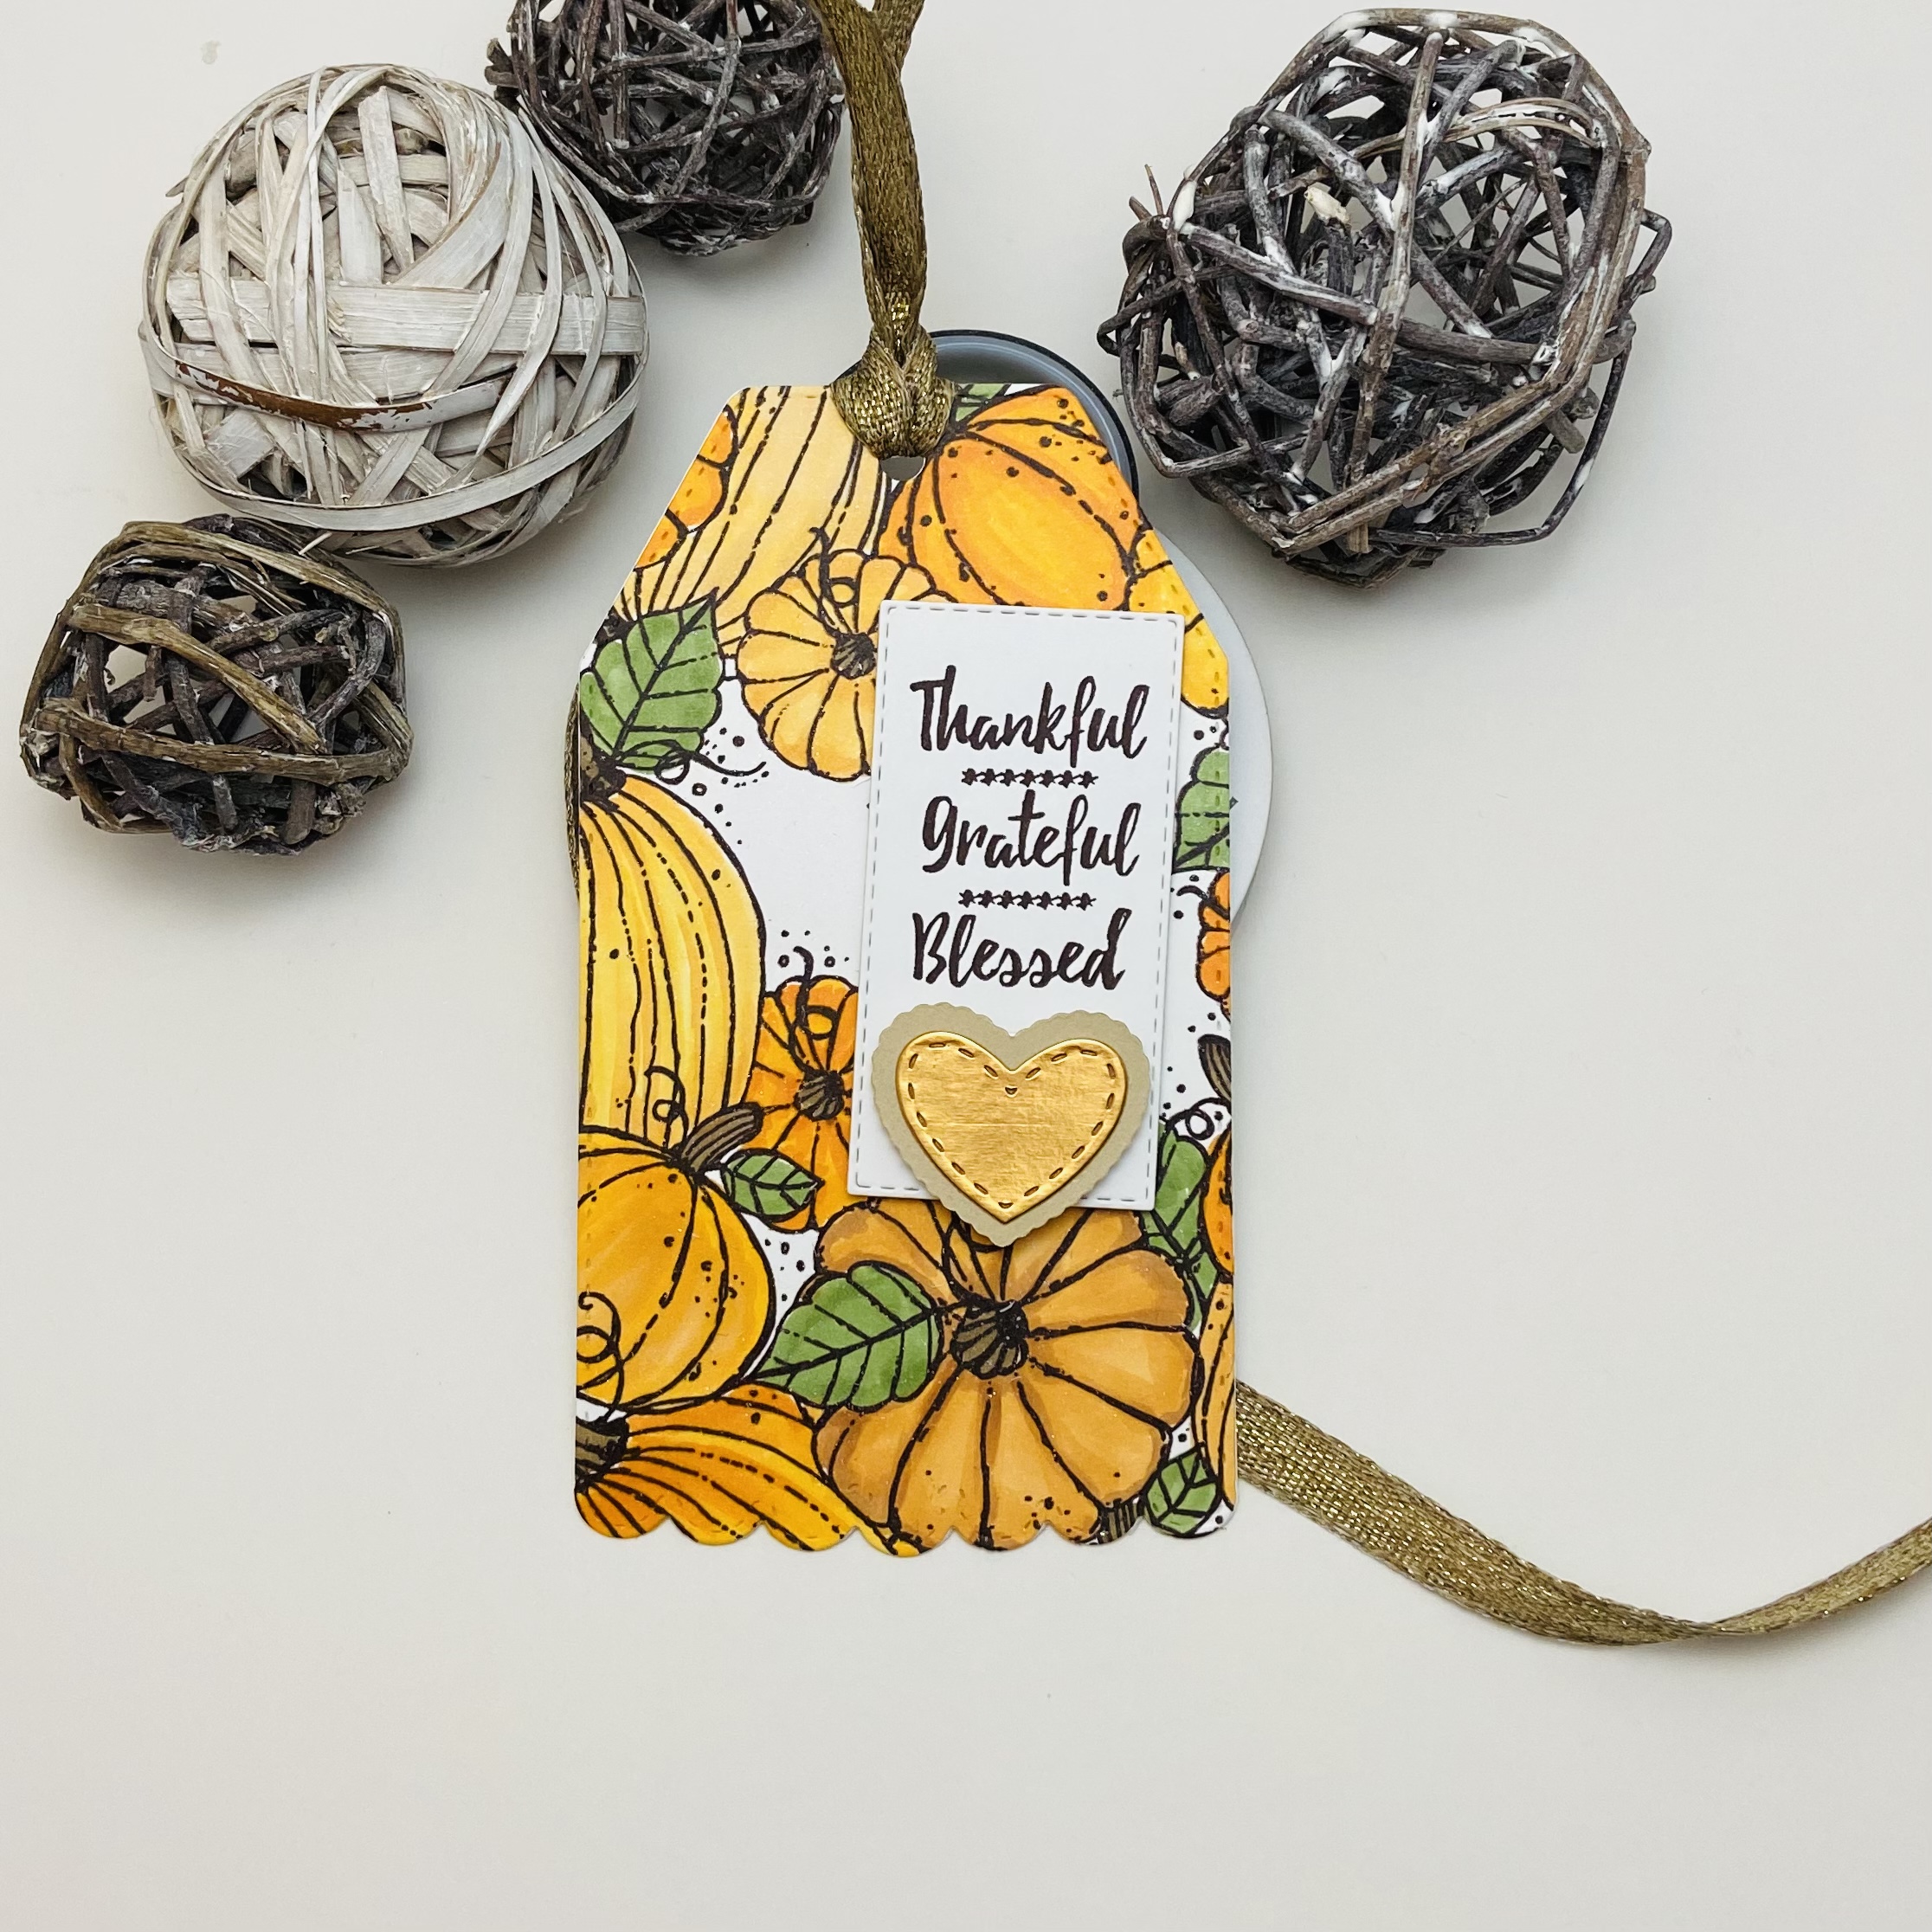
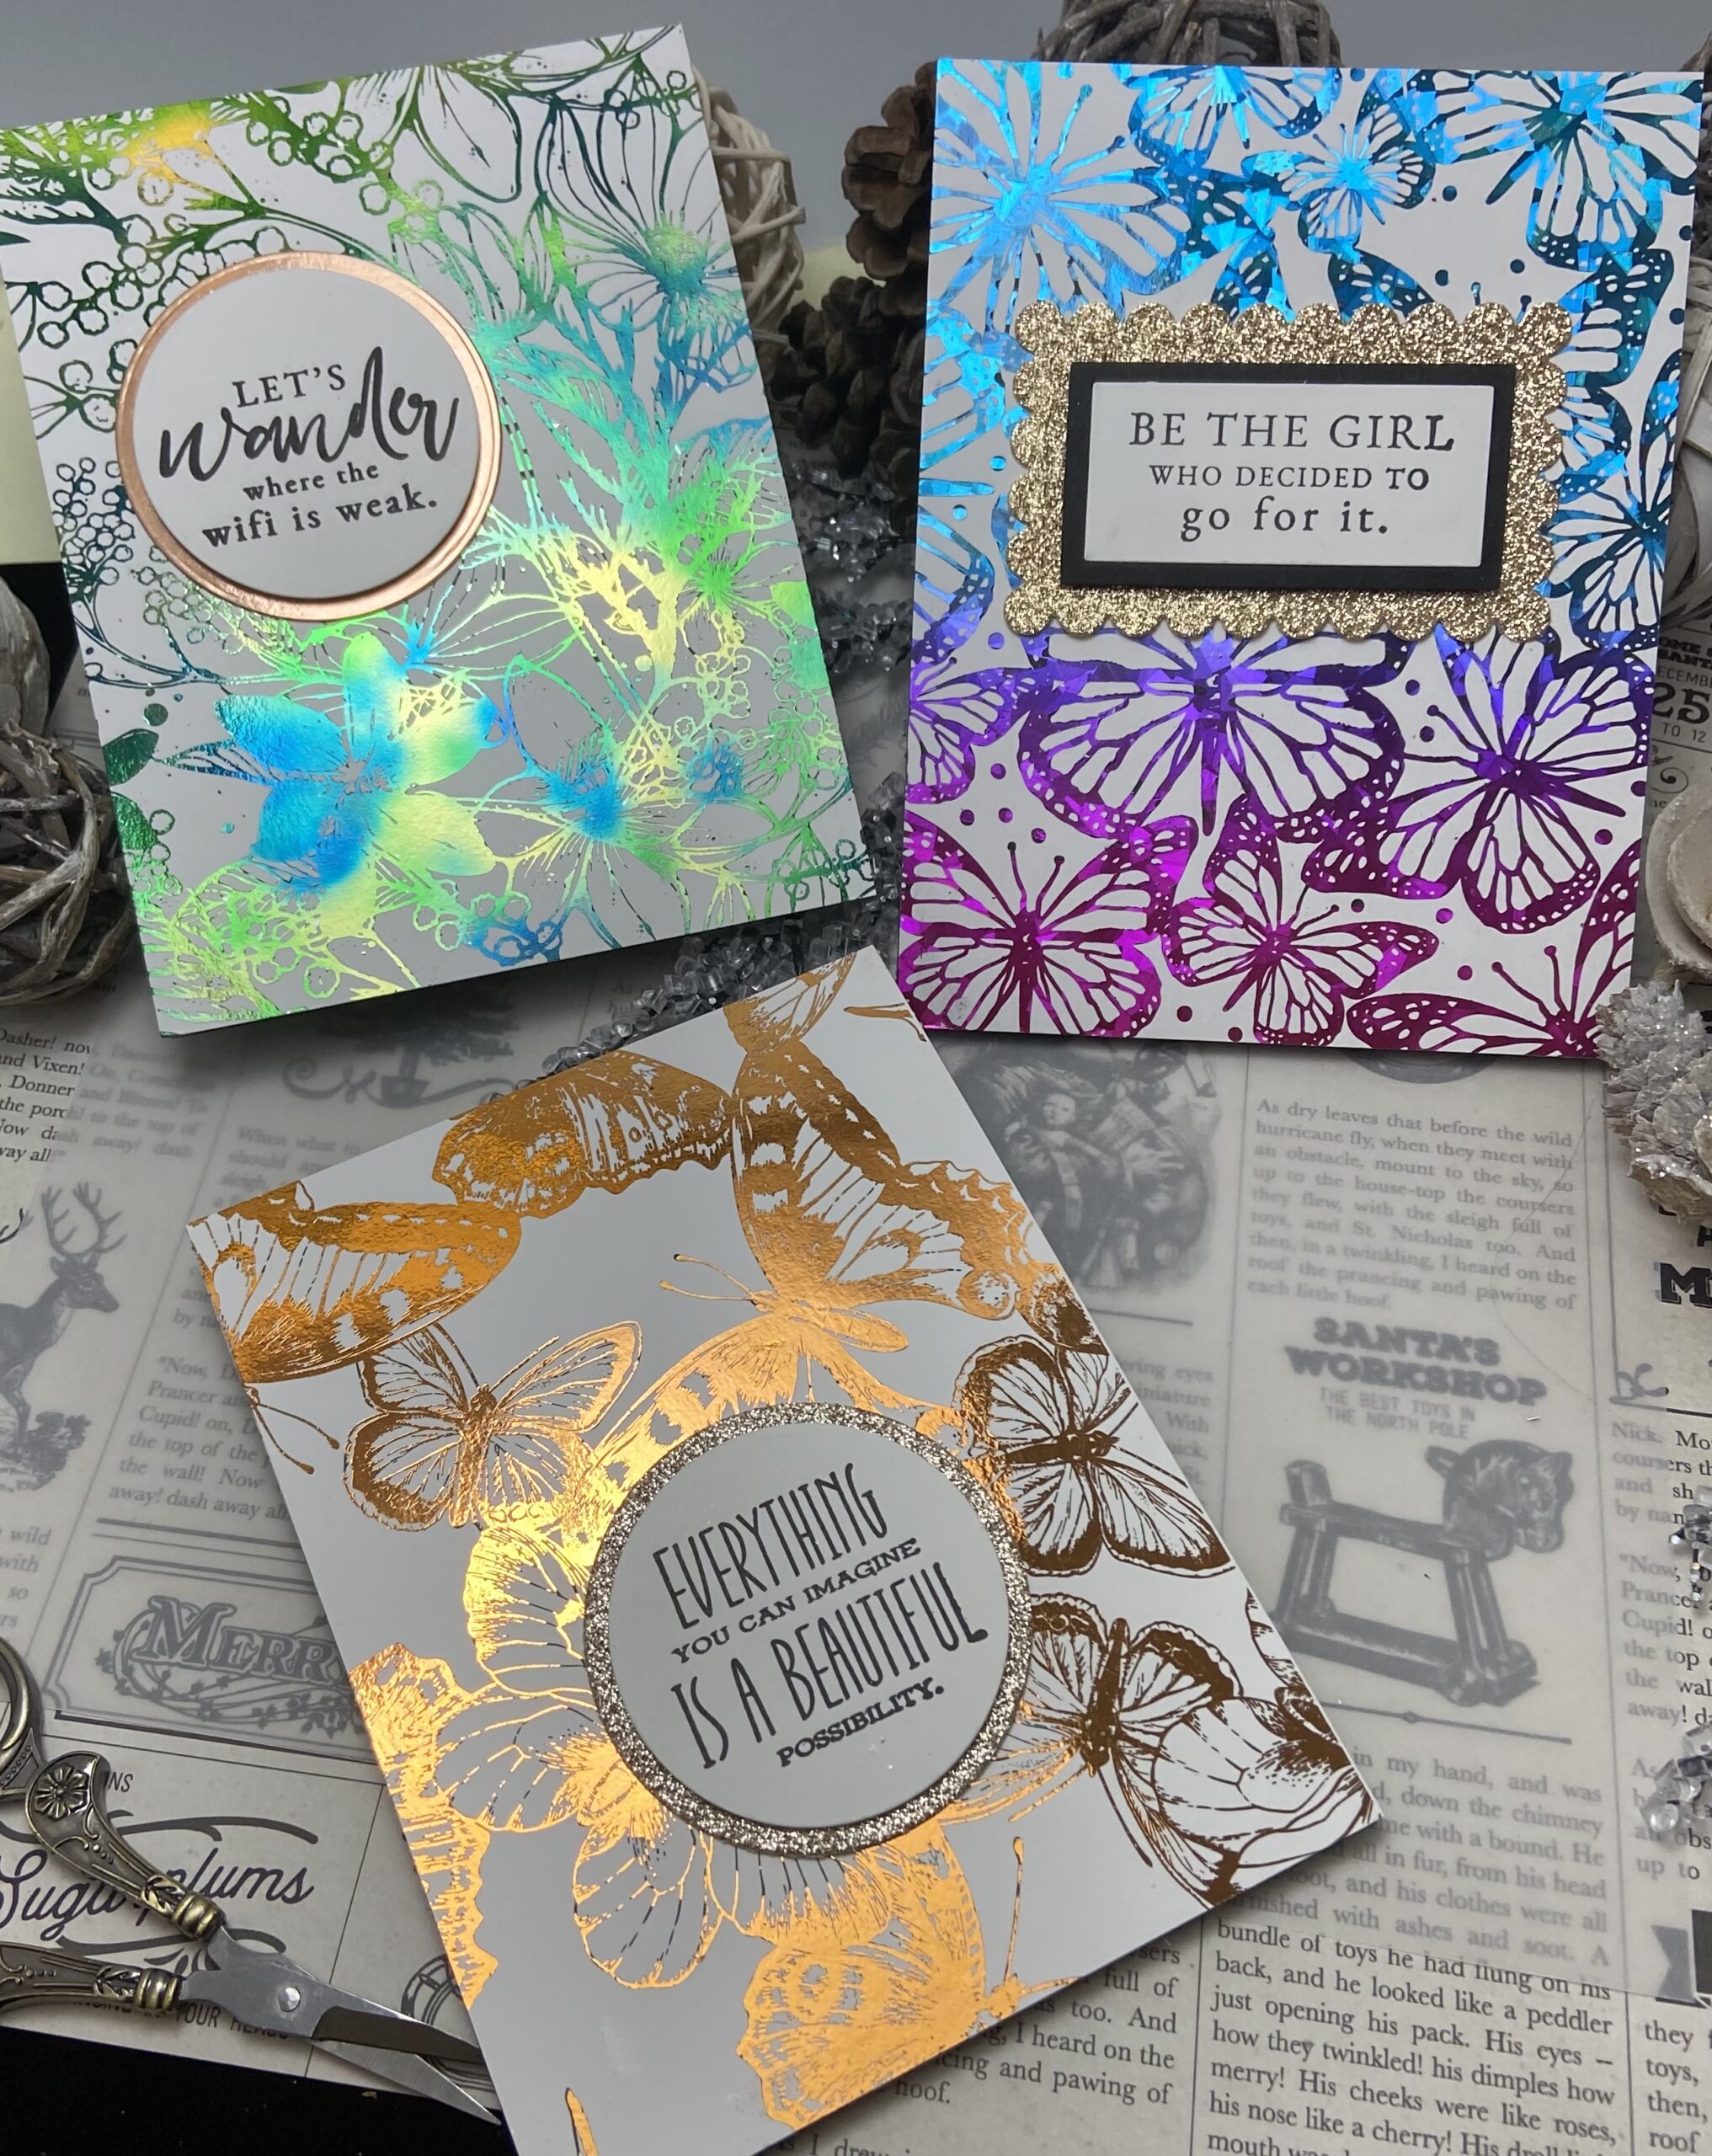
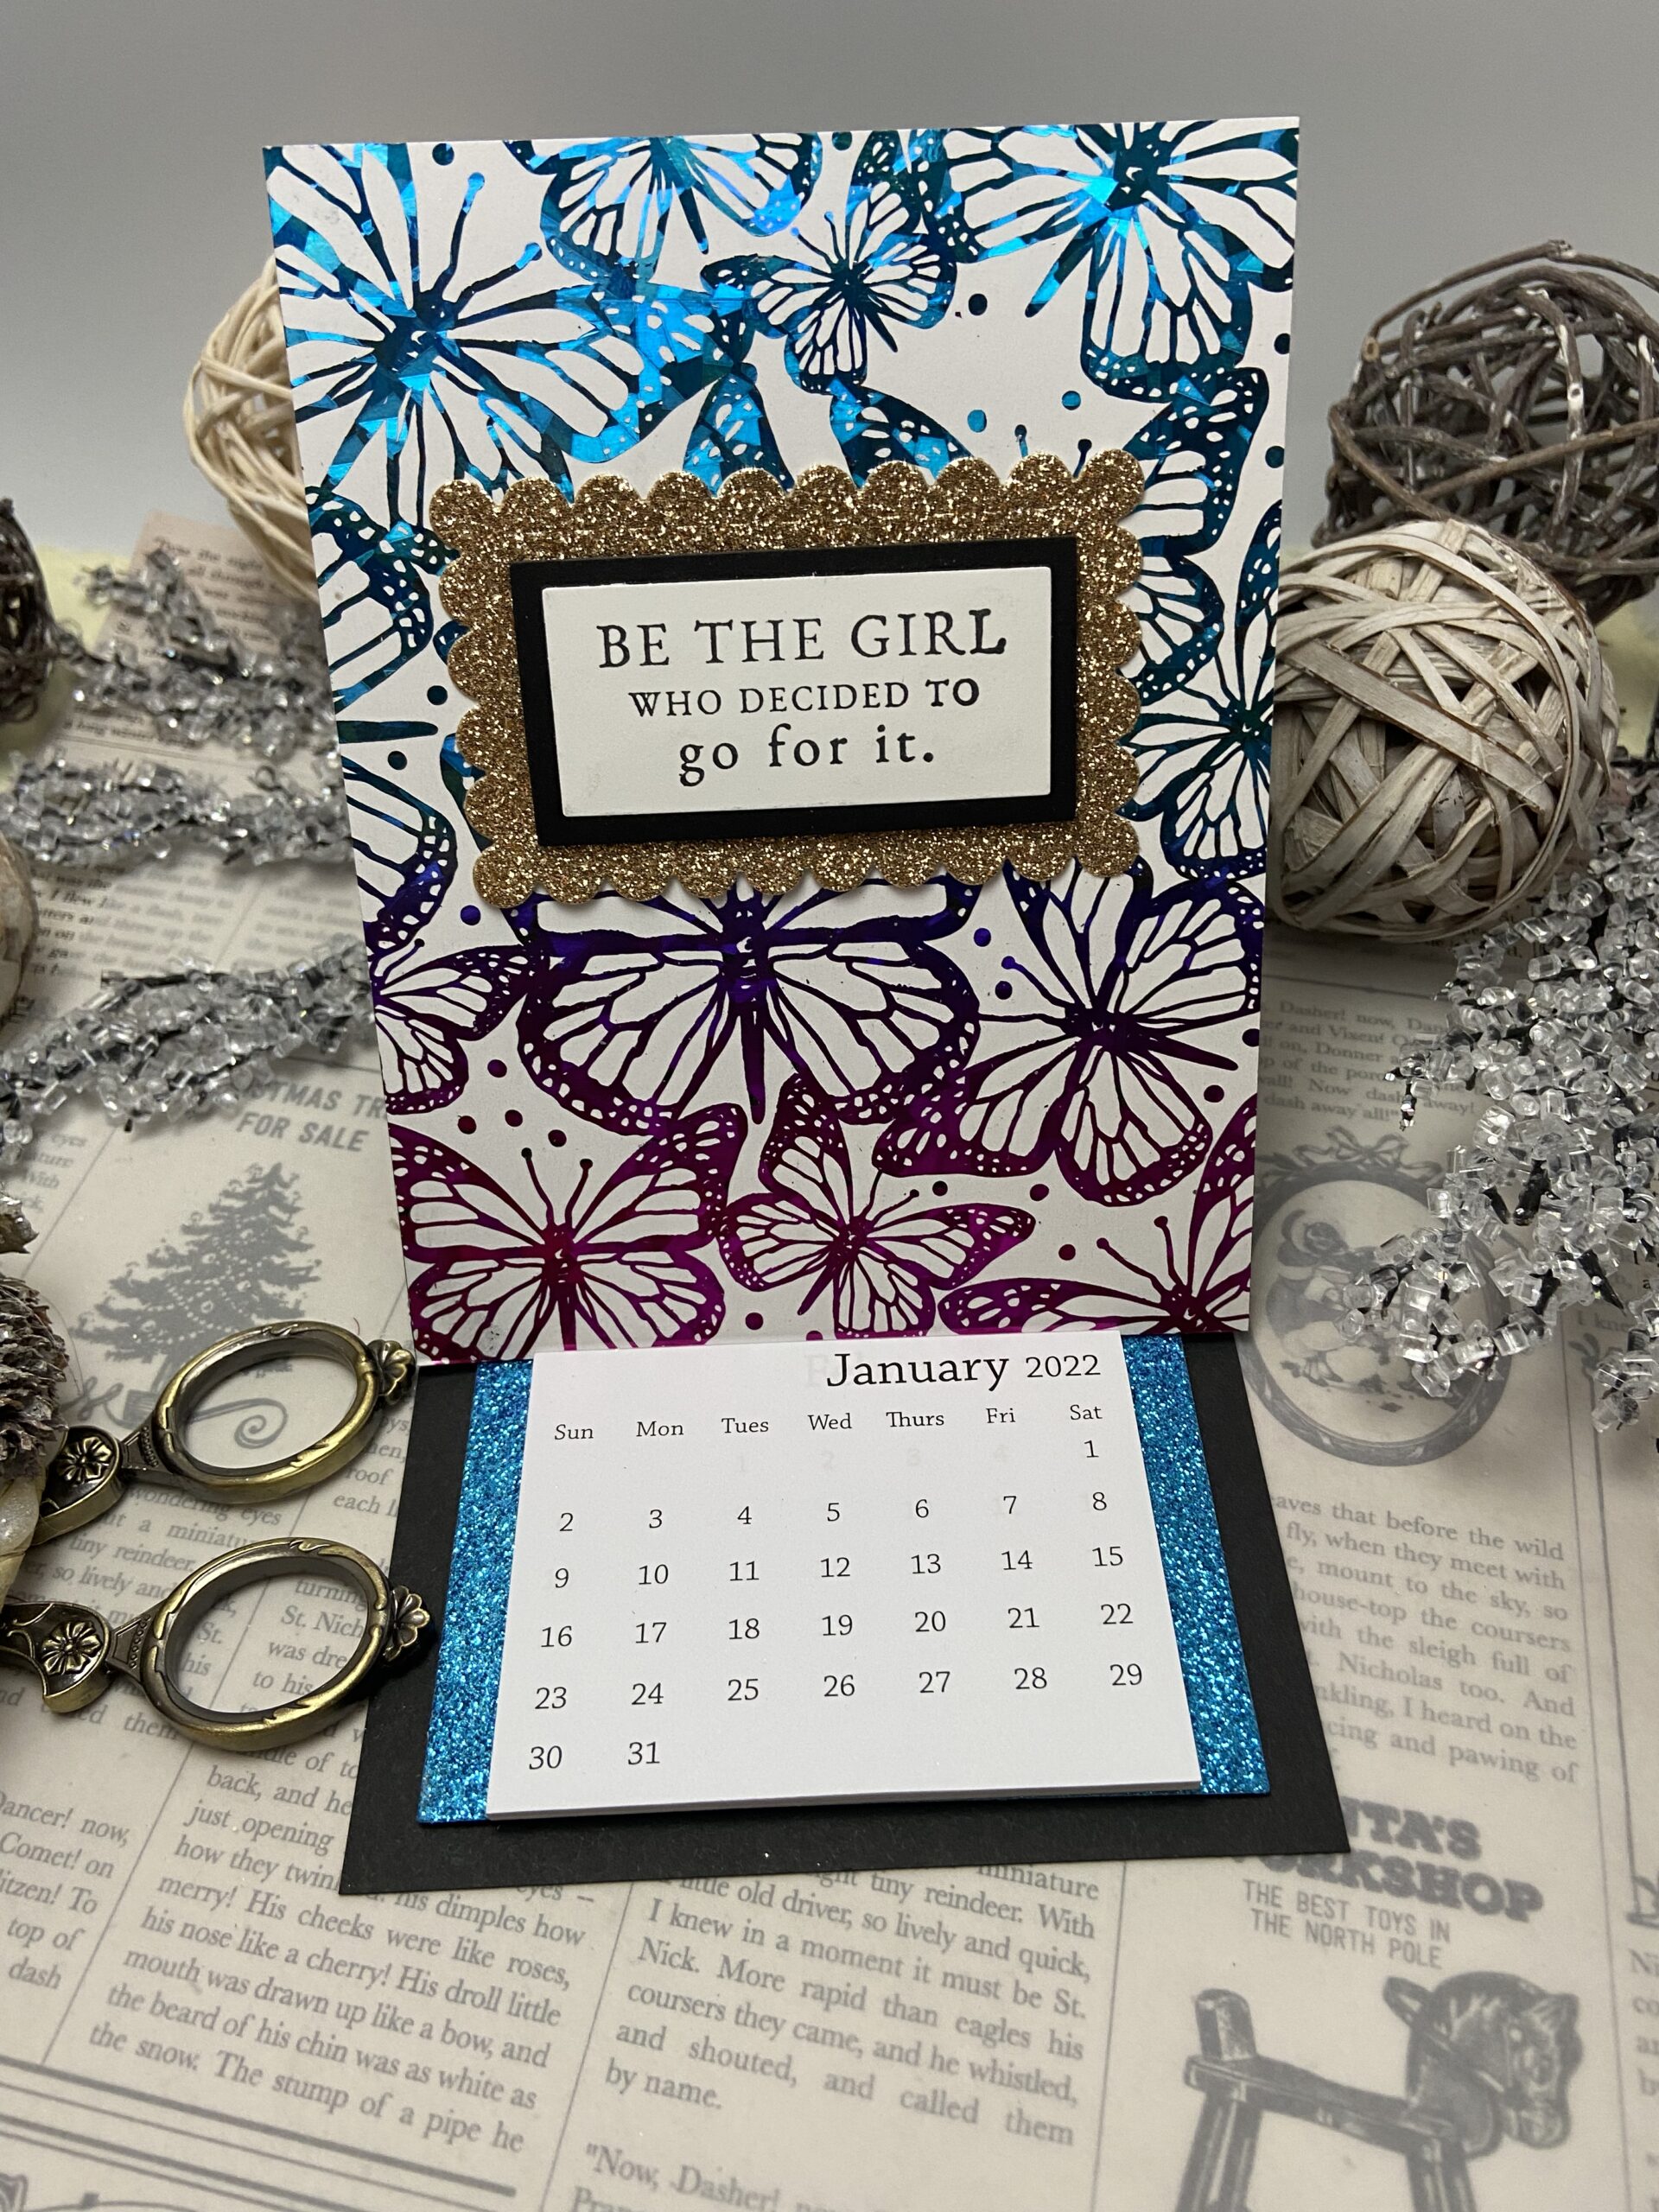
For sentiments I batch them usually pulling a few Sentiment kits out. I cut Neenah 110# in half and place it in my Misti then I place a bunch of sentiments in the Misti with enough room around them to I can die cut them. I’ll stamp 5 or 6 pages of these then swap out the sentiments and do it again. When I’m watching tv or listening to a pod cast I mindlessly die cut out all the sentiments and organize them in piles. Then I put them in 12 pocket sleeve in a three ring binder. Now I have cards ready to send but usually I will make gift sets and package 4-6 cards for friends or hostess gifts. I will usually give the cards without sentiments attached and then include various die cut sentiments for the recipent so they can decide what they need. I will add Thermoweb tear tape to the back of the die cut sentiments so the recipent can just pull off the release paper. Below are several examples one with sentiments and some blank. I’ve listed the Stamp sets i used under each picture.

Sentiment Kits Hearts of Autumn (8/2020) & There Is No Reason (8/2018)
September 2017 KOM I plan on using these squirrel tags for jars of homemade trail mix.

Autumn Dream & There Is No Reason (8/2018)
September 2017 KOM
Warm & Cozy August 2019 KOM
This is my favorite pattern paper those nails❤️
KOM 9/2017

Later this week I will share how I package cards for gifts with simple Dollar Tree supplies.

Thank you so much for stopping ❤️

Growing In Unity Day One… Fall Pumpkins 

My first projects feature some of my favorite sets Pumpkin Patch Background and Fall To Go. I used a sentiment from Hey There Pumpkin. I made two A2 cards and a tag. I like to keep sentiments on the front of my cards generic so I customize them with a sentiment on the inside when I’m ready to use them. the cute ”Hey Pumpkin” will work for just about any occasion.

All my projects today are colored using Copics. I have a couple tricks I like doing for Fall stamping and its to use brown ink. I start by using my Misti and Gina K Charcoal Brown Ink all her inks are Copic friendly. Next I color all my images. Then I put my panel back into the Misti and stamp over the colored image in Versafine Claire Pinecone. Versafine inks are a pigment so they sit on top of the card stock and make all the lines of the image come back into focus. When I have a stamp set out I always stamp it mulitple times sometimes they all turn out and sometimes the first one is practice coloring. I also like to have lots of tags on hard and I think its fun to use background stamps and die cut part of the image. A great way to stretch your supplies. Another tip is after I’m done die cutting my projects I always spray them with Thermoweb’s Ultra Fine Glitter Spray. I used Iridescent today, it also comes in Gold and Silver it does two thinks seals your work and gives the most beautiful sparkle without distorting your image the way shimmer pens do.

Thank you so much for stopping by!

Christmas Gift Calendars with Therm O Web Toner Card Fronts

Creating gifts with your card making supplies is a great way to make quick and easy gifts for friends and family. I made thirty of these calendars they look like a card but when you open them they are the cutest little desk calendar and the recipient can admire it for the whole year. The mini calendars can be found on the Taylored Expressions website.

I started by pulling out some of my favorite toner card fronts from Therm O Web and matched images with foils. I knew I was going to be making lots of these so I chose a variety of foil colors making sure I had both masculine and feminine looks. I also saved all the negative foil pieces because I was going to use those as well.


The photos so you how they look closed they fit into a standard A2 envelope. The next photos show what they look like opened the stand up on your recipients desk. Aren’t they pretty? So shiny and a beautiful reminder of you for them the cherish all year long.

Here’s how to make this version

Cut an 8 1/2 by 11 card stock card base in half to create a top folding card.

Score at 5 1/2 and again at 2 3/4. Fold both score lines.

Add Therm O Web tear tape to ONLY the small bottom portion of the 2 3/4 section of your card base. This is where you adhere your foiled card front. I added a piece of patterned paper from my stash to the back of the foiled front for extra sturdiness and a decorative feature on the back.

Then I lined up the toner piece to the card base and attached them together.

Next it is time to place the calendar to the inside. You want to add it to the bottom of the inside low enough to create a stopping point to when opened the foiled front has a place to rest.

I die cut a piece of cardstock using Therm O Web’s stitched rectangle dies.

They come in a set of single stitched and double stitched. These are some of my favorite dies and when used together they nest perfectly for a tiny little border a great investment for your stash. They come in multiple shapes, rectangle, square, circle and oval. I have all the sets.

Then I layered the rectangles die cut I added my calendar over the top with foam tape.

now you have a shiny mini desk calendar. The only thing left to do is add a sentiment to the front. I used stamps from my stash.

I’m a huge fan of Unity Stamp Company they have the best encouragement sets. All the sentiments featured are from various Gracille Designs kits. Right now Unity is having the best sales of the year so it’s a great time to add to your collection.

This last one is a sneak peak into tomorrow’s post showing how I made a calendar using the negative foil. I’ll also show you an alternative fold to create desk calendars. Thanks for stopping by❤️

Christmas Ornaments with Therm O Web products

Today I’m sharing a few Christmas tree ornaments using cute frame ornaments I picked up at Hobby Lobby combined with my paper crafting supplies and Therm O Web products. This year I wanted to make gifts and not just cards, these are my first projects and I love how they turned out and were pretty easy to put together.

Here’s my first ornament I’m making several of these for family and friends who have dogs. Once they receive it they can insert of picture of their pup. The sentiment behind the plastic dome pops out. I wanted it to look pretty so I used a piece of foil that I had previously used with a Unity Stamp Company toner card front. I always save those foils for projects like this one.

I used Therm O Web adhesive sheets, it’s double sided adhesive. First I placed it on white cardstock, then I peeled of the top layer of the sticky sheet and place the foil of top and smoothed it out then die cut it with a circle die. Really simple and instant shiny foiled goodness. The back of the ornament is a Whipper Snapper Designs stamp I colored with Copics. Then I used Therm O Web Peel and Stick Toner sheets to die cut my sentiment happy holidays, that is from the Unity Stamp/Therm O Web Collaboration kits for the Holidays. I foiled a strip of the toner sheet with the foil color of choice shiny side up and then I die cut it. The peel and stick toner sheets have the adhesive on the back and it’s perfect for tiny intricate dies like this one. Once it’s foiled and die cut the release paper comes of easily and you simply stick it where you want it.

My Next two ornaments are little shakers fun ornaments for kids especially little micro beads are sealed inside the ornament to look like snow. Both use a variety of toner card fronts and foils available on Therm O Web’s online shop.

You really just need some circle dies the foils you want to use to coordinate with you design and good adhesive. As much as I love the foil and toner card fronts I adore the adhesive I cannot live without my Gina K Designs dot tape runner Therm O Web makes as well as their Ultra Bond liquid glue it’s the best and I’ve tried lots of different kinds.

If you can’t source the ornaments you could make something very similar creating a circle frame with fun foam or Thermoweb does carry a double sided adhesive foam that would work perfectly too and make it really easy to decorate.

thanks so much for stopping by. I’ll be sharing lots more Christmas projects in the coming weeks I hope to see you again soon, please let a comment or question if you have any!❤️

Thermoweb Time To Fly

I have two cards to share using one Time to Fly butterfly slimline card front. The first card is a full size slim line. I used Rainglow and Ocean Deco foils. The rain glow is 6×6 inches so I needed more foil for the bottom portion of the card, I used a small leftover piece of Ocean Foil. I overlapped the foils and ran then through the laminator at the same time.

Next I colored small butterflies with Copics in a rainbow assortment and die cut them. I die the the slimline using Pinkfresh Studio dies and added a little Kraft patterned paper from my stash for the bottom.

The sentiment is from the Thermoweb Gina K Designs stamp set.Thermoweb still has this set available it’s an oldie but a goodie I reach for it often. Then I simply popped the butterflies up the card using Thermoweb foam squares that coordinated with the foil colors.

My second card is a bonus. I used the negative foil from the Rainglow and adhered it using spray adhesive to a piece of white cardstock. Then I die cut a frame with Unity Stamp Company patterned paper. The sentiment is also a Unity stamp from their new Rainbow sentiment kit for April 2021. Lastly I die cut a butterfly out of white, I think it really pops off that shiny Rainglow foil and makes it shine.

thank you for stopping by!

Thermoweb Tome to Fly Clear toner sheets

My first card uses the dragonfly clear toner sheet foiled with Deco Foil Gold. My idea for both cards was to use the clear sheets as an overlay on Copic colored card fronts. The stamp set used is from Unity Stamp Company, I love all their stamps they are the highest quality red rubber stamps you will find. This kit is designed by Gracielle Designs called Strength & Hope, the dragonflies are so detailed and really pretty simple to color.them I ink blended a piece of cardstock with Taylored Expressions Blue Raspberry and Cookie Monster inks and randomly stamped the dragonflies over the ink blending for some texture. I used a Taylored Expressions frame die on the ink blended cardstock, I saved the center for a future card.. I then cut four additional frames out of thick cardstock to give some dimension. I used Thermoweb’s liquid glue it’s my absolute favorite to adhere the foiled acetate to the back of the ink blended frame. Then I adhered the additional frames behind that to sandwich the acetate. It gives lift and makes the frame more sturdy. Then I placed the frame over my Copic colored front and popped the whole thing onto a card base. This card took a little time to color and assemble but I think the end result is worth it. The foiled dragonflies hovering over the colored images is really pretty. Below is a closeup photo to see the beautiful details of that stamp and the shine of the Gold Deco Foil.

My second card uses the same Unity Stamp set and this time I used Silver Deco Foil for the dragonfly clear toner sheet. I colored the image with Copic markers in a variety of purples and the bottom portion in dark gray to mimic a night sky. Then I ink blended the rest of the card using Taylored Expressions inks the colors are Jelly Donut, Plum Punch and Lollipop. Then I took the foiled acetate and put tiny drops of glue behind each little foiled dragonfly and adhered it directly to the colored card front. The sentiment is from the same Unity Stamp Company Kit. I liked the dramatic look of the dark background contrasting with the shine of the silver foil. Below is a close up.

I hope you enjoyed my projects for today and it gave you some inspiration to create something beautiful.❤️