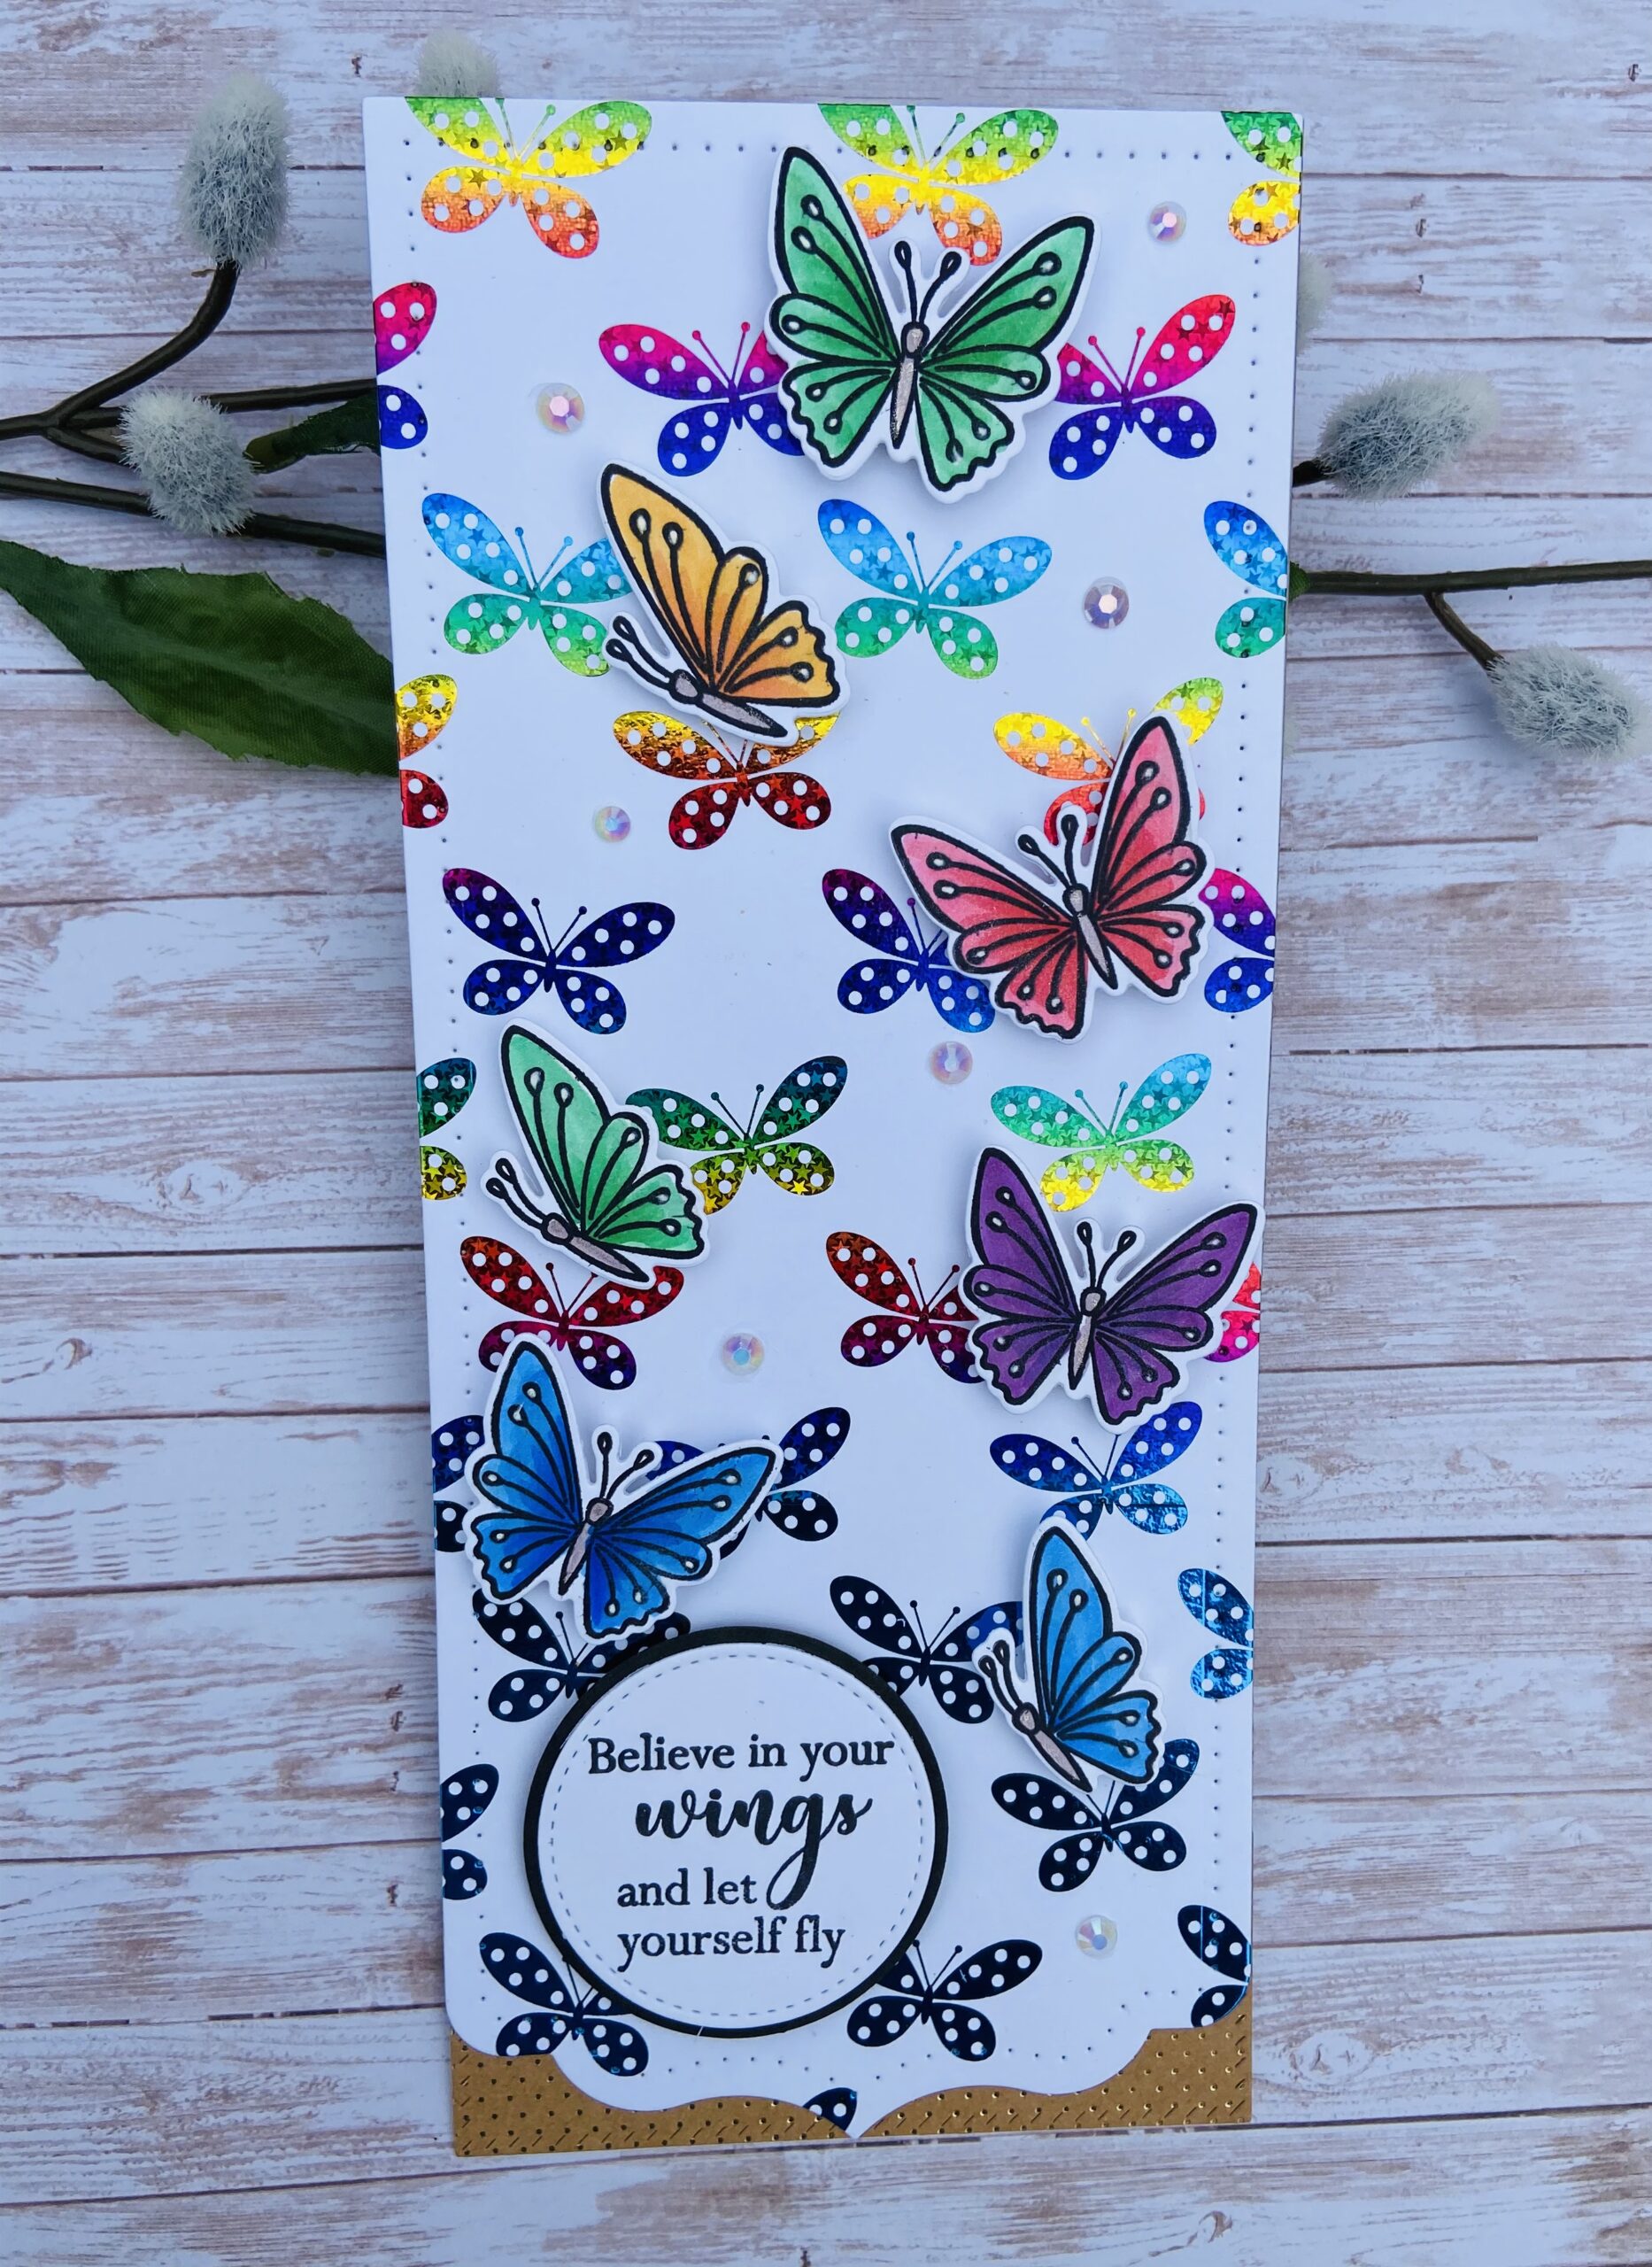
I have two cards to share using one Time to Fly butterfly slimline card front. The first card is a full size slim line. I used Rainglow and Ocean Deco foils. The rain glow is 6×6 inches so I needed more foil for the bottom portion of the card, I used a small leftover piece of Ocean Foil. I overlapped the foils and ran then through the laminator at the same time.
Next I colored small butterflies with Copics in a rainbow assortment and die cut them. I die the the slimline using Pinkfresh Studio dies and added a little Kraft patterned paper from my stash for the bottom.
The sentiment is from the Thermoweb Gina K Designs stamp set.Thermoweb still has this set available it’s an oldie but a goodie I reach for it often. Then I simply popped the butterflies up the card using Thermoweb foam squares that coordinated with the foil colors.
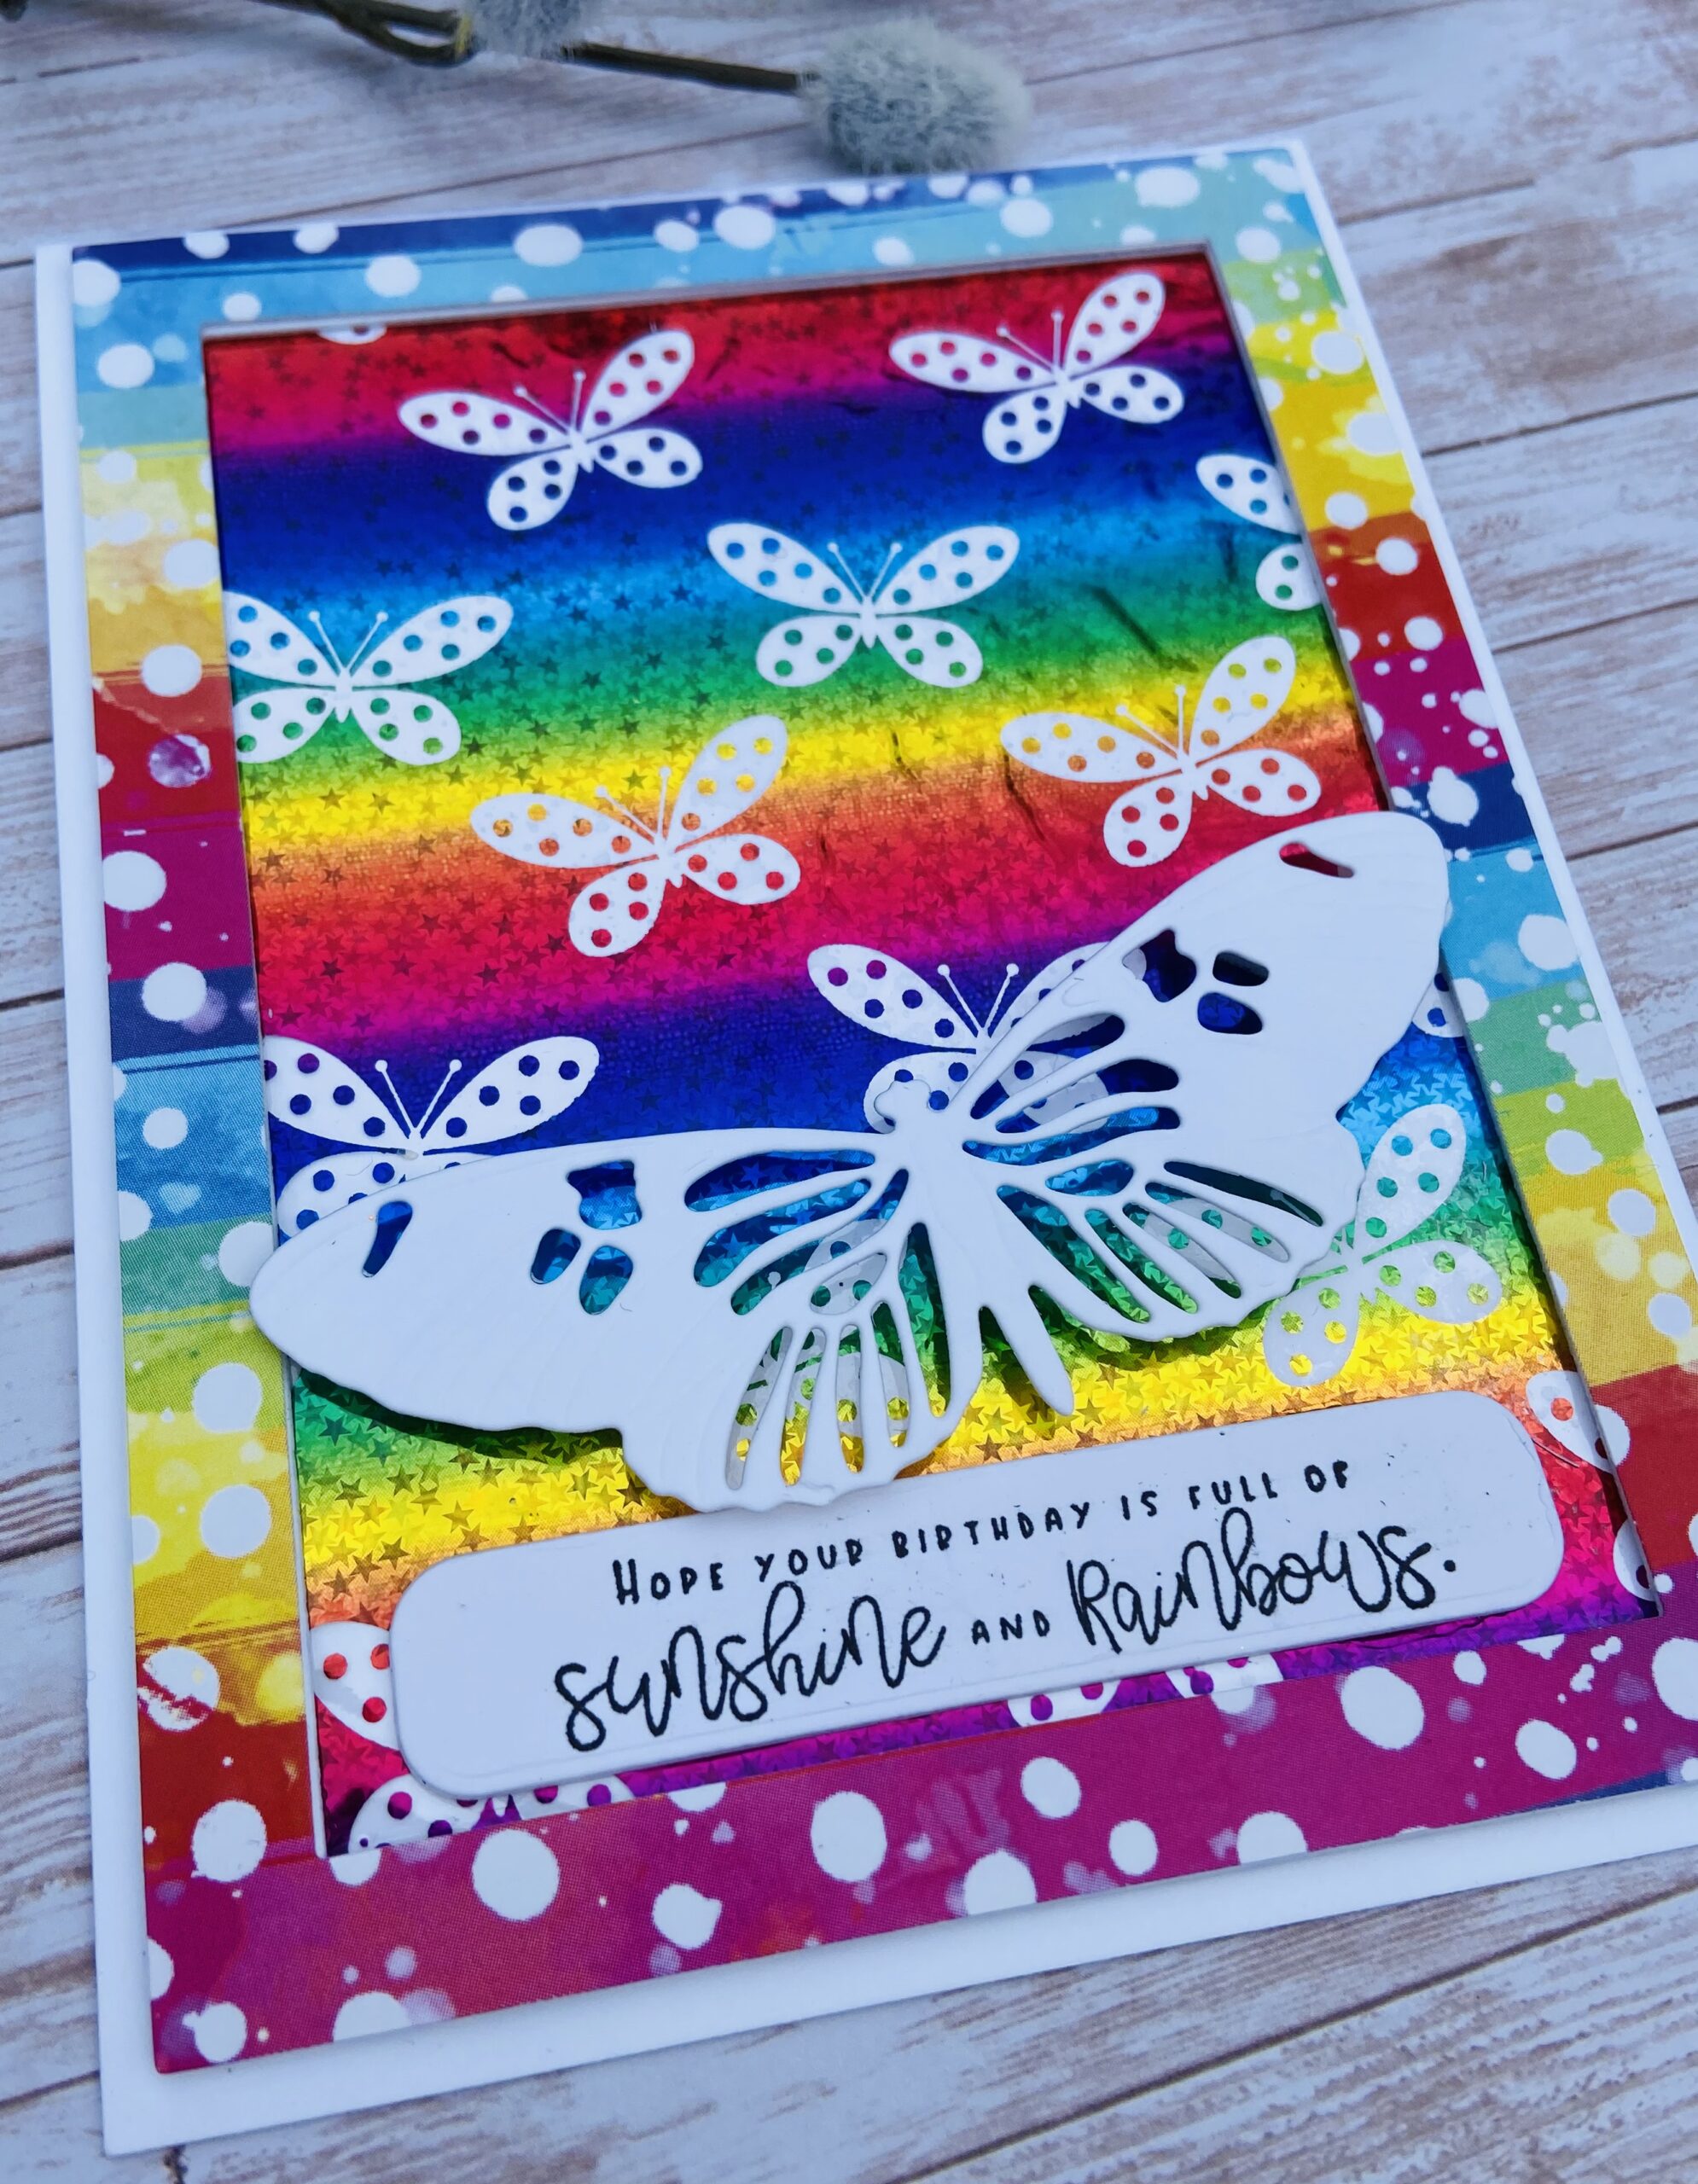
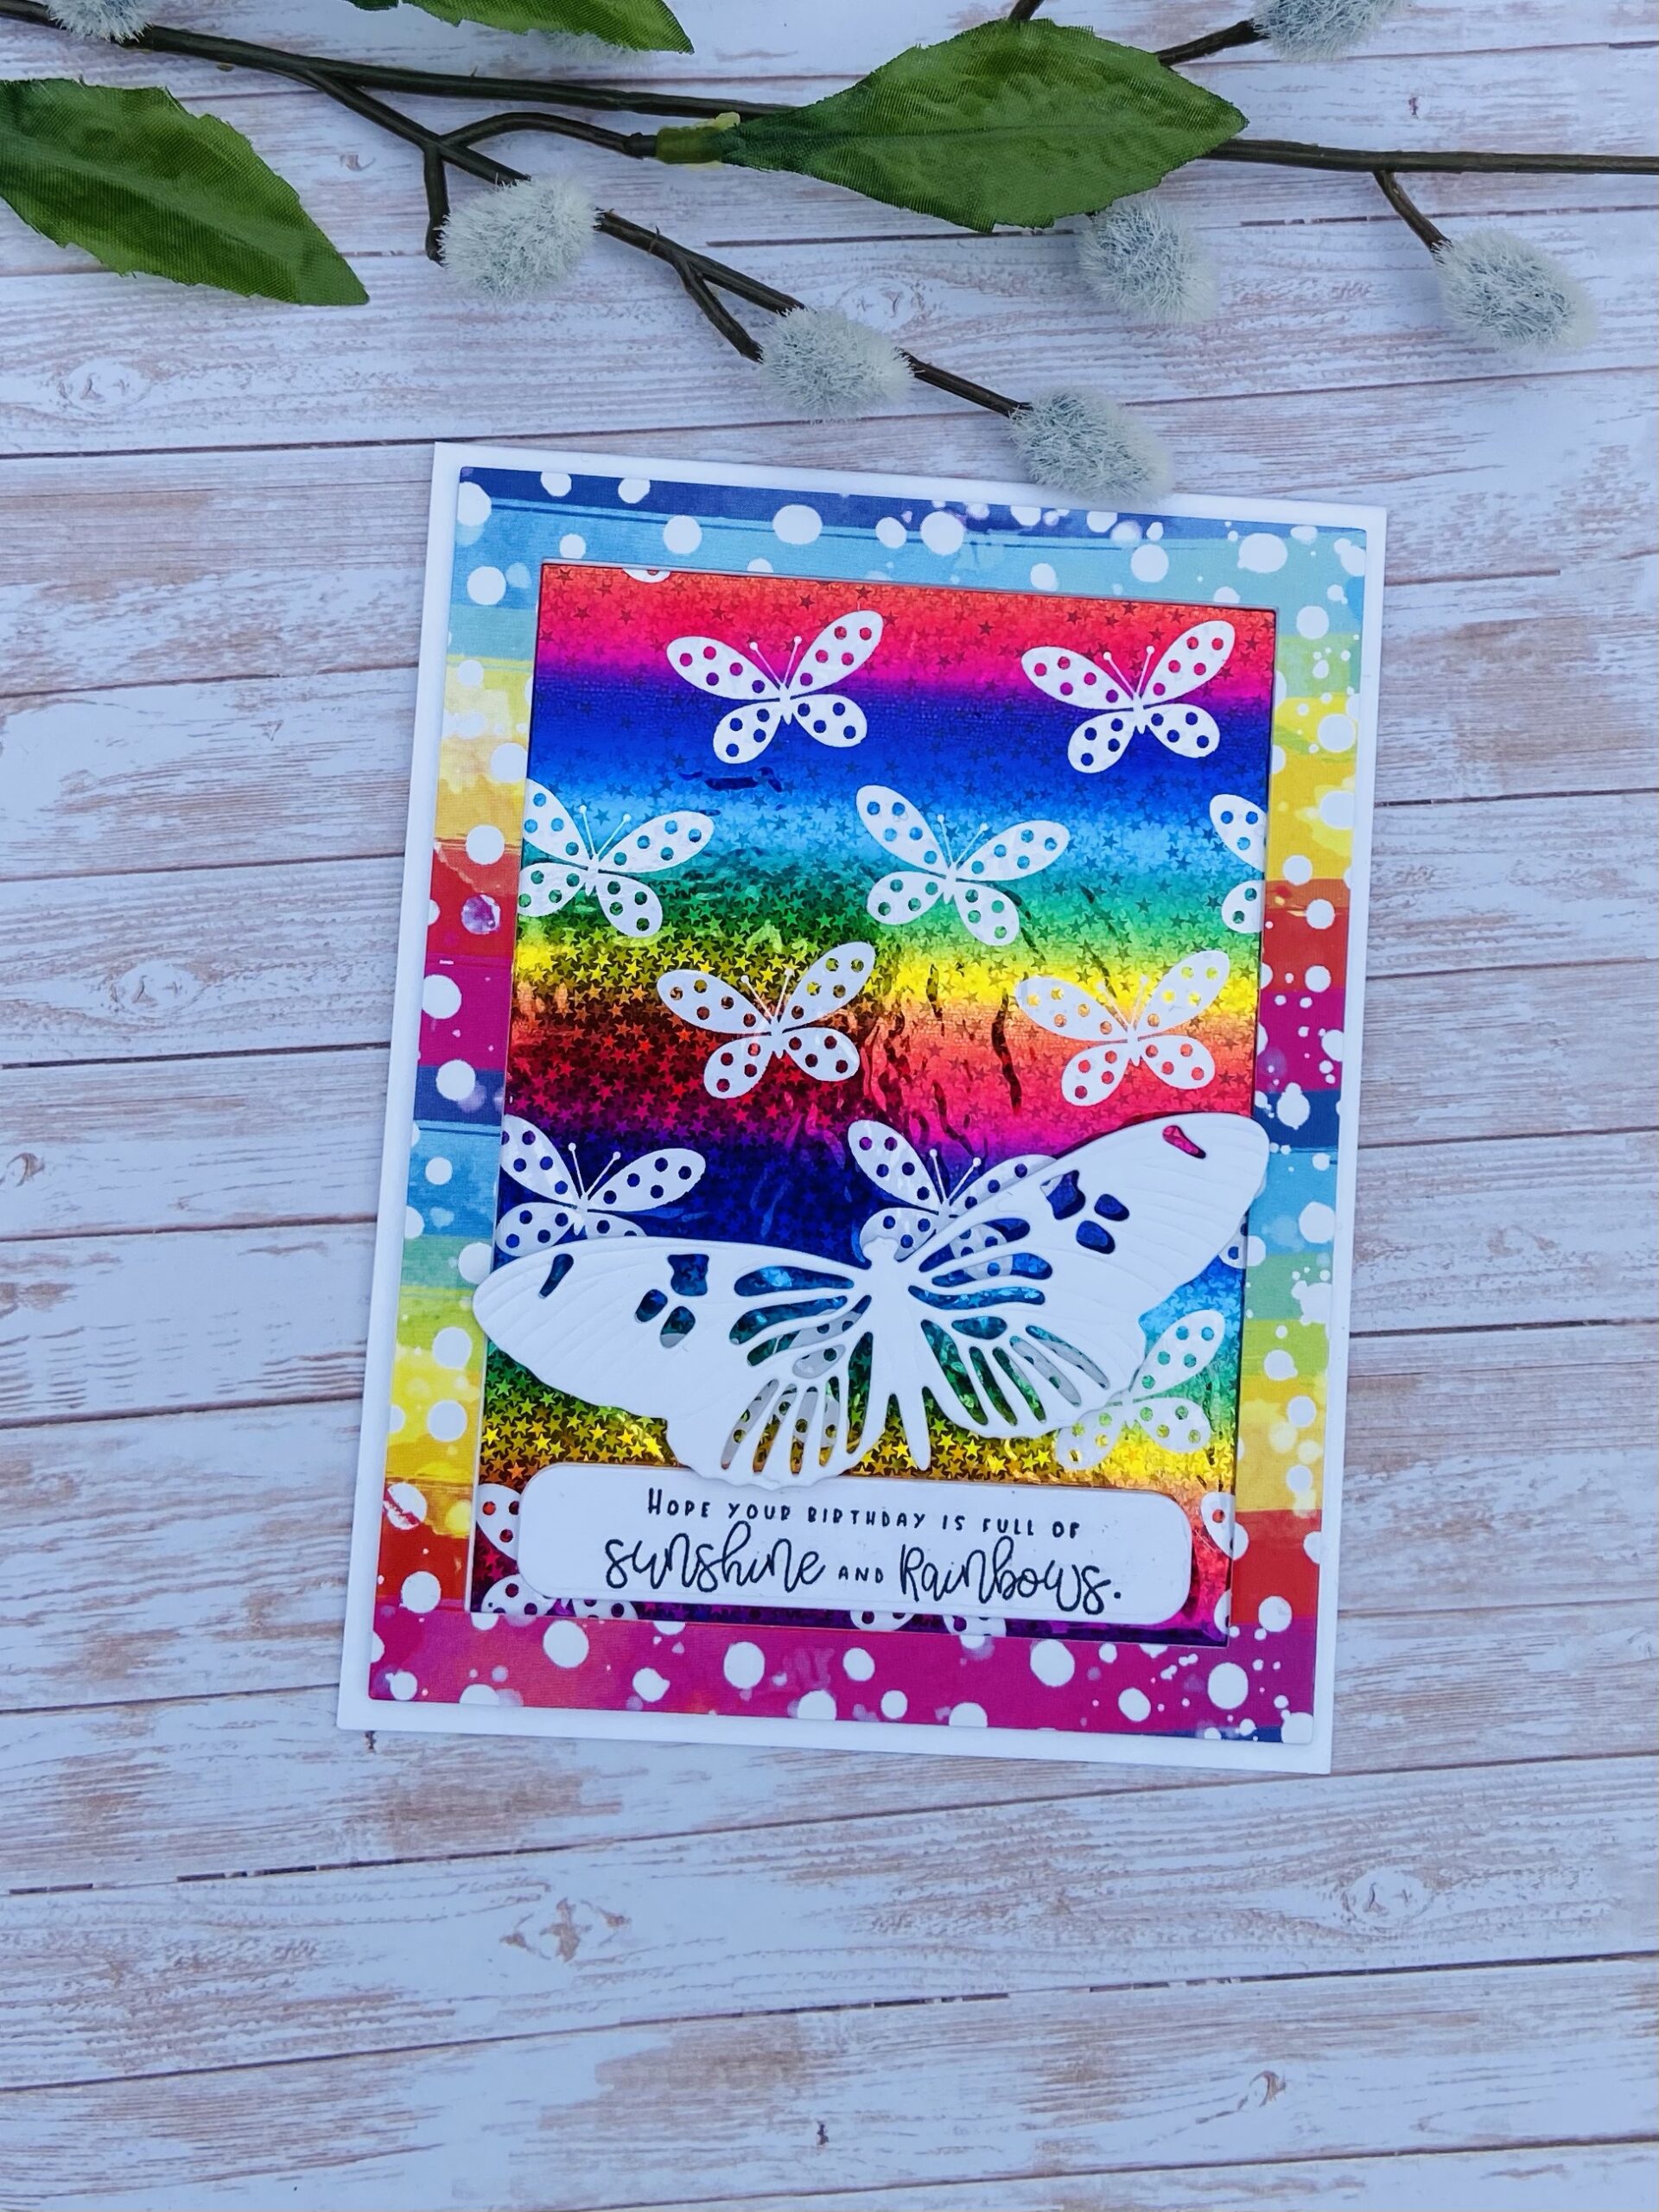
My second card is a bonus. I used the negative foil from the Rainglow and adhered it using spray adhesive to a piece of white cardstock. Then I die cut a frame with Unity Stamp Company patterned paper. The sentiment is also a Unity stamp from their new Rainbow sentiment kit for April 2021. Lastly I die cut a butterfly out of white, I think it really pops off that shiny Rainglow foil and makes it shine.
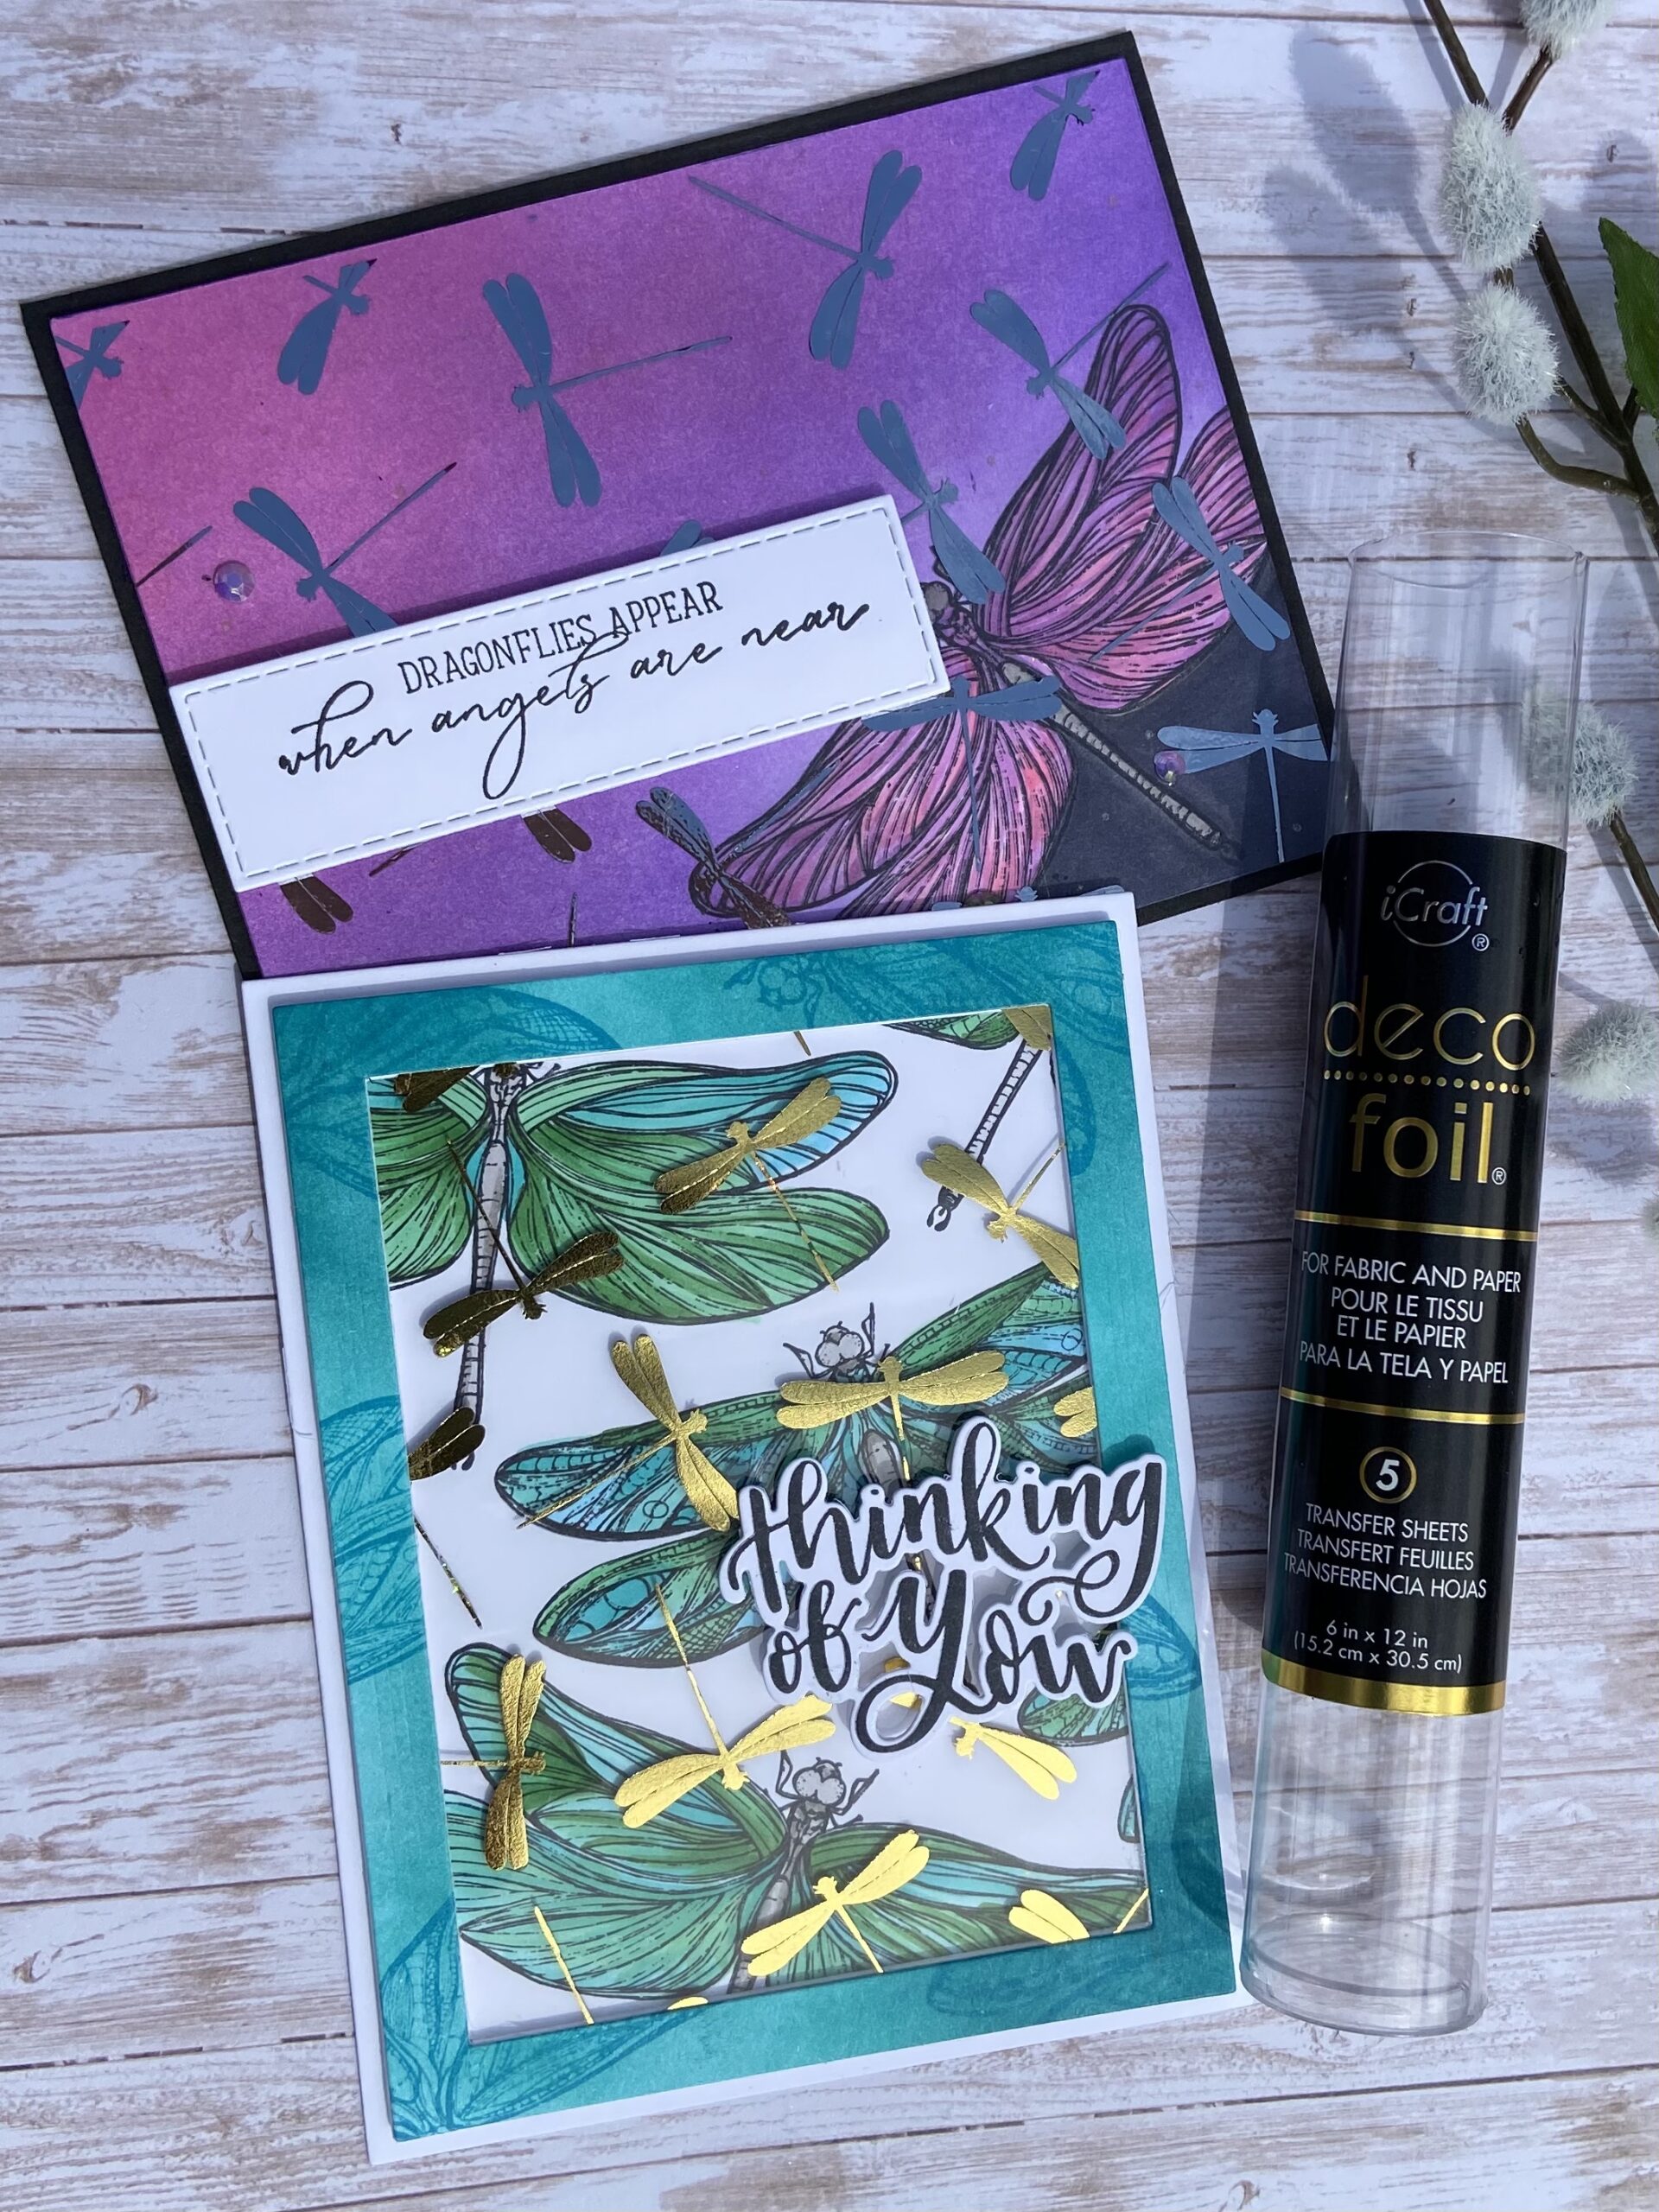
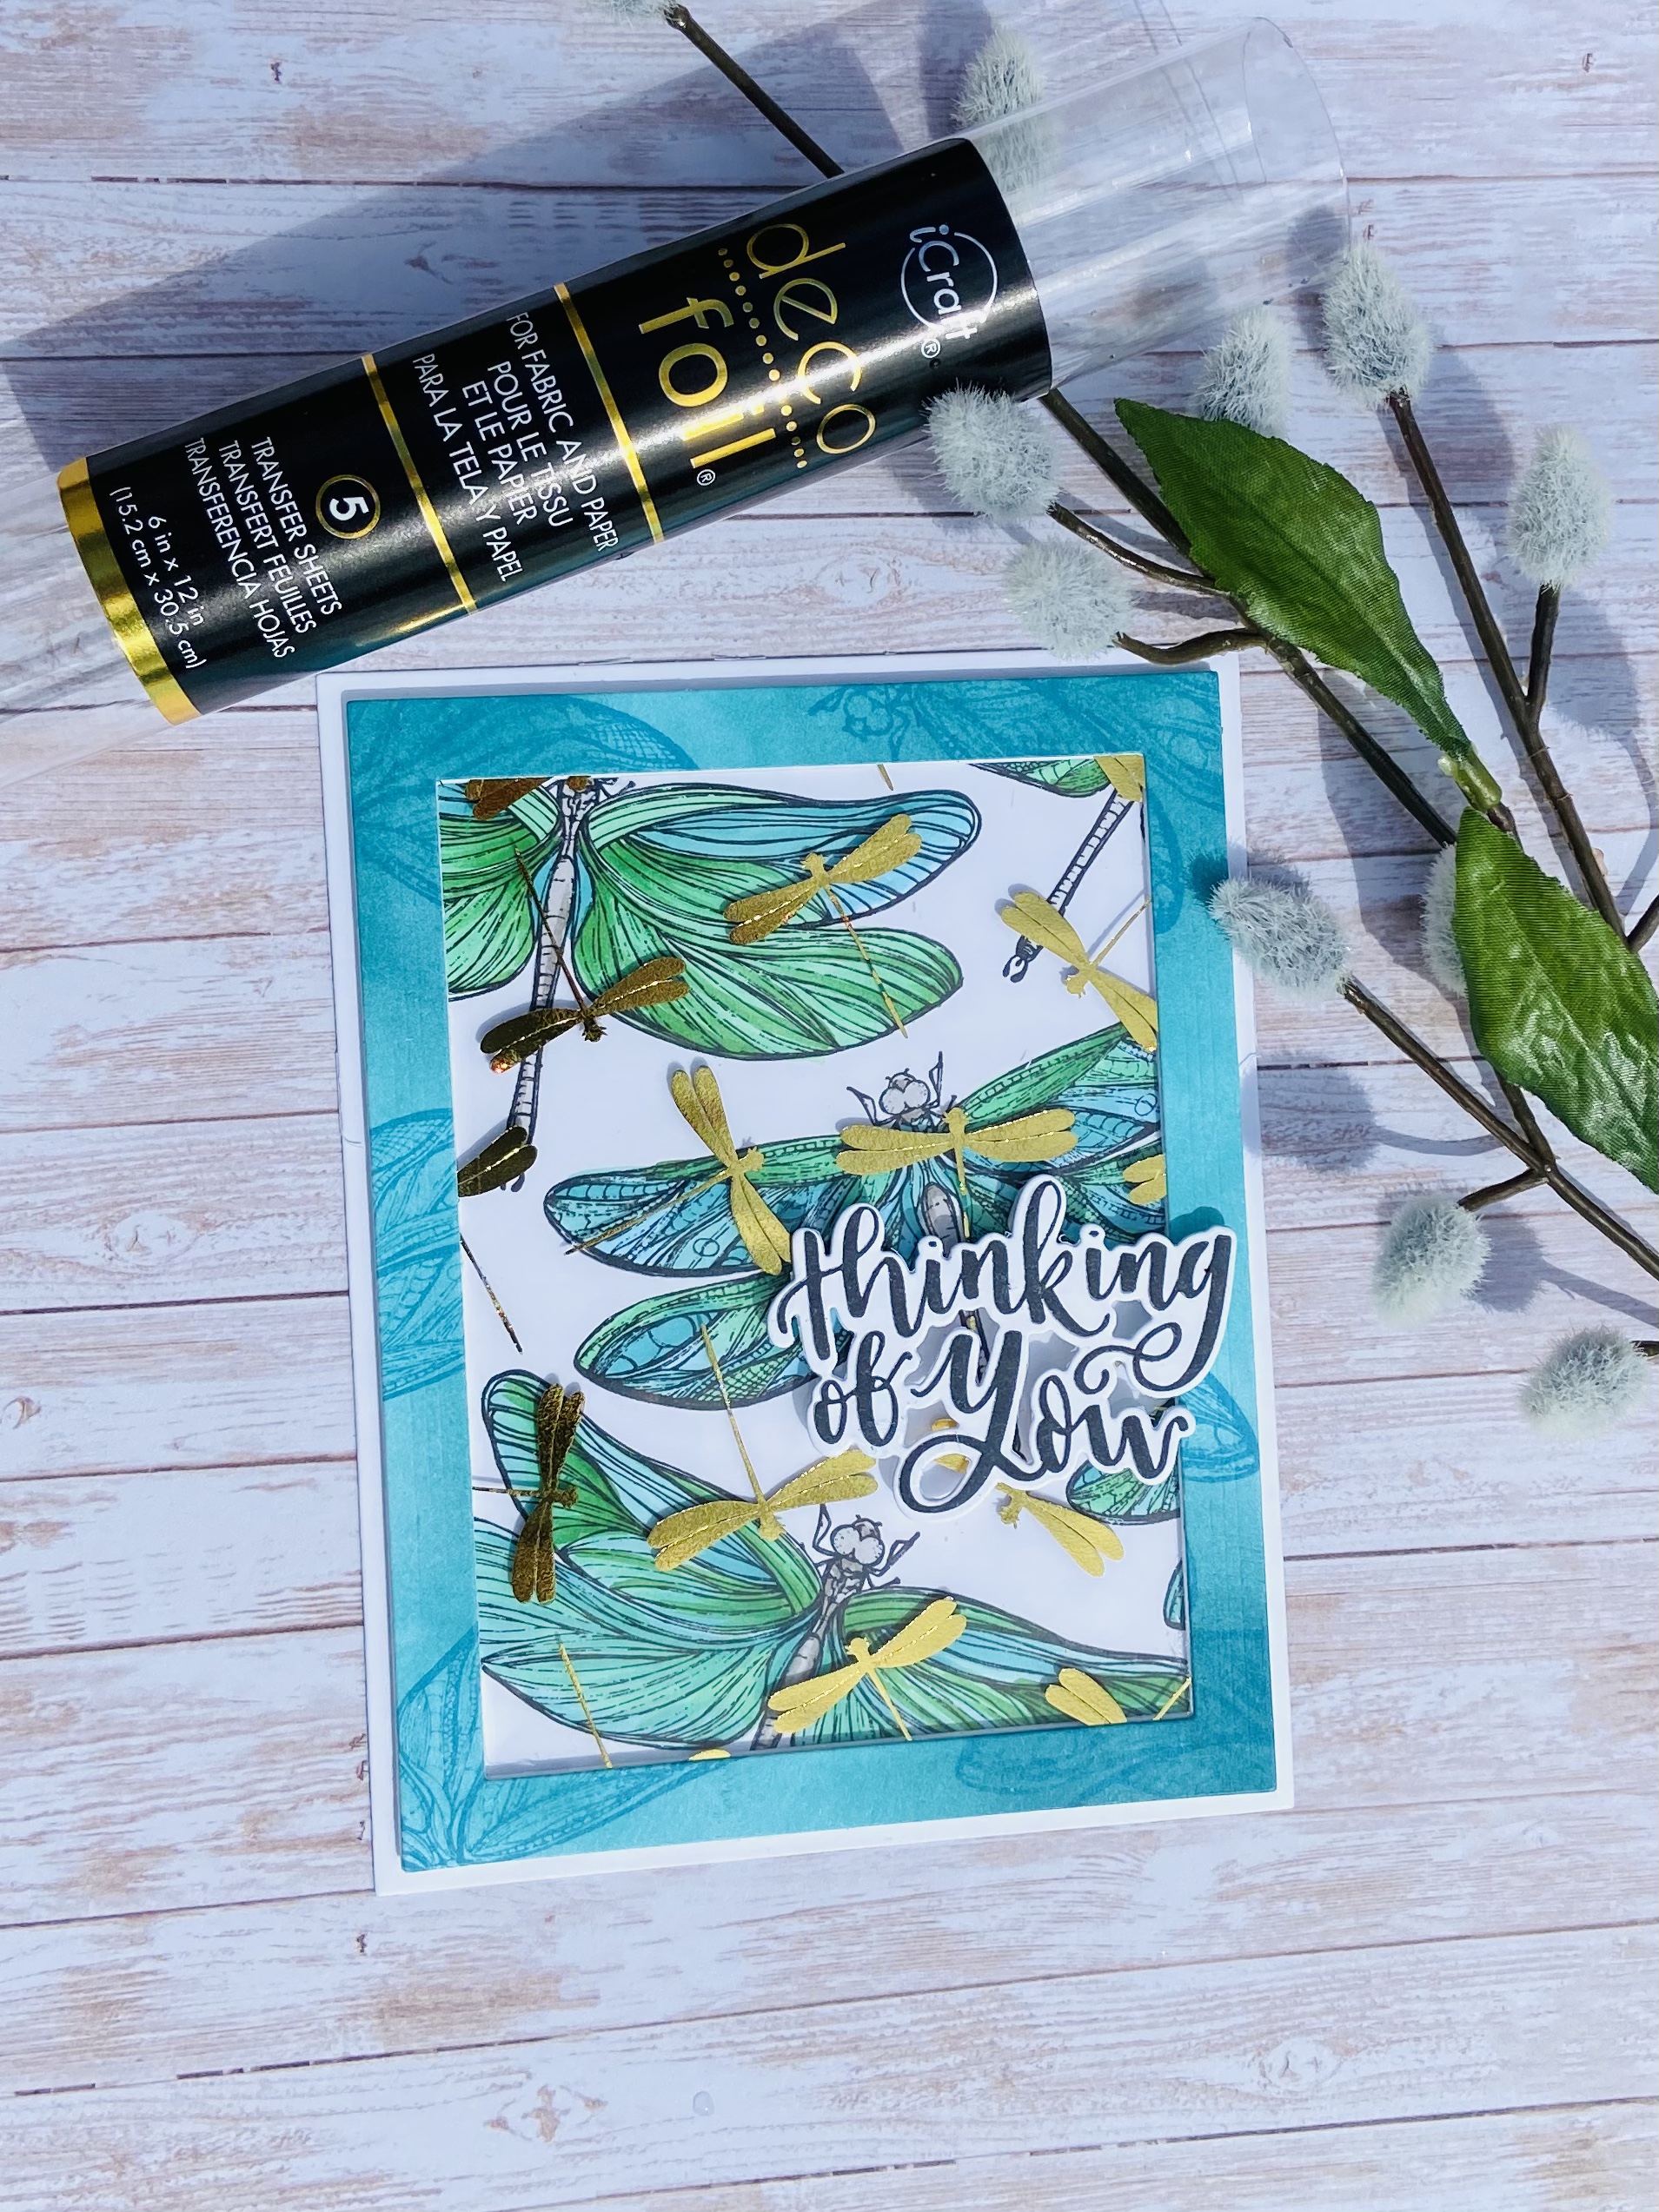
My first card uses the dragonfly clear toner sheet foiled with Deco Foil Gold. My idea for both cards was to use the clear sheets as an overlay on Copic colored card fronts. The stamp set used is from Unity Stamp Company, I love all their stamps they are the highest quality red rubber stamps you will find. This kit is designed by Gracielle Designs called Strength & Hope, the dragonflies are so detailed and really pretty simple to color.them I ink blended a piece of cardstock with Taylored Expressions Blue Raspberry and Cookie Monster inks and randomly stamped the dragonflies over the ink blending for some texture. I used a Taylored Expressions frame die on the ink blended cardstock, I saved the center for a future card.. I then cut four additional frames out of thick cardstock to give some dimension. I used Thermoweb’s liquid glue it’s my absolute favorite to adhere the foiled acetate to the back of the ink blended frame. Then I adhered the additional frames behind that to sandwich the acetate. It gives lift and makes the frame more sturdy. Then I placed the frame over my Copic colored front and popped the whole thing onto a card base. This card took a little time to color and assemble but I think the end result is worth it. The foiled dragonflies hovering over the colored images is really pretty. Below is a closeup photo to see the beautiful details of that stamp and the shine of the Gold Deco Foil.
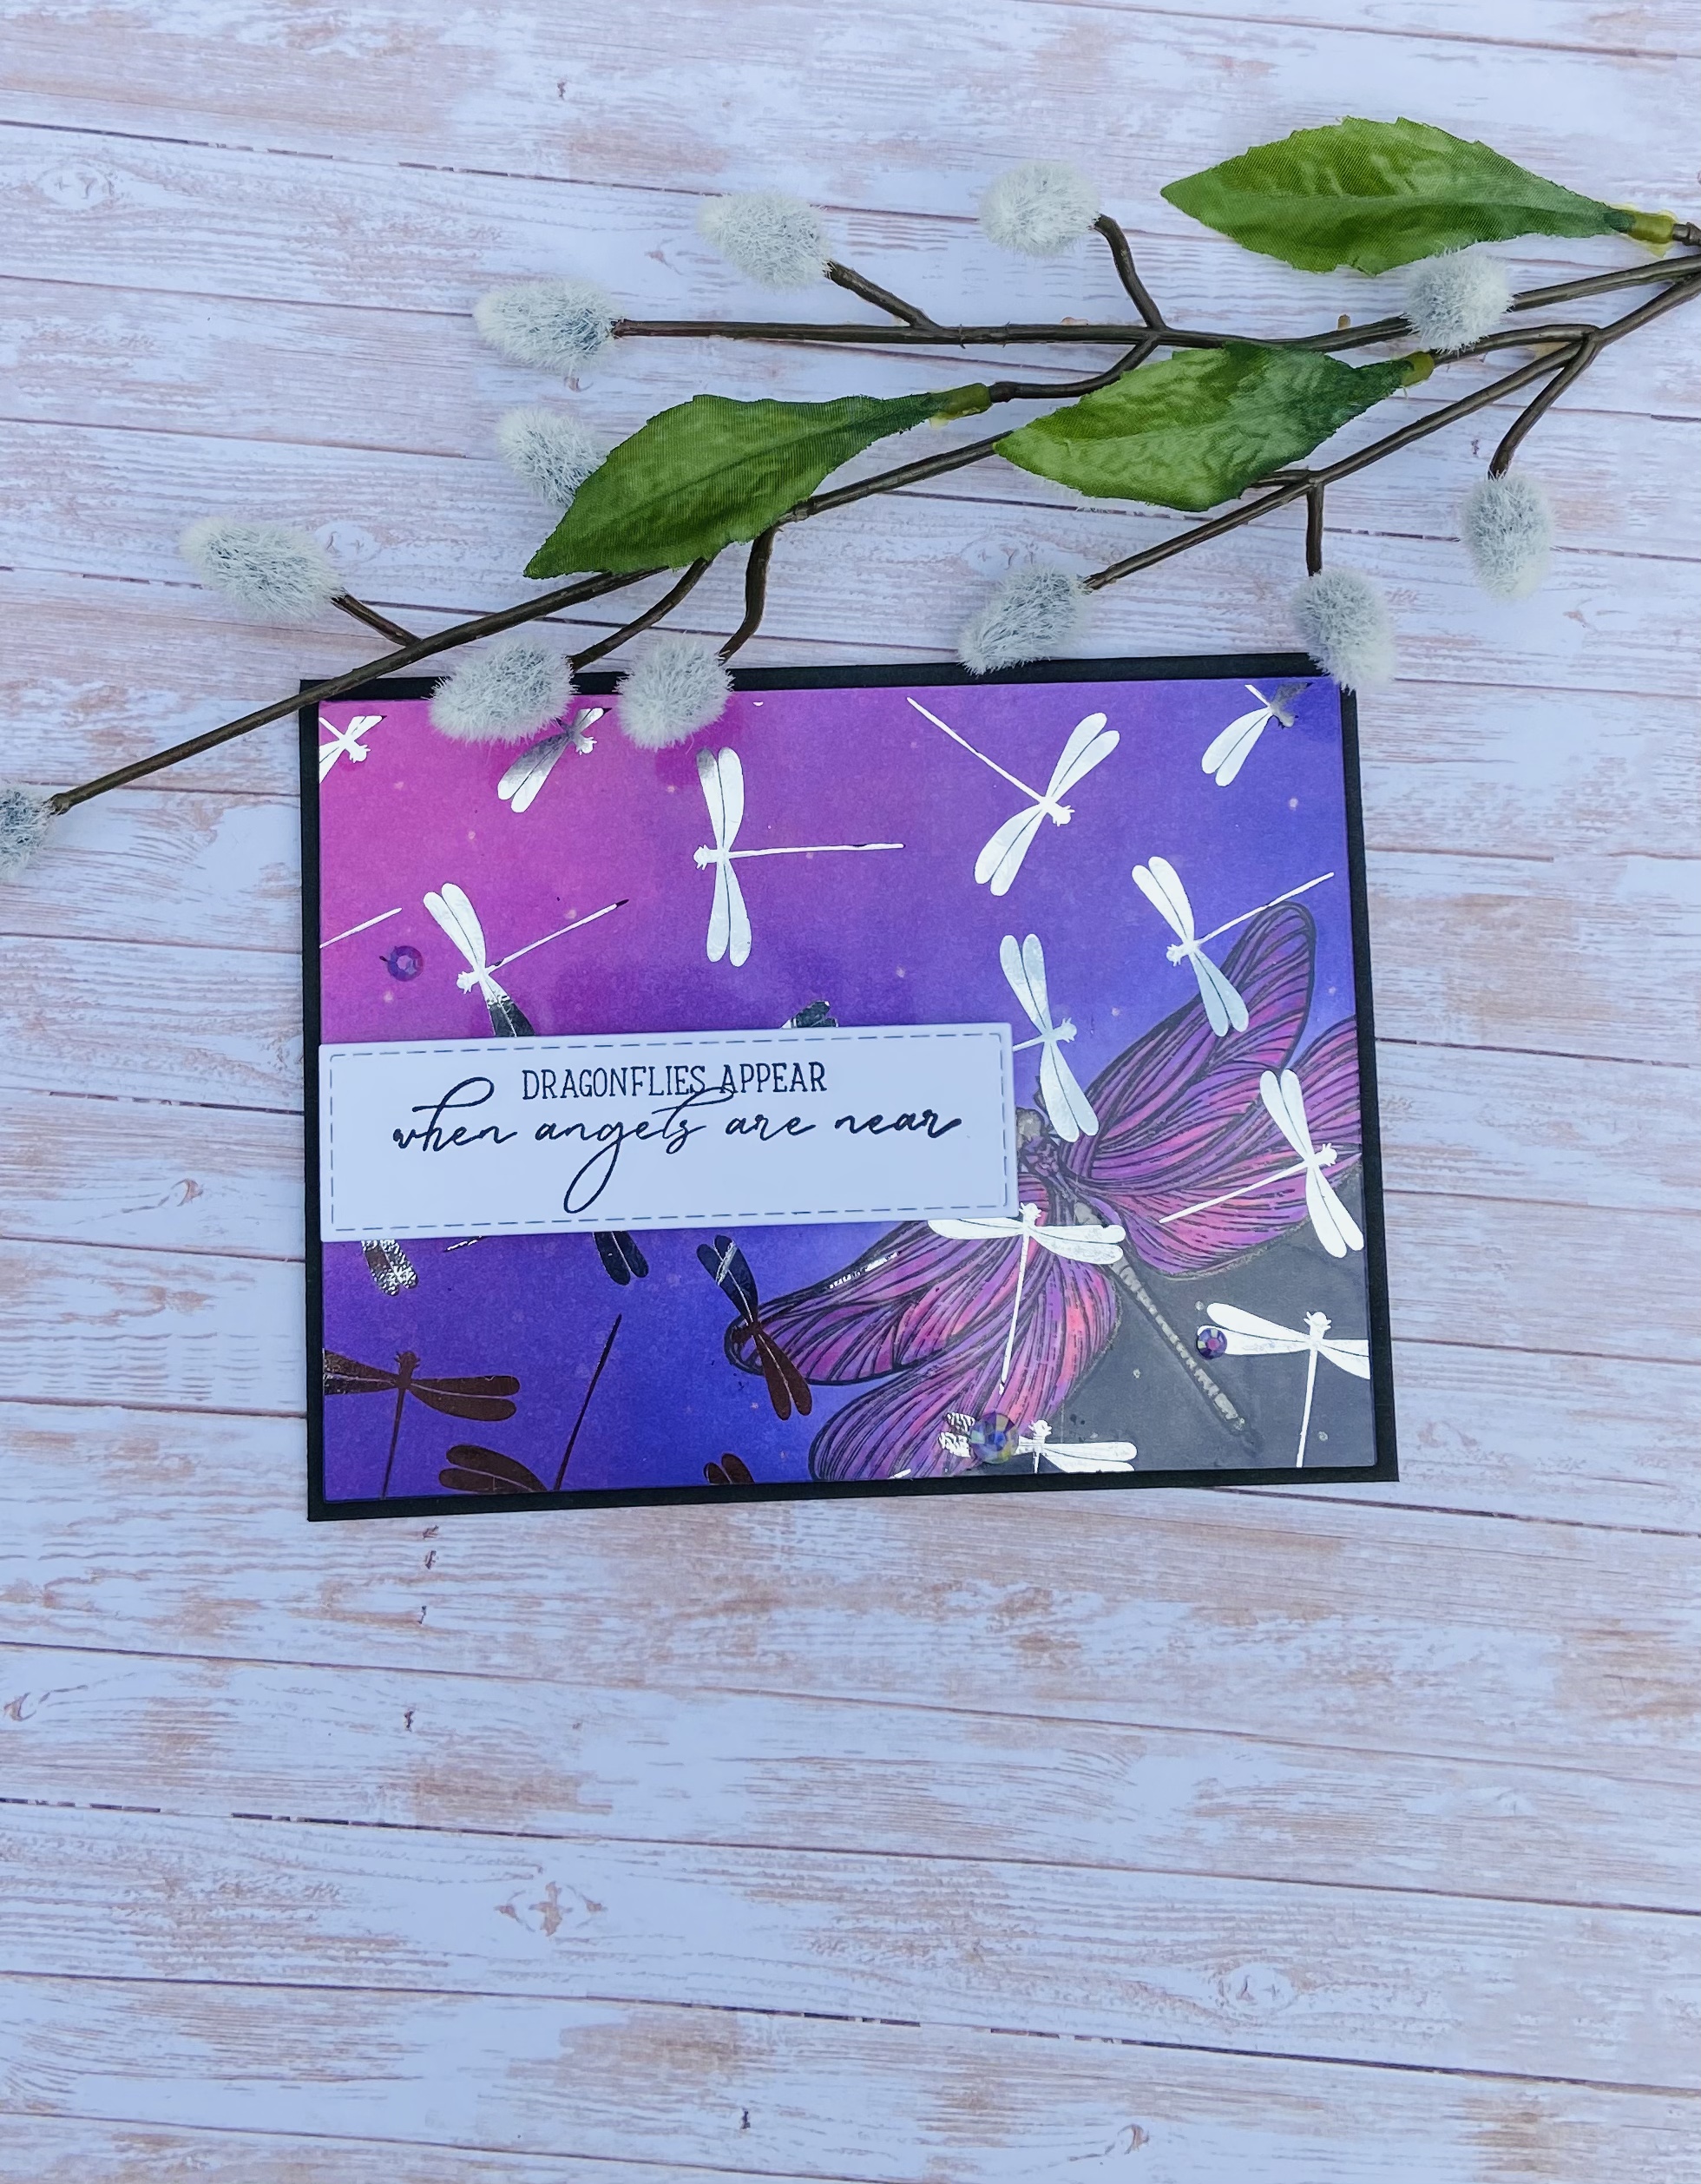
My second card uses the same Unity Stamp set and this time I used Silver Deco Foil for the dragonfly clear toner sheet. I colored the image with Copic markers in a variety of purples and the bottom portion in dark gray to mimic a night sky. Then I ink blended the rest of the card using Taylored Expressions inks the colors are Jelly Donut, Plum Punch and Lollipop. Then I took the foiled acetate and put tiny drops of glue behind each little foiled dragonfly and adhered it directly to the colored card front. The sentiment is from the same Unity Stamp Company Kit. I liked the dramatic look of the dark background contrasting with the shine of the silver foil. Below is a close up.
I hope you enjoyed my projects for today and it gave you some inspiration to create something beautiful.❤️
You can make quick cards with a tons of sparkle and shine using Thermoweb toner card fronts. Sometimes I just turn on my laminator and run a bunch of toner fronts through to use for future cards I need in a hurry.
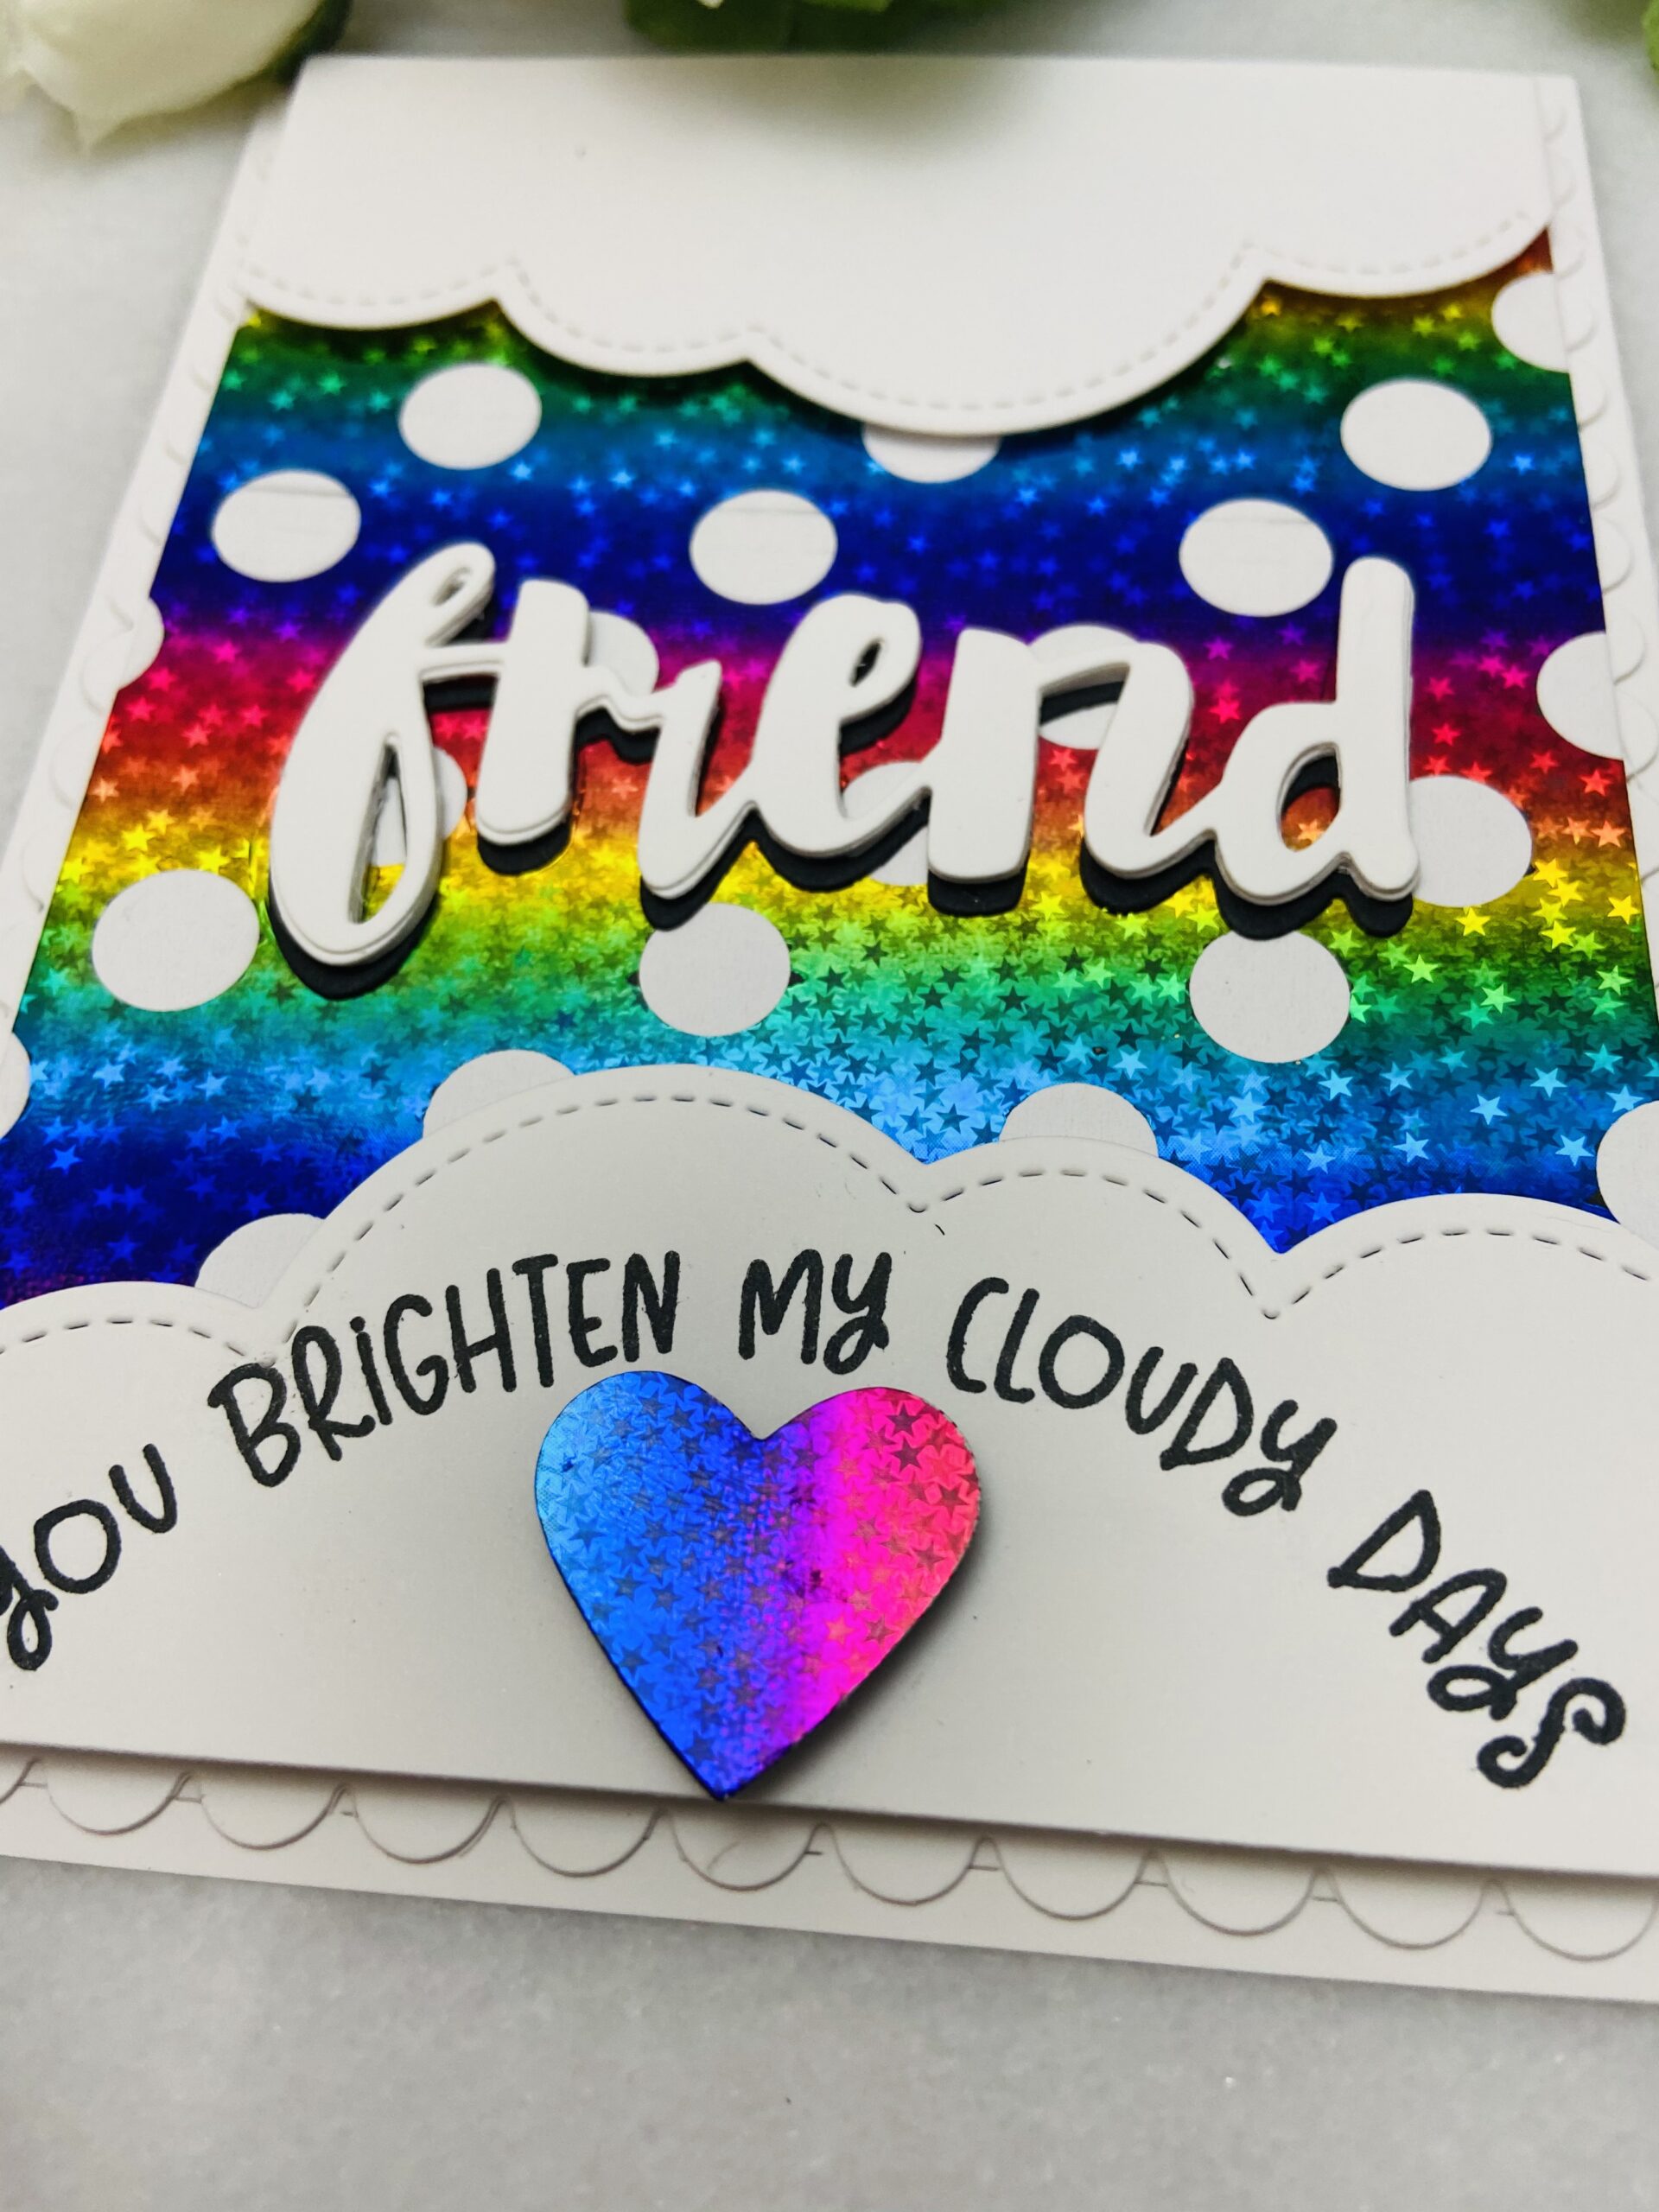
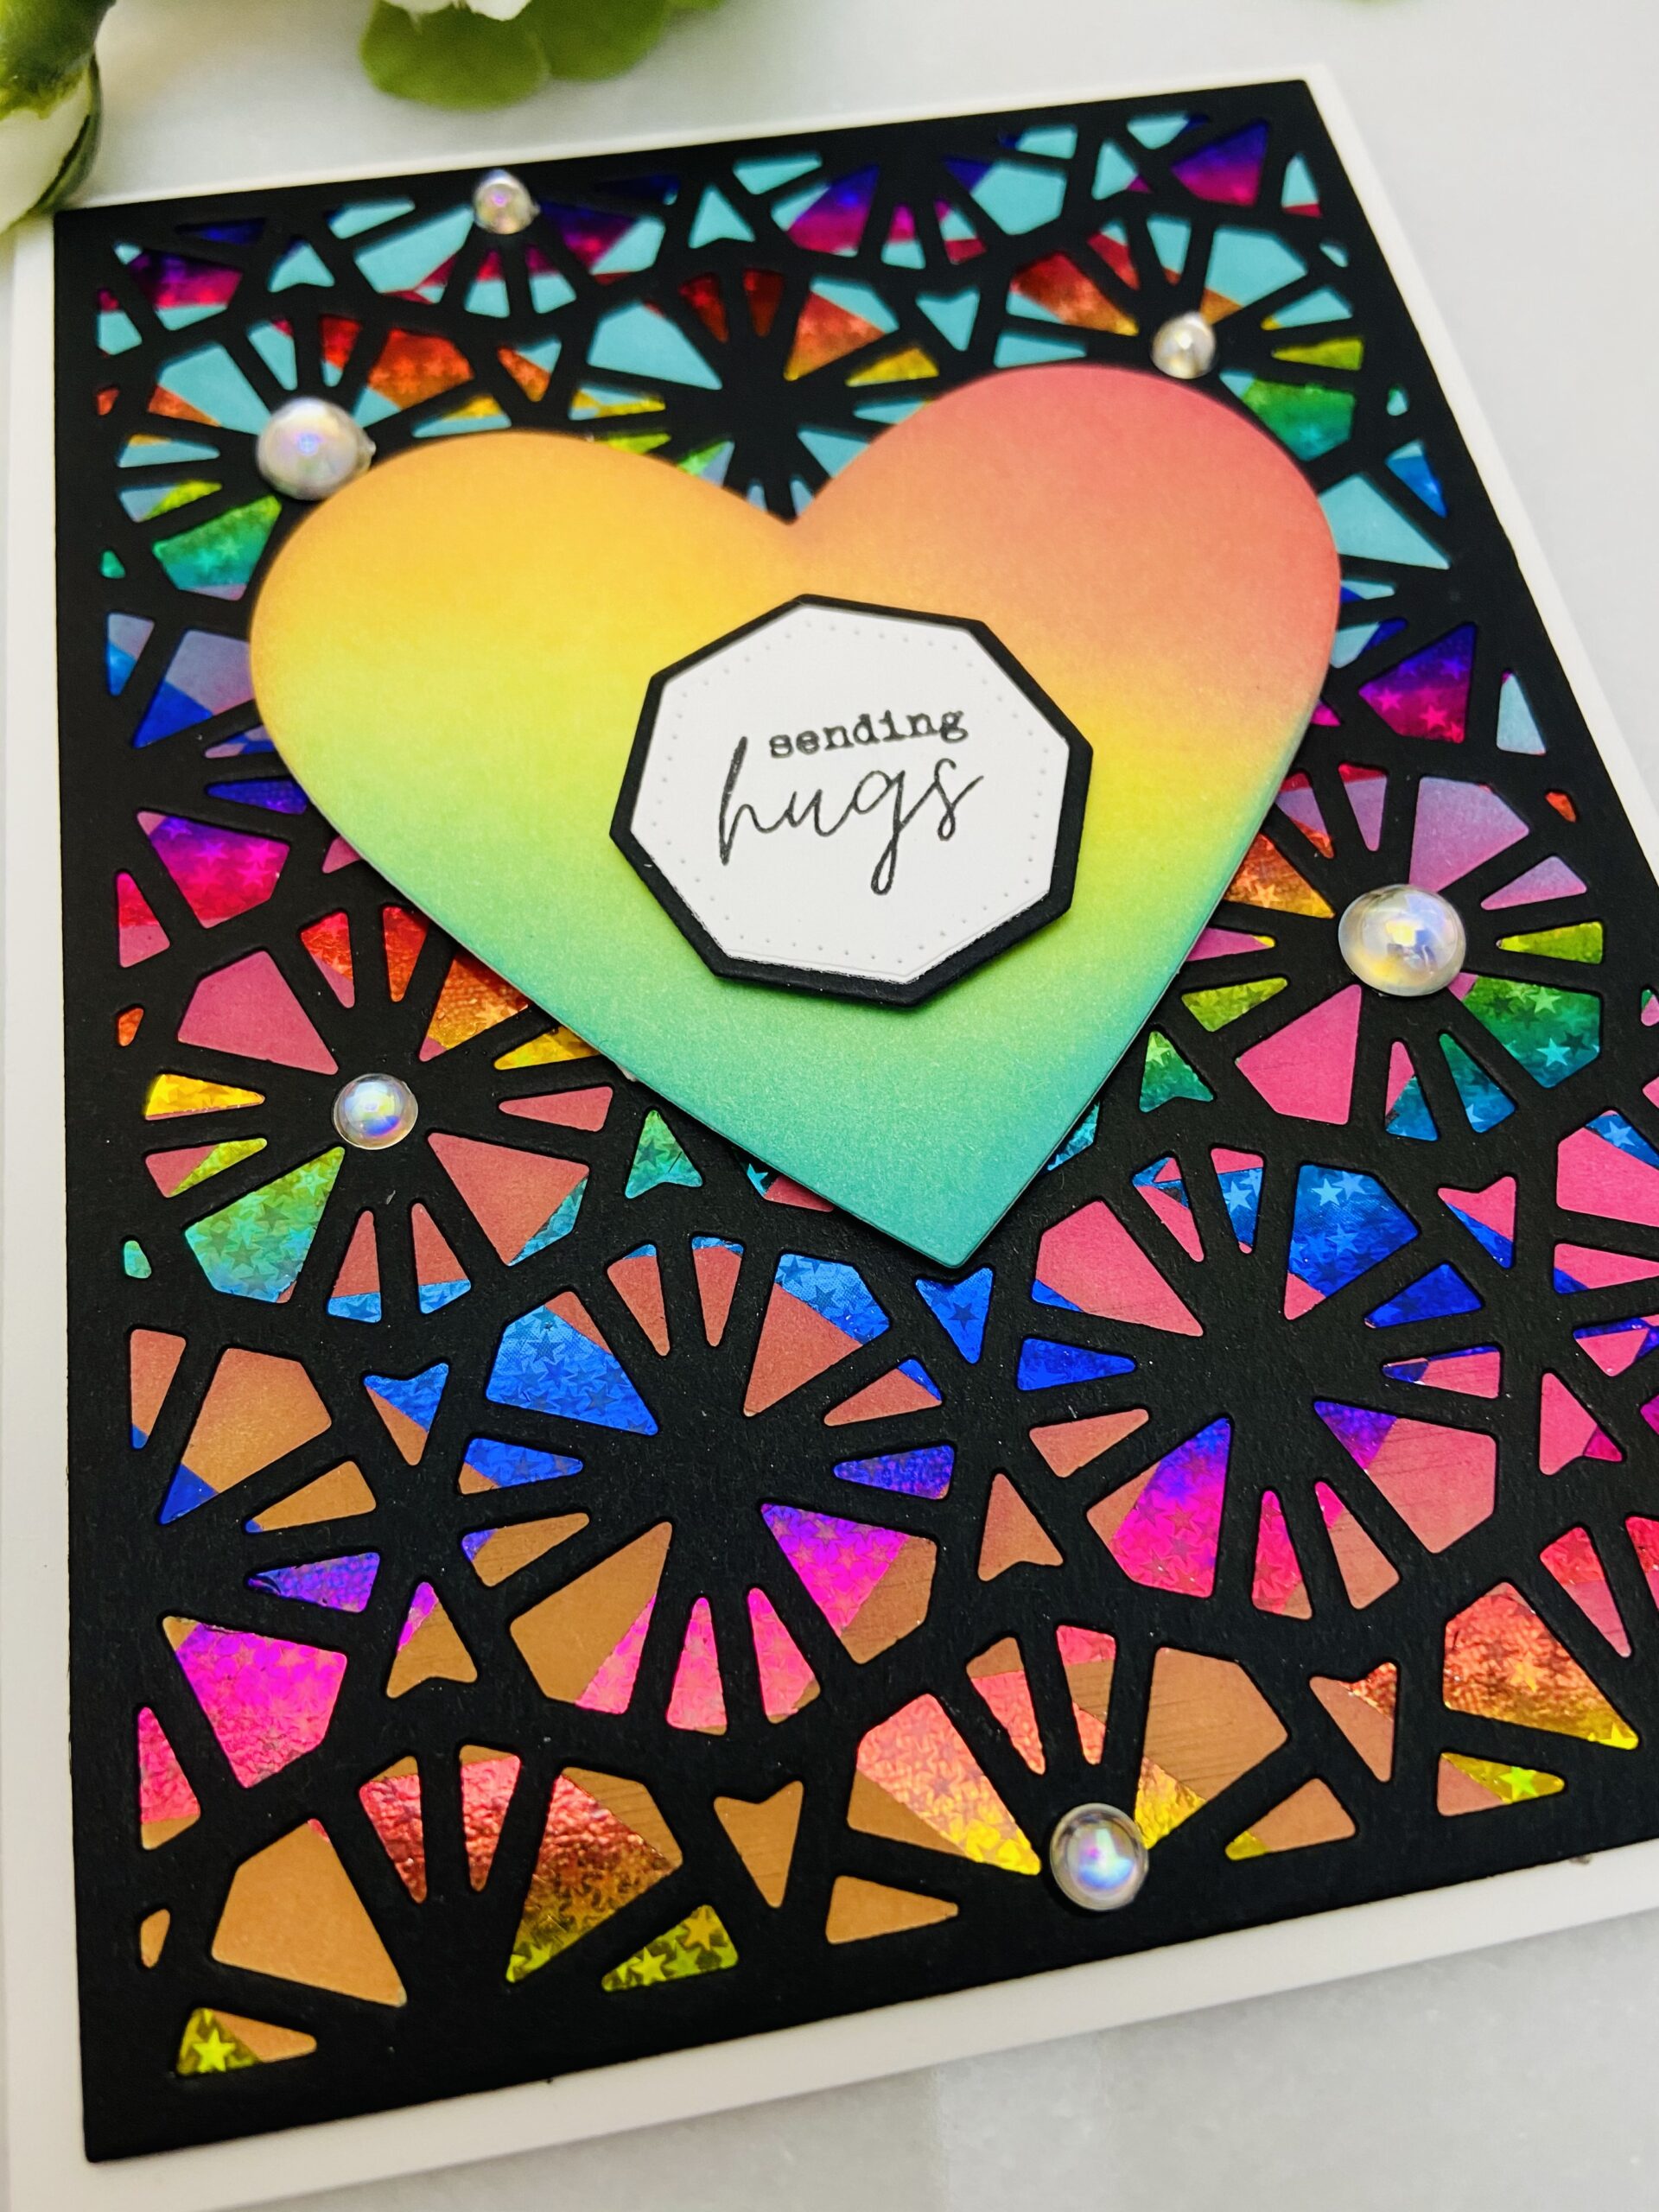
The first card uses the toner card front Reverse Polka Dot with Rainglow foil. I wanted to let the foil be the focus so I just die cut some cloud edge dies and a TE rainbow sentiment and then used some leftover Rainglow foil and a toner piece to die cut the cute little heart. I also added a Simon Says Stamps friend word die cut.
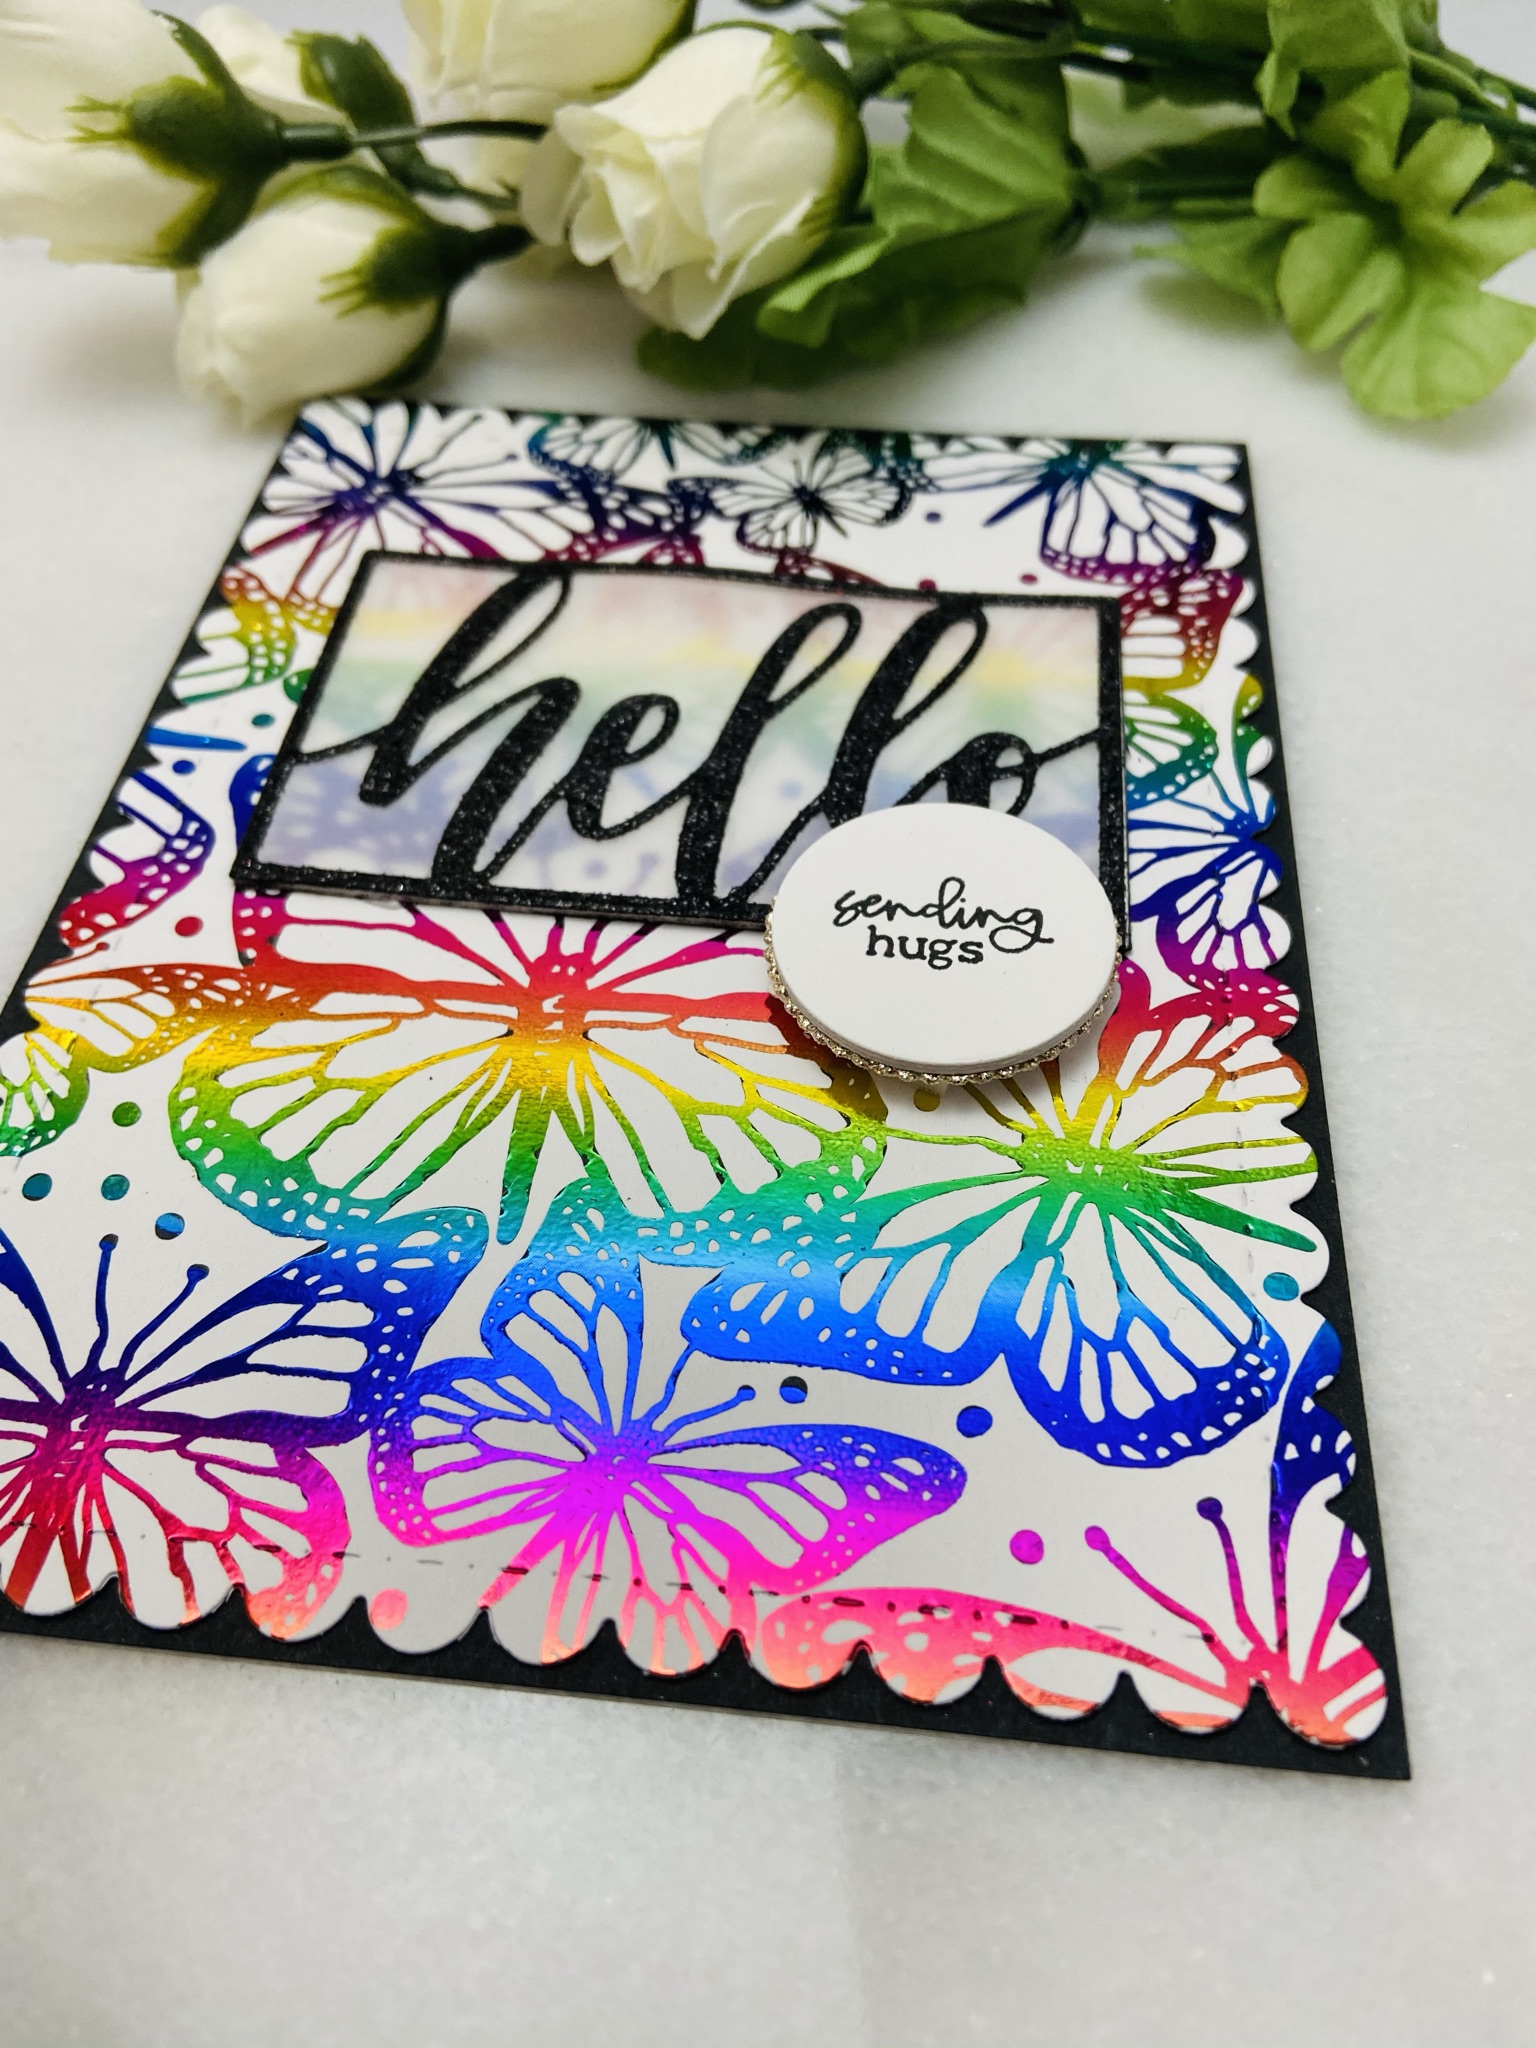
My next card uses the Unity Stamp Company Butterfly Fly Away toner front. I’m obsessed with this card front I always add a pack when placing an order with Thermoweb or Unity Stamp Company. I die just the Taylored Expressions Framed Hello die out of black glitter cardstock and then several times out of thick cardstock. Next I trimmed a piece of vellum to place behind the black piece and sandwiched the other die cuts to give dimension. Then a simple sending hugs sentiment die cut with a circle and a scallop gold glitter circle behind that. I used Thermoweb foam squares on the bottom half of the circle to give a little more dimension.
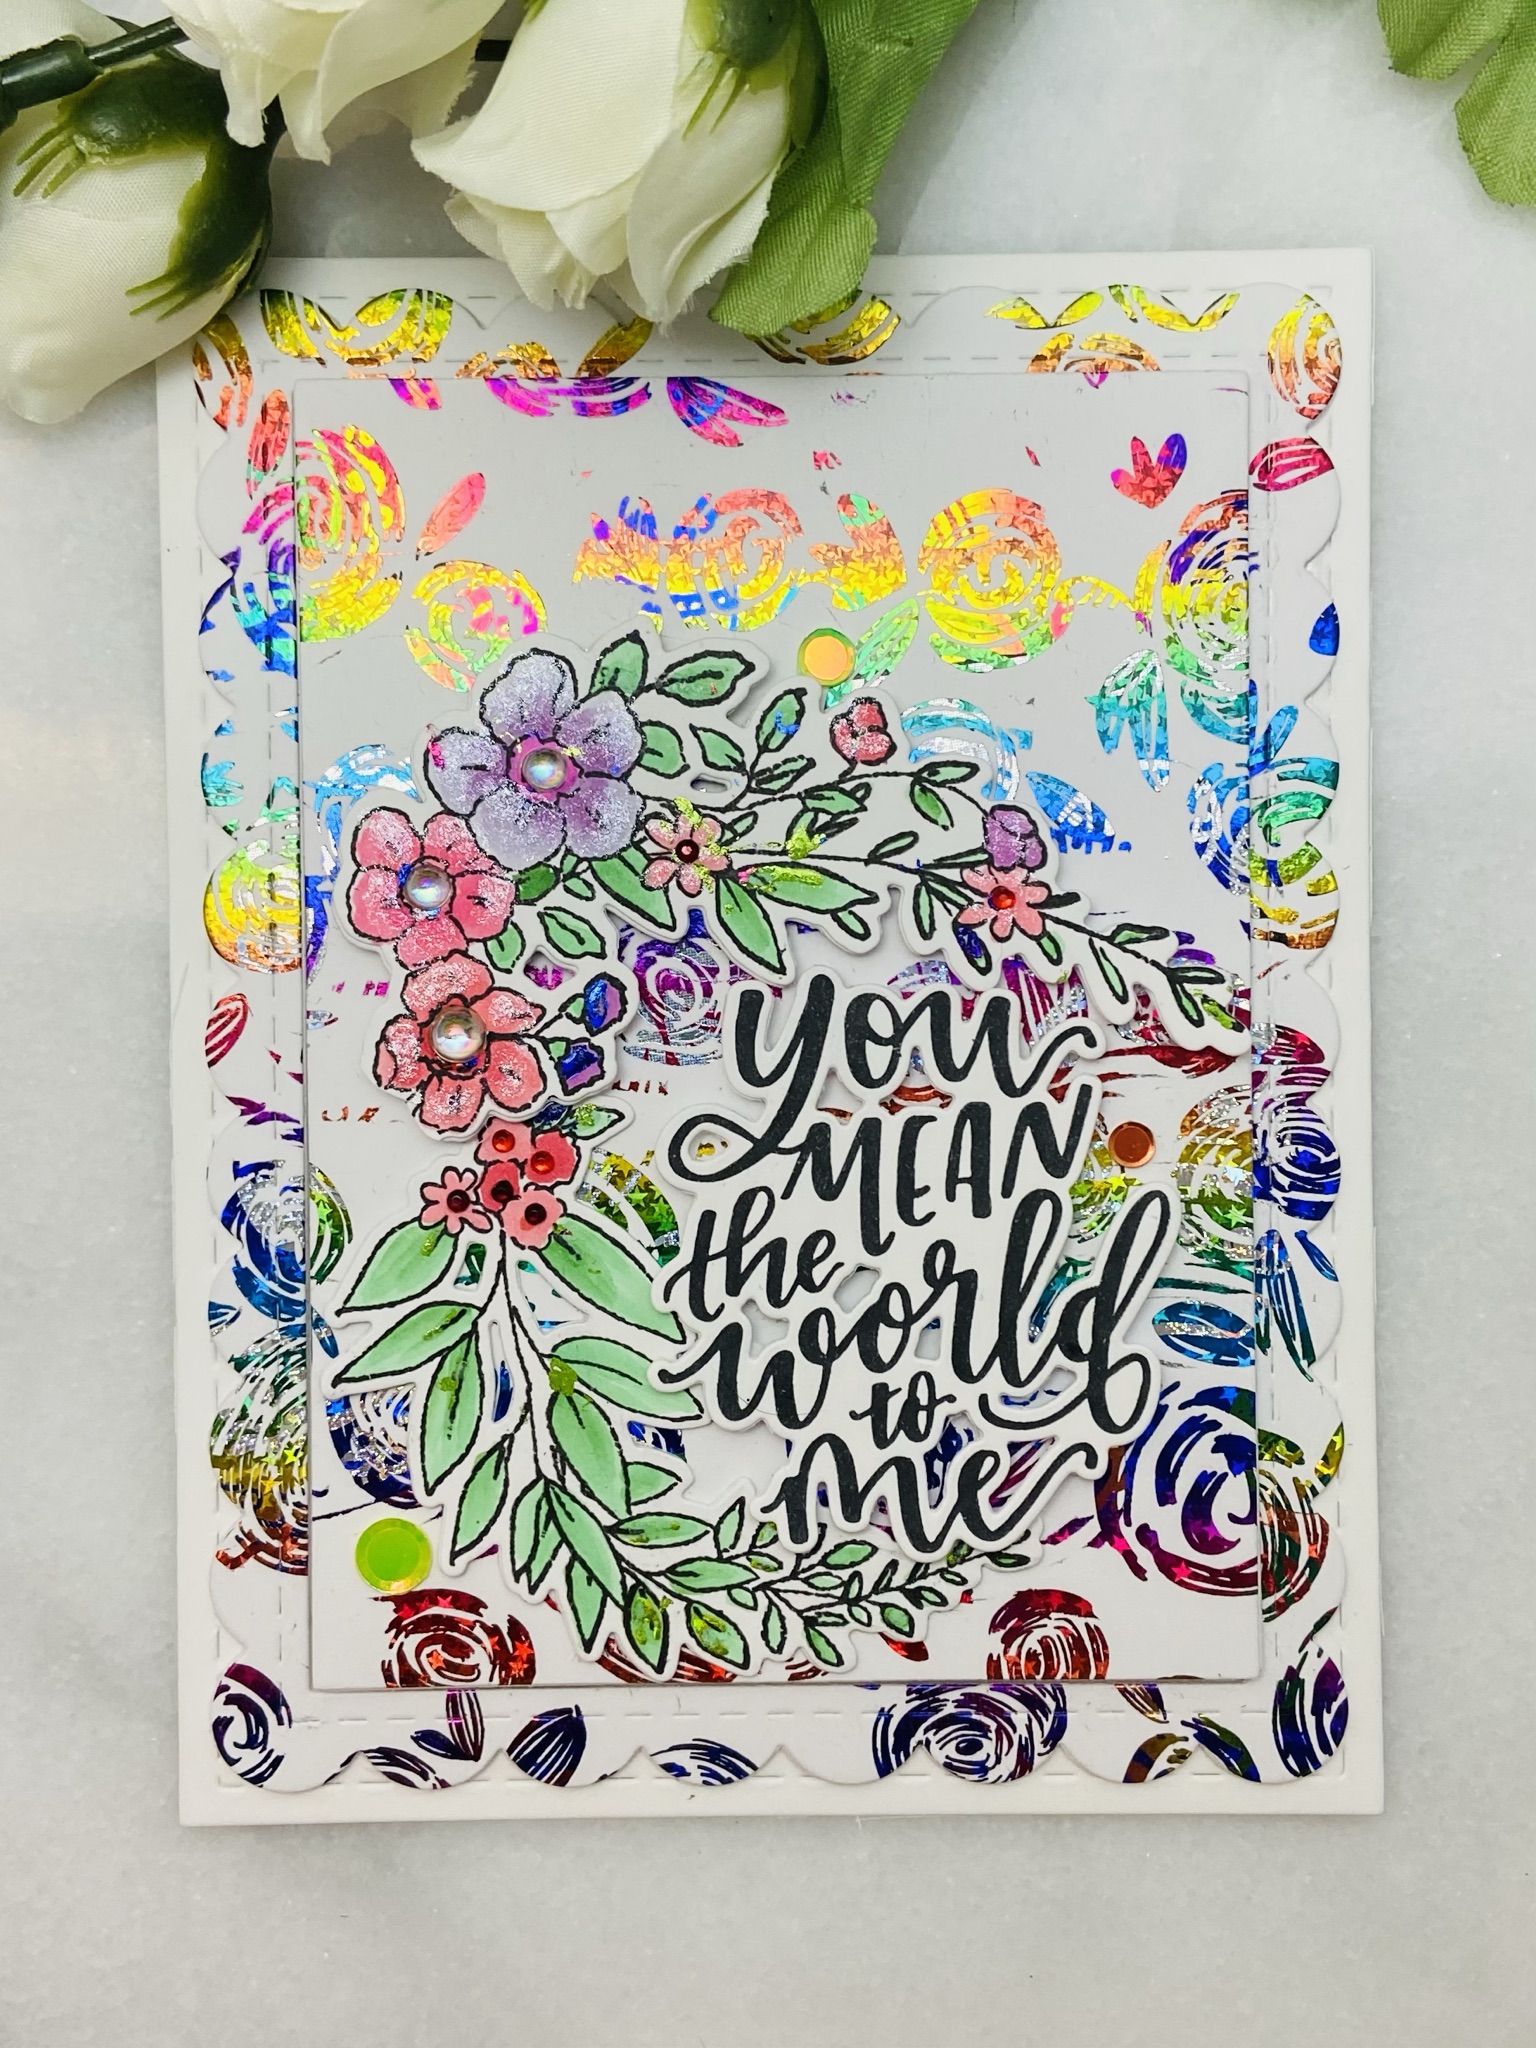
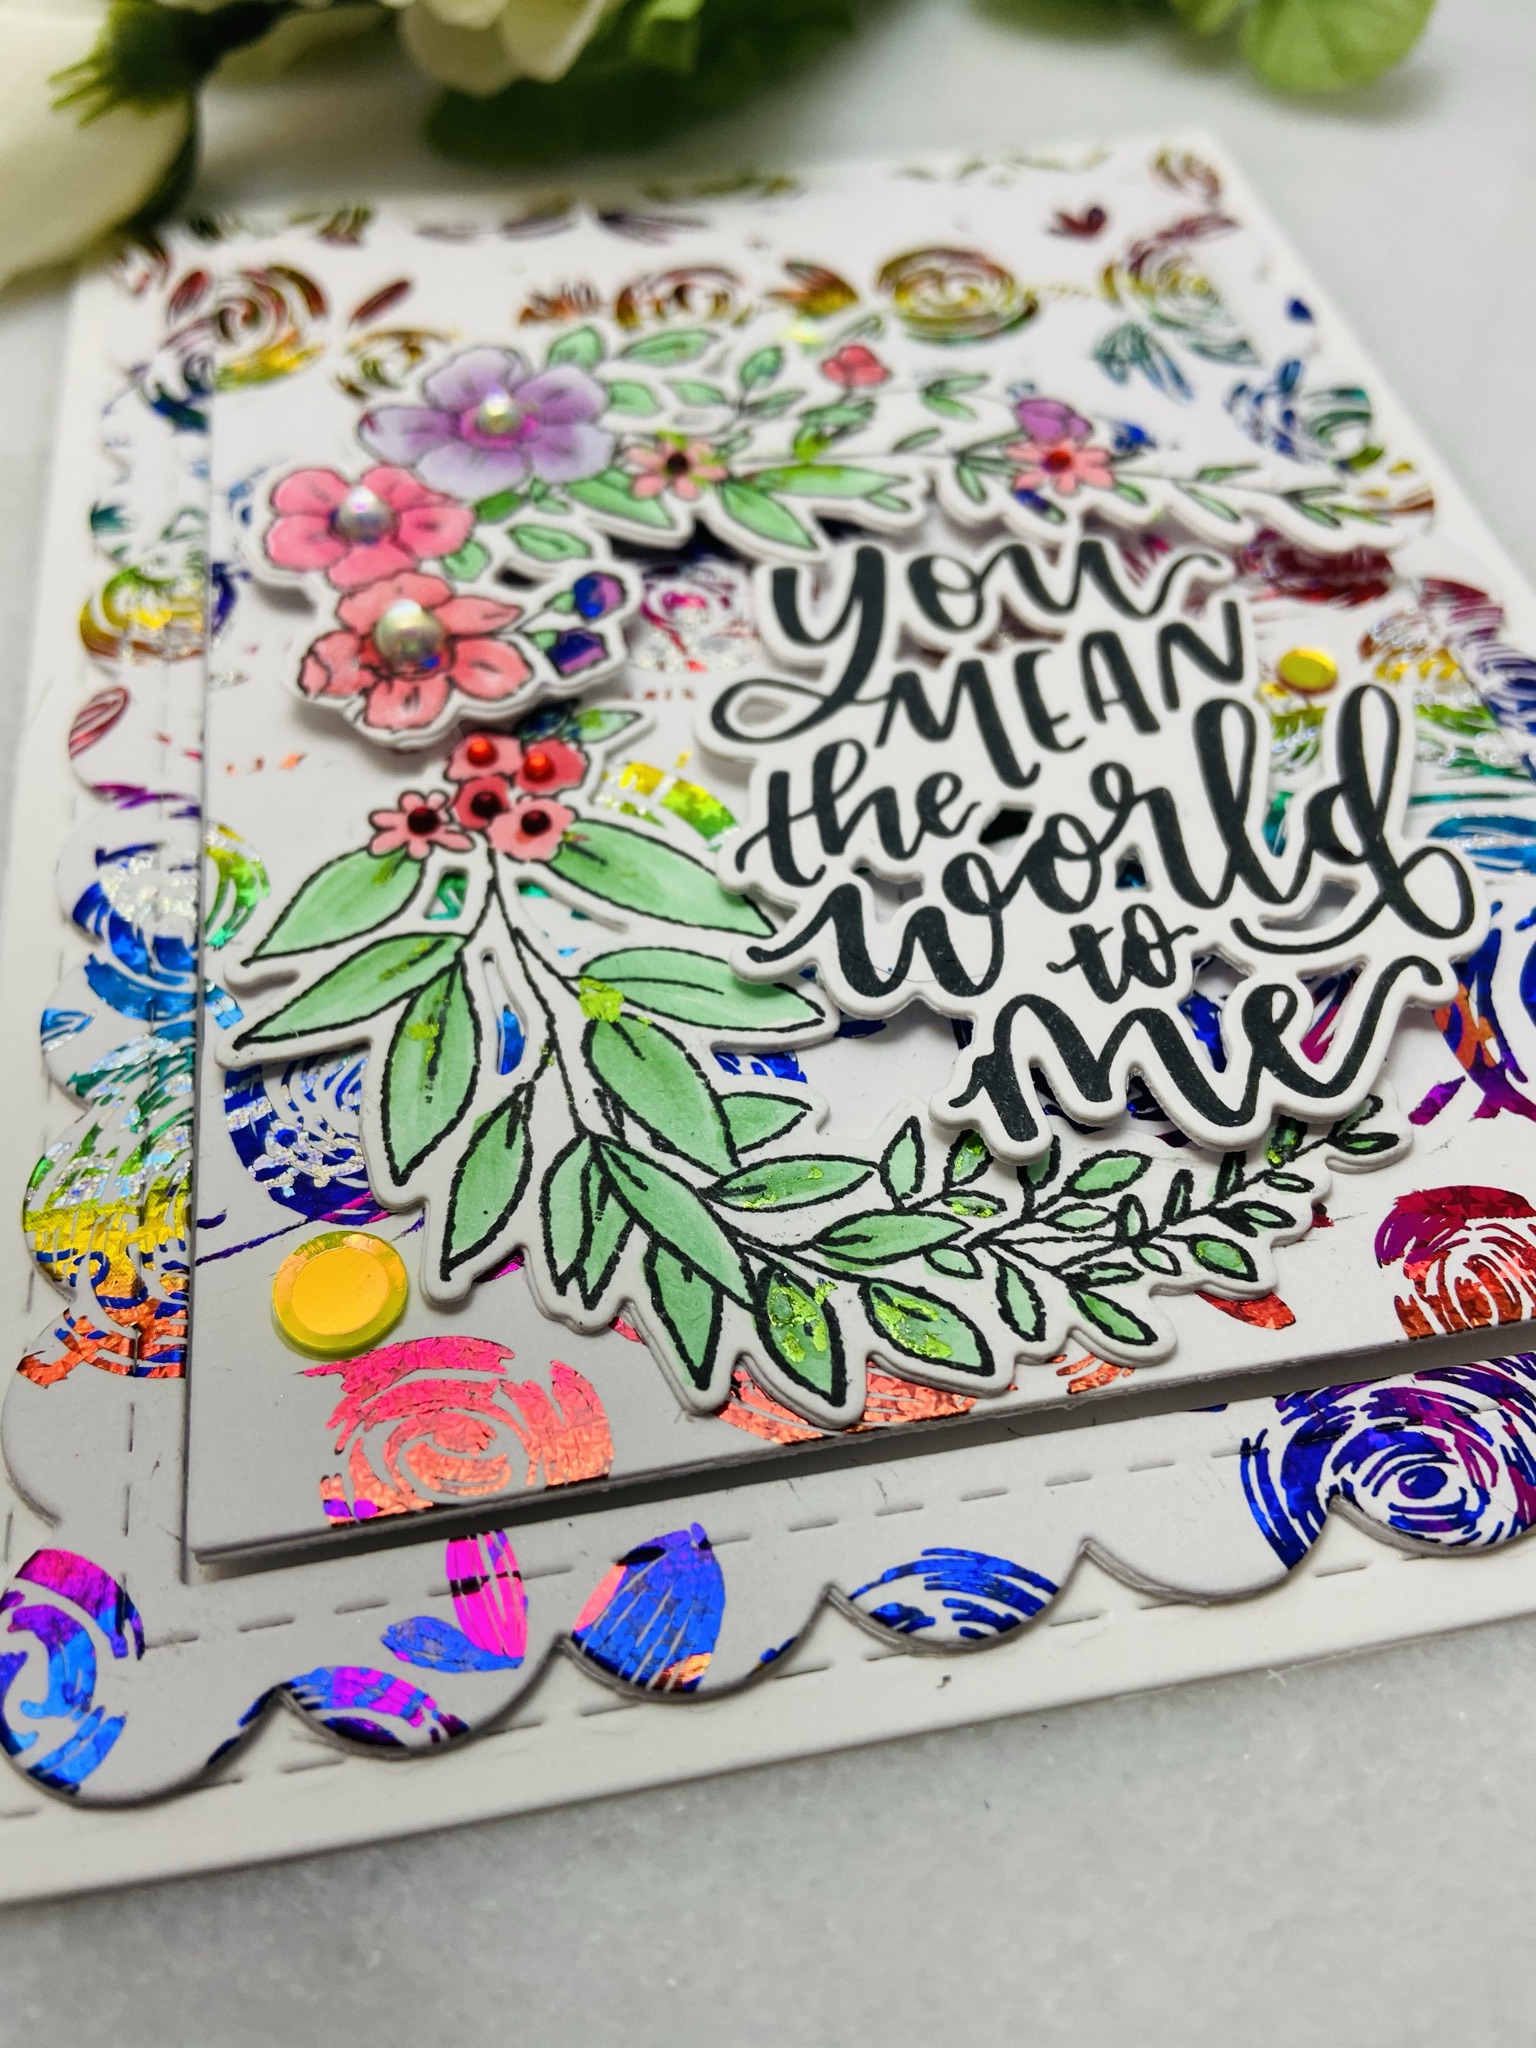
My third card is my favorite and it was a mistake! I had used an Easter egg toner card front with Rainglow foil. When I ran the Blossoms card front through the laminator I didn’t realize that the egg negative was behind my fresh foil. When I removed it from the laminator I had the egg negative print foiling the card front…. ugh. So I thought I’d try and salvage it. I took a bunch of small pieces of leftover foil and placed it over the card front and ran it through again. Everywhere the toner was foiled with the scraps. I also had some over foiling of the egg print but I actually liked the sketchy look of it. Then I used a TE frame die and inlayed it in the card using Thermoweb foam squares to pop up the center portion. I used a Taylored Expressions Handlettered stamp and it companion die for the sentiment as well as Unexpected Blessings stamp and die set. I used Copics to color the flowers and arranged them around the sentiment. I then added drip drops, tiny red rhinestones and sequins from my stash. My best advice about “mistake” toner card fronts is don’t give up keep working with them you can create something beautiful. Thanks for stopping by hope you have a Blessed Easter.
Today I’m sharing easy ways to combine foiled toner card fronts and cover plate dies from your crafty stash. This is a great way to use foiled pieces that may have some imperfections.
My first card uses the Thermoweb Chic Chevron foiled in Deco Foil Brutus Monroe Rainglow. I love this foil so much with all its sparkle and rainbow goodness. After I foil the toner card front I used Taylored Expressions ink to create a ink blended rainbow over the foil. The foil resists the dye ink and you are left with beautiful ink blending combined with the gorgeous foil pattern. Next I simply die cut a cover plate with black cardstock and placed it over my foiled background. Next I ink blended another rainbow and die cut it with a heart die. I added a sentiment and some TE drip drops. I love how dramatic this looks with the black and rainbow elements.
My next card uses the negative foil piece from card one. I always have toner sheets on hard so I can foil using my negative pieces. For this one I liked the black toner that was left behind after foiling but you can also run this piece through the laminator again with a fresh piece of foil to cover any remaining black toner and the result would be a 100% covered piece.
I then used the same cover plate this time die cutting with white cardstock. I layered it on top of my foils piece and then used a scrap of the Rainglow foil and a scrap of toner sheet to create the heart element on the card. Then I stamped a simple Taylored Expressions sentiment and popped the whole thing on a black card base. I used a few TE drip drops and that finished the card. So I was able to make two cards with one toner card front and a piece of toner sheet.
My last card uses the same cover plate and this time I used the companion die and small pieces of scrap Deco Foil Rainglow foil and toner sheet to die cut the cute little pinwheels. I ink blended a rainbow on a piece of Hammermill 100lb smooth white cardstock, die cut the cover plate in white and layer them together. They I popped the three foiled elements on the card with iCraft liquid glue and some TE drip drops and a little die cut sentiment. This really is a bonus card just using small pieces of foil I could let go to waste. Thank you so much for stopping by. Have a great weekend!
I resisted the Gnome trend until I saw these Trinity Stamps cuties I just had to have them. They are so fun and easy to color, I used Copics for my cards today. I thought they would be adorable paired with Thermoweb toner card fronts.
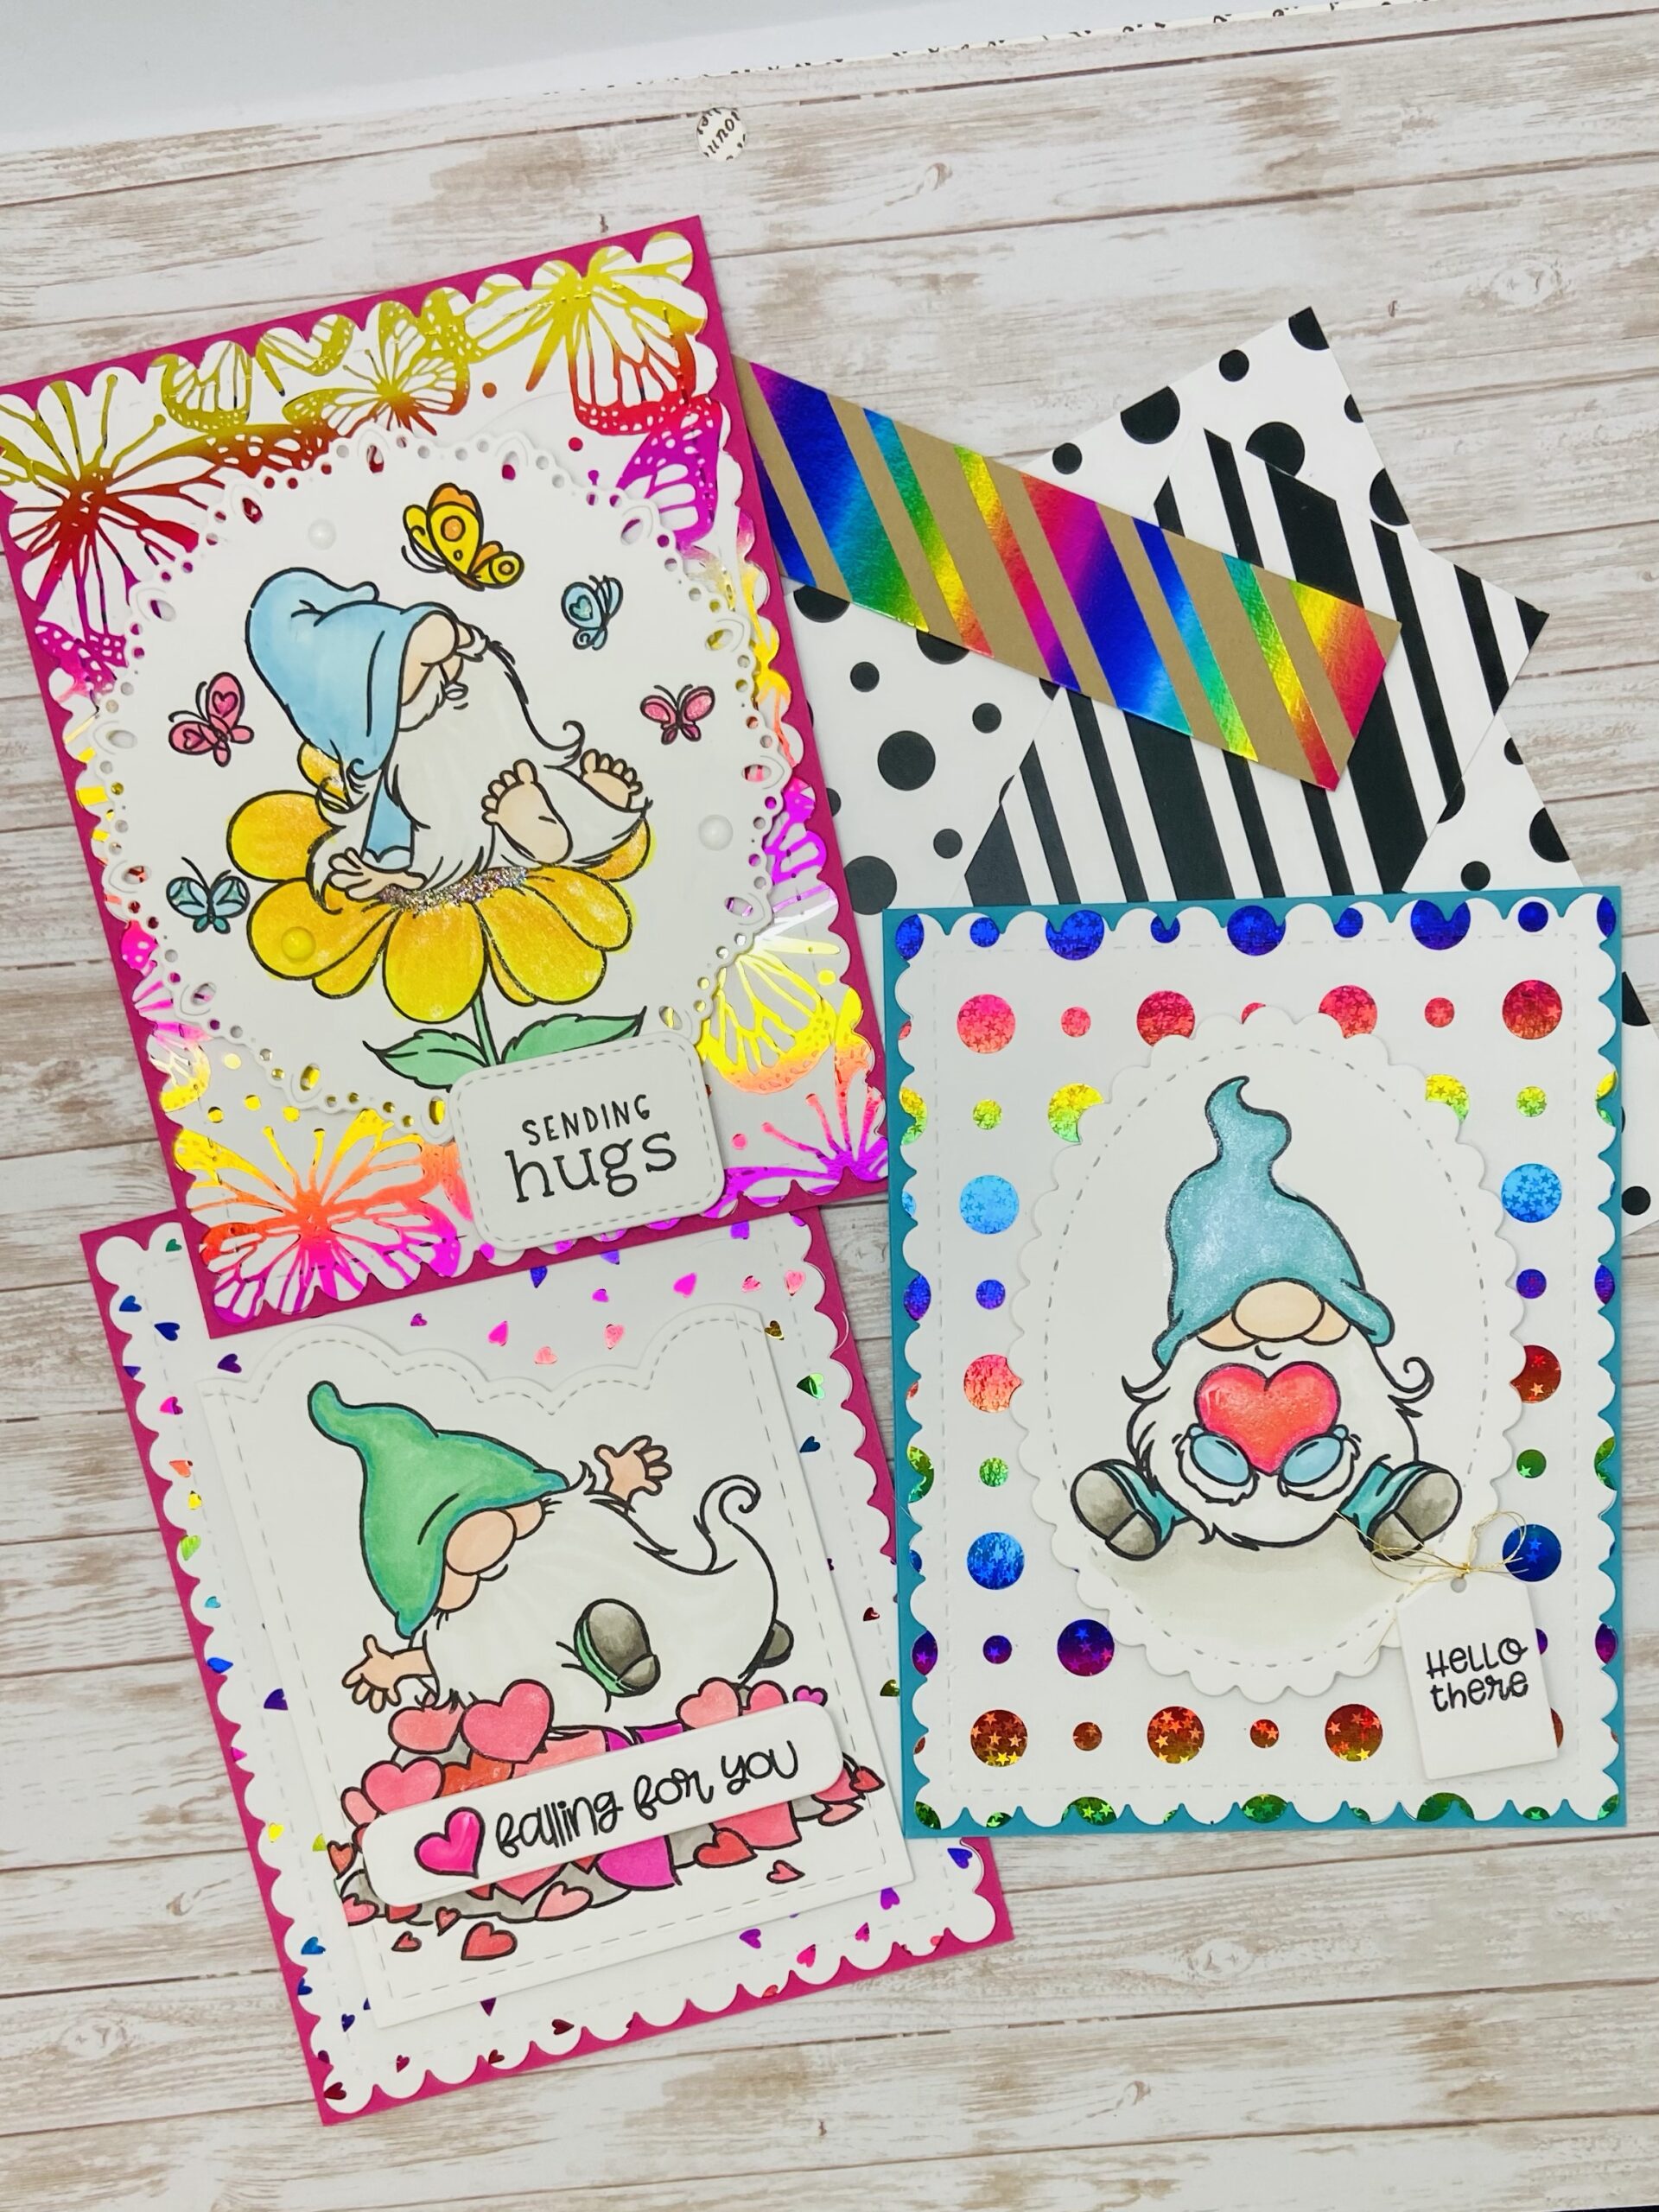
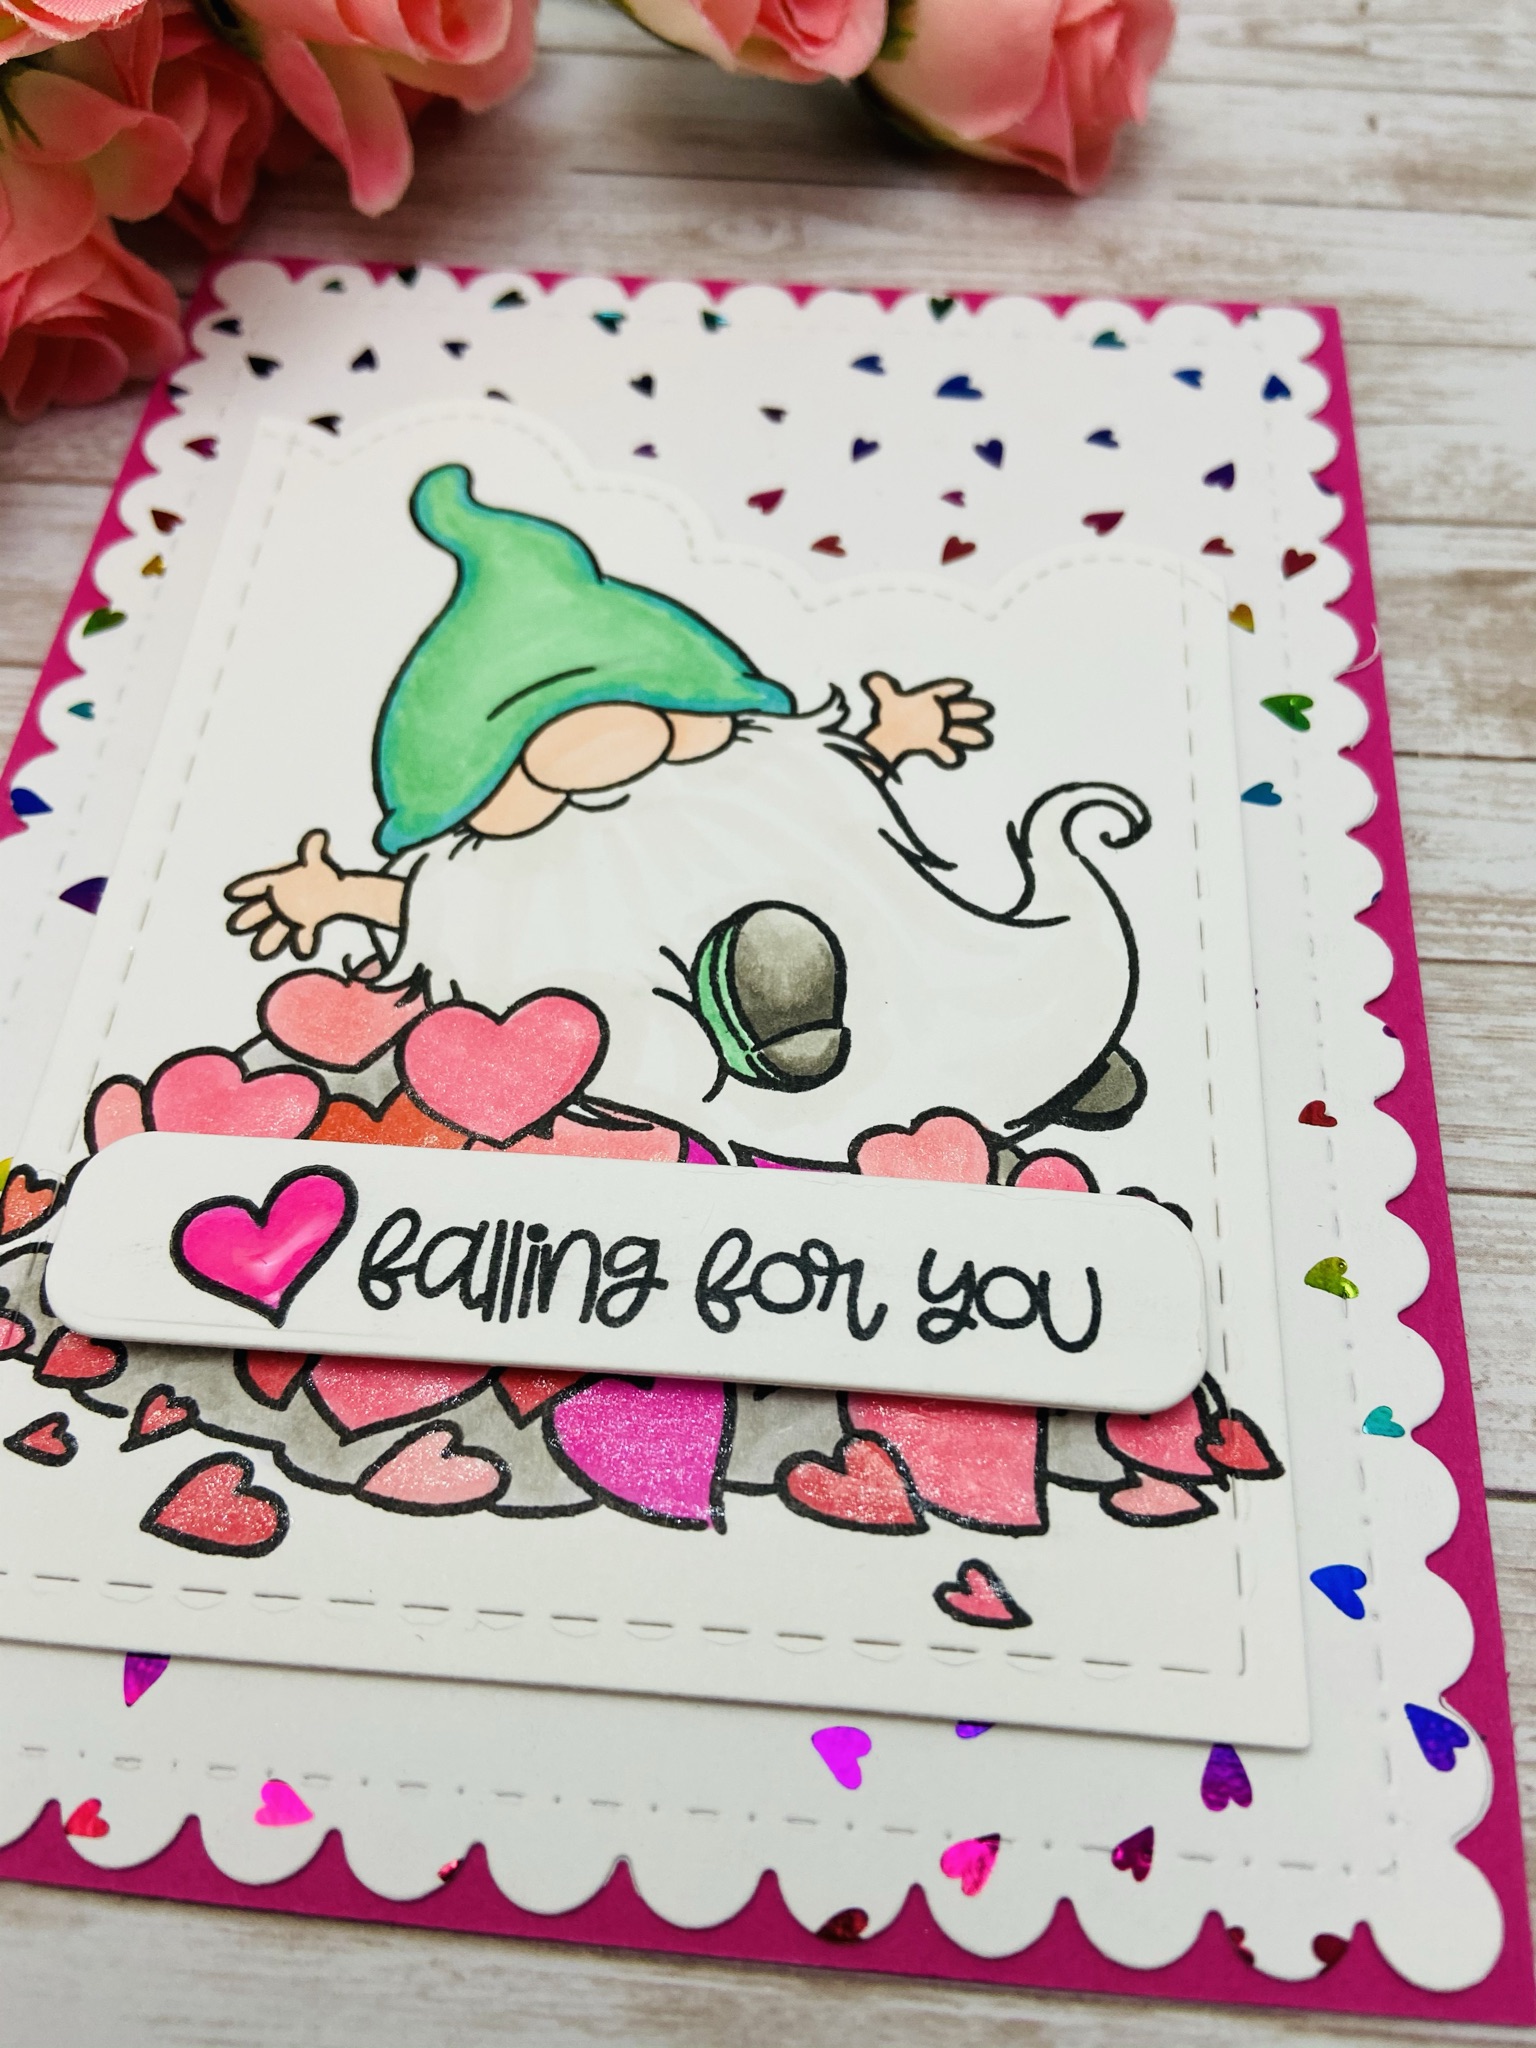
My first card uses Thermoweb Rainbow Deco Foil paired with the Dainty Hearts toner card front. I used a laminator to foil the toner card front and die cut it using a Gina Marie Designs scallop stitched rectangle. Next I stamped and colored the Falling for You Gnome stamp and die cut it with a rectangle and then die cut the top with a stitched cloud die to show off as much of the foiled goodness as possible. All the Gnome sets do have coordinating dies I just don’t have them but they are on my shopping list for sure. Then I popped the cute sentiment over the pile of hearts and added some Tonic gloss shimmer and glossy accents to some of the hearts. A really simple card with lots of sparkle and shine.❤️
Here’s a close up
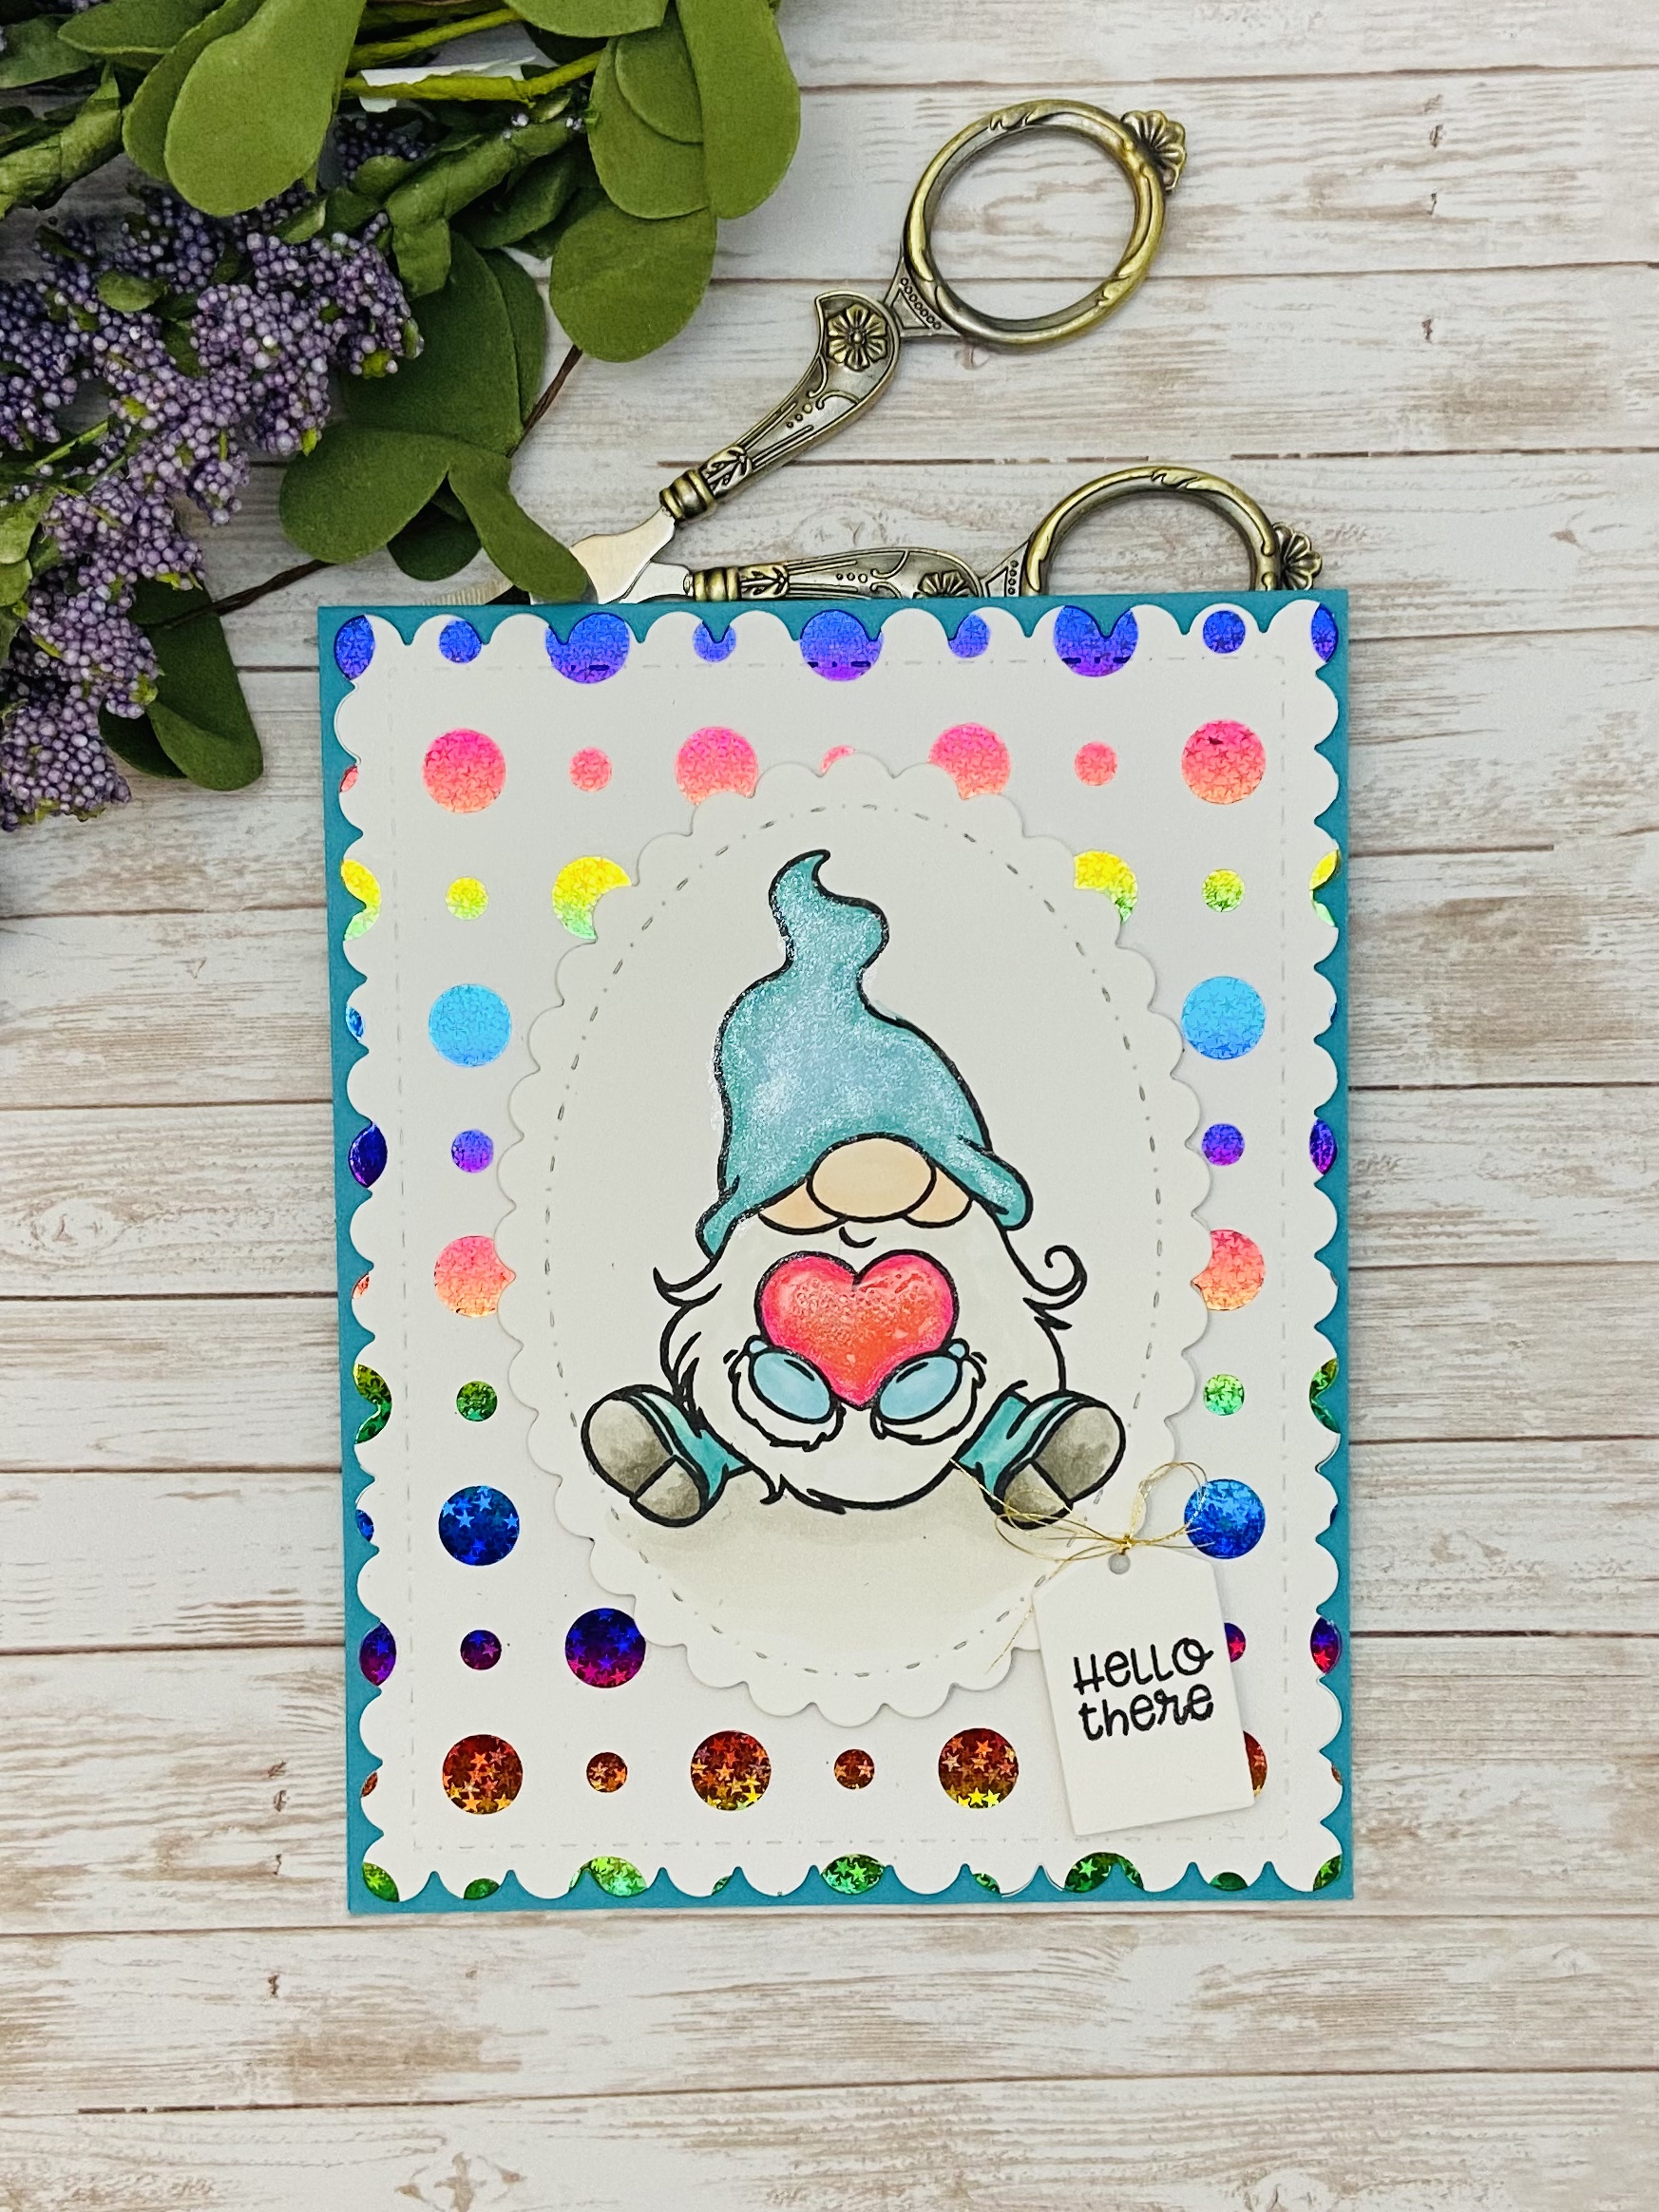
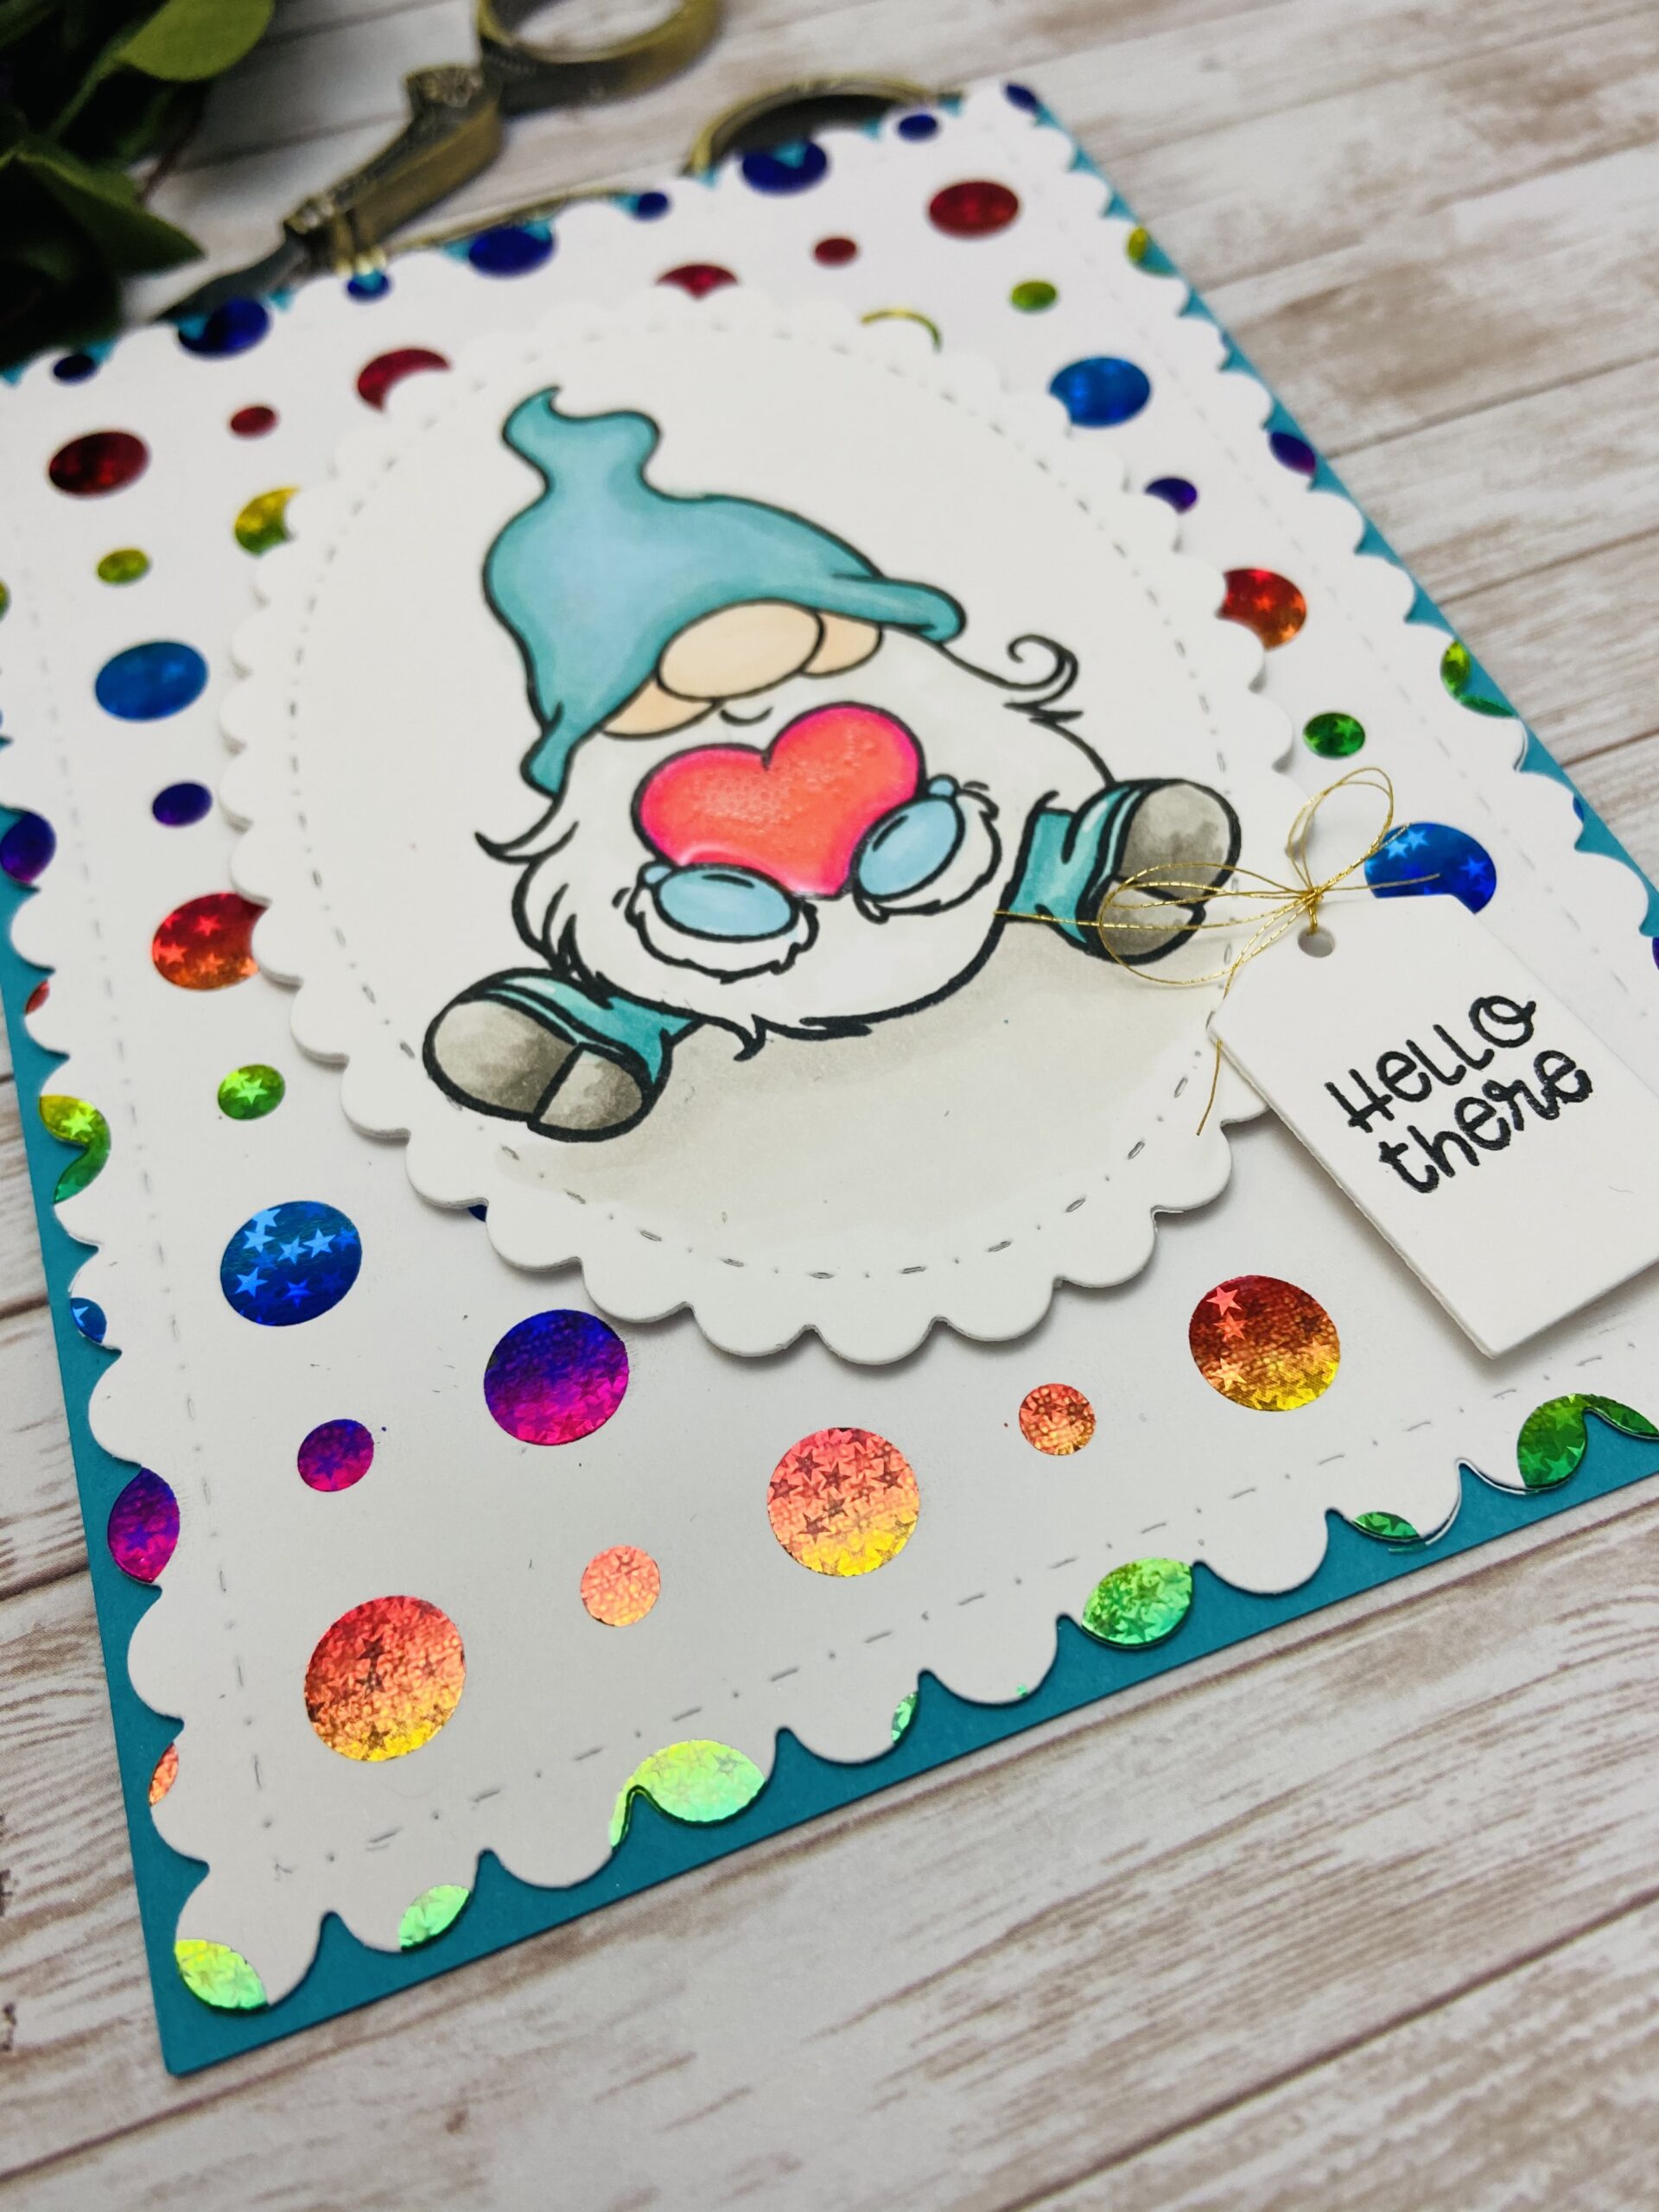
My next card uses Trinity Stamps Joyful Heart stamp set and Thermoweb Lots of Dots toner card front, foiled with Deco Foil Brutus Monroe Rainglow foil. This foil is so sparkly in person it’s really beautiful. One of the things I really like is it comes in 6×6 squares so you can easily cut it with the rainbow going in the direction you want for the card. I again colored with Copics and die cut with a scallop oval. Added some Tonic shimmer sparkle pen and glossy accents on the heart he’s holding. I simply stamped a sweet sentiment and die cut it with. trinity mini tag die then added a little bow with gold thread. Tying the bow was the hardest part of this one.
here’s a close up of that beautiful foil
My last card uses a Thermoweb/Unity Stamp Company toner card front. I LOVE these butterflies so much. I used Summer Sunrise foil it’s so pretty in person dark pink and bright golden yellow I have a hard time covering it up.
The stamp is Hello There and he’s adorable sitting on that flower. I wanted to make the golden foil pop so I colored the flower using yellow and oranges. I love a blue and orange color combination they are complimentary colors. I added more butterflies around the gnome from the stamp set and again used a die from Gina Marie designs. I used foam tape to pop the circle off the card front and a sentiment from Taylored Expressions die cut from an MFT rounded rectangle set from my stash.
Foil closeup
One last thing I’d like to mention. As card markers we are always looking for the perfect adhesives. I am in love with the Thermoweb adhesive line I cannot stress enough how amazing their iCraft Ultra Bond is. It is slippery and gives you time to center and place die cuts on your cards. I use it on every card I make. Their iCraft tear tape is also awesome it’s super easy to tear and more importantly it’s very easy to remove the backing. I use this on every card as well. I use these two products to adhere all my card fronts to my bases. I add the tear tape to the border of my card front leaving the backer on. Next I add some liquid glue to the center, then I can move and slide the front exactly to where I want I give it a few minutes to set and then I reach underneath and peel the backers off of the tear tape. Its been a game changer for me. I’d encourage you to try their foam adhesives too they come in different thicknesses and it’s great for building different heights on dimension on your cards. I did that on all my cards today I wanted the sentiments lifted slightly higher that my other die cuts I’m able to achieve this without have to double up foam. Thank you so much for stopping by leave me a comment if you have questions.❤️